How to Remove Scratches From Your Truck’s Paint [Video]
We'll be the first to admit we're not the best at keeping our truck’s paint in primo condition. Since we frequently travel off-road with our 2008 Toyota Tacoma, it stands to reason that it collects a fair amount of scratches. Given that the truck is black, these tend to be more pronounced. It’s been about a year since any wax has come close to our paint, and we felt it was finally time to shine up the Tacoma.
Our main challenge was attempting to remove the bevy of surface scratches caused largely by tree branches. We had tried a regular rubbing compound and hand wax, but that wasn’t doing much. So, we decided to give 3M’s Trizact Precision Scratch Kit a try. It’s a DIY kit that includes everything you need, minus the drill. This includes the first step, which is a 3,000 grit sandpaper.
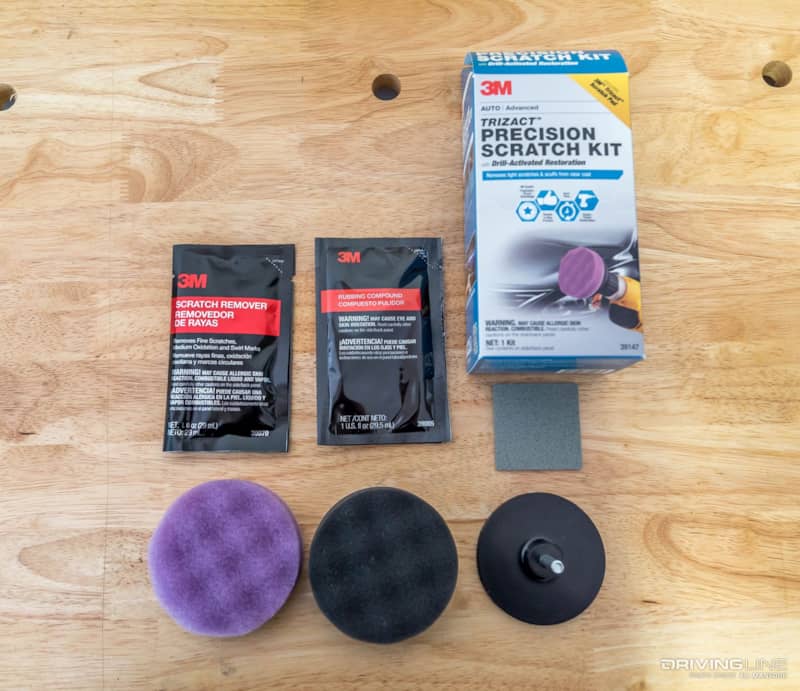
Now, here’s where we come clean and confess that even we were nervous about wet sanding on our black truck. Thankfully, we do have a friend that’s extremely adept at all things paint and body. Owning one of the Southeast’s premier mobile body and paint services, Michael Jones of Scratch Solutions was nice enough to drive up from his headquarters in Little River, South Carolina, and give us his professional assessment of this advanced-level kit.
While our video above offers an in-depth rundown, we figured you’d like to see some close ups of what we were working with.
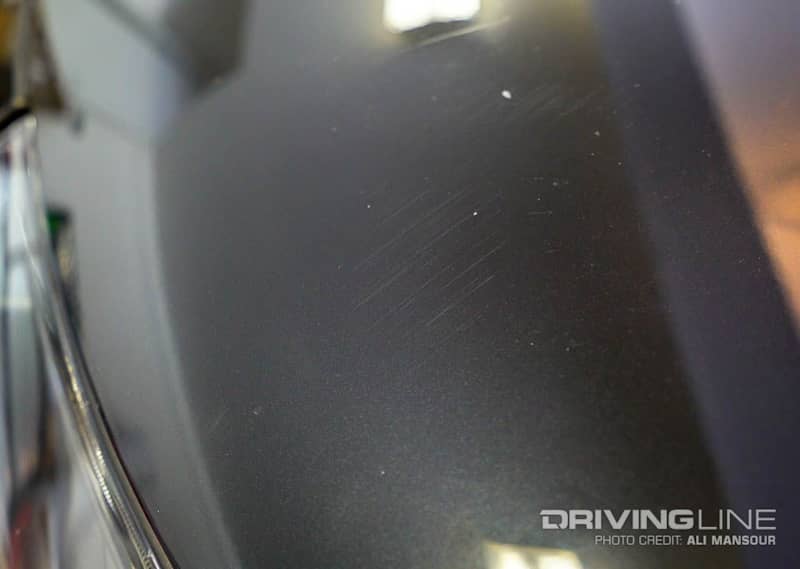
Step 1: Scratch Depth
The first thing you have to determine is if the damage that you are attempting to fix goes beyond the clearcoat. To determine this, we used our fingernail to see if it would grab or set into the scratch. If it did, we moved on to another area. Another trick Jones taught us was to use the natural oil in our finger to run over the scratch. If the scratched seemed to disappear, it’s a good sign the damage does not go beyond the clearcoat. Thus, a perfect candidate for repair.
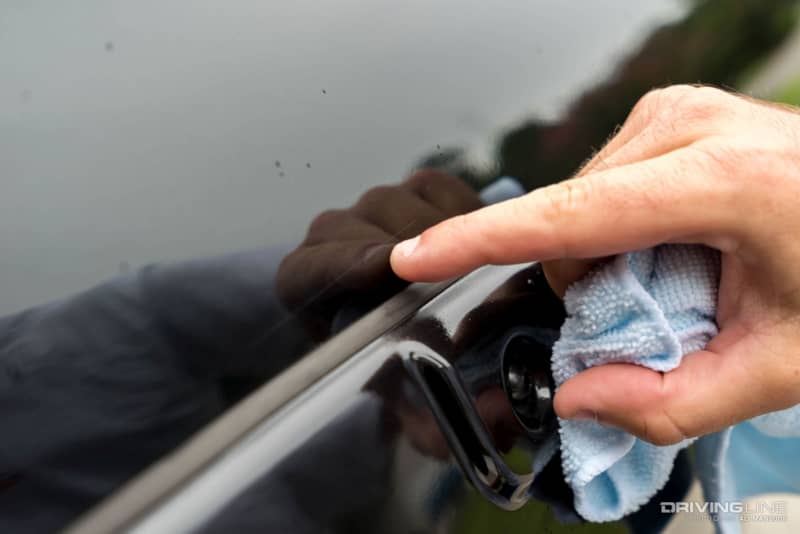
Step 2: Cleaning
One of the largest concentrated areas of scratches we found was on our Tacoma’s hood. After doing the “finger test,” we determined that it could all be removed. Once we cleaned the hood thoroughly, we were able to get started.
Step 3: Wet Sanding
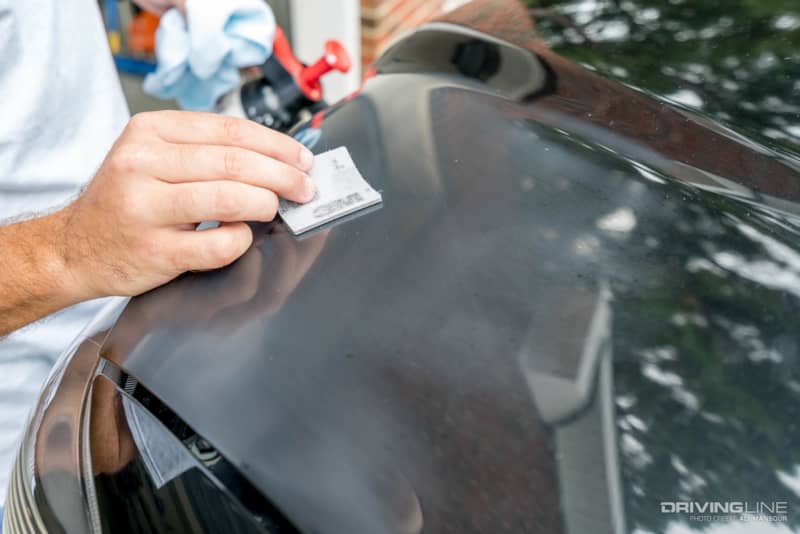
Using the provided swatch of 3M Trizact scratch pad, you’ll begin the wet-sand process. You’ll want to be smooth here and use big strokes. Stop and clean the area frequently. Also, don’t be afraid to go a little larger than where the scratch is as you will be able to easily smooth out the sanded area. Remember, your vehicle’s paint is roughly the thickness of a dollar bill. Take it easy with the sanding pressure and follow the instructions.
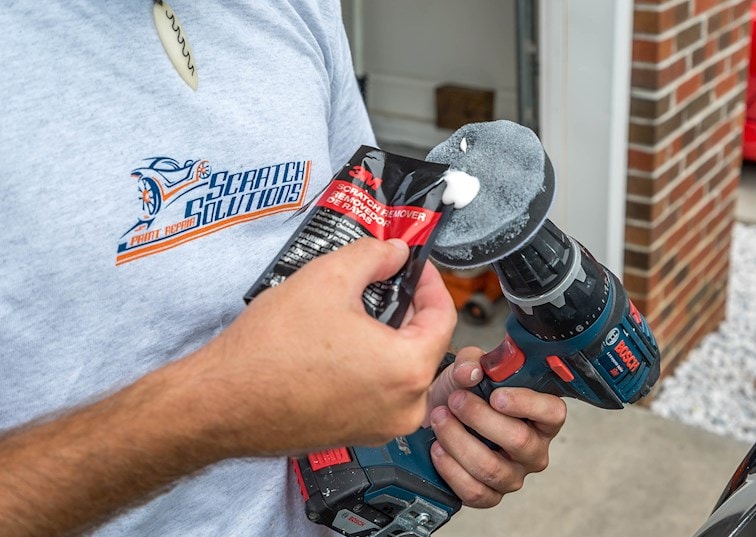
Step 4: Rubbing Compound
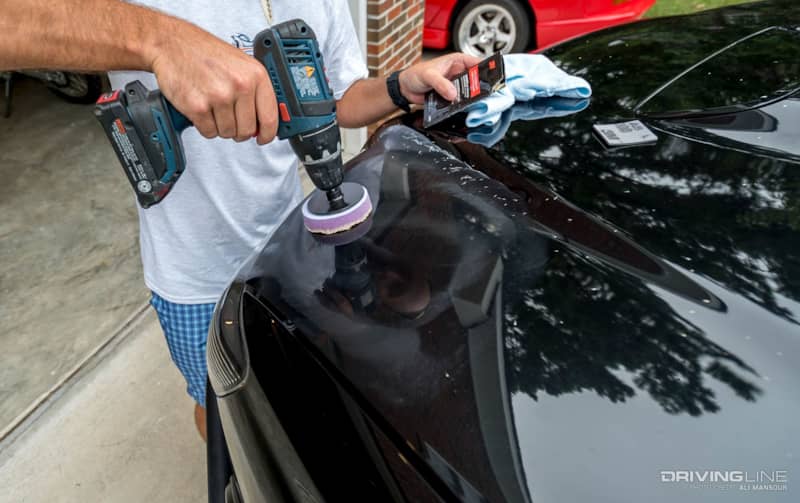
Once the scratches appeared gone, we were ready for the rubbing compound. The key with this step is to make sure you don’t run out of compound on the pad and you keep the drill moving as you work the area. You’re not drilling holes in a wall, so don’t apply tremendous pressure or run the drill at its max setting. Once the area looks shiny again, wipe it down with a microfiber cloth.
Step 5: Polishing
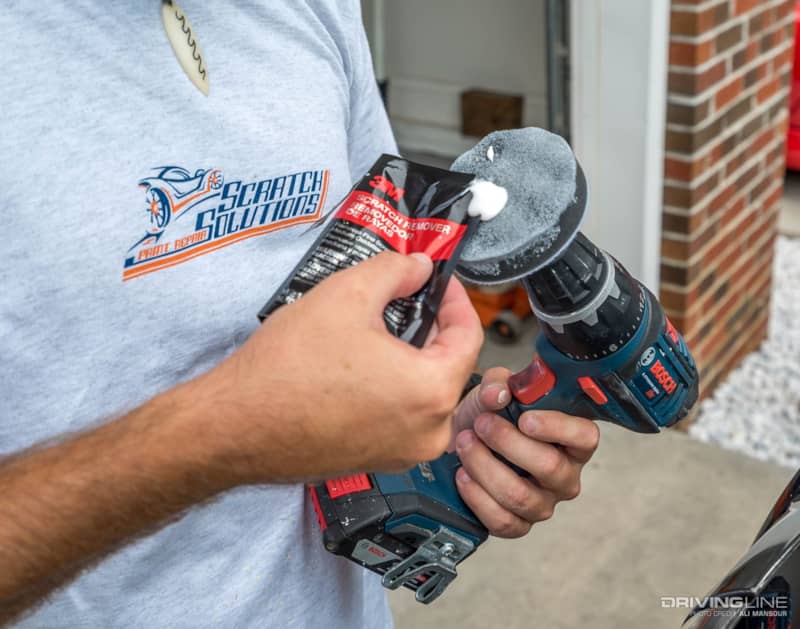
Your final phase with the drill comes with a new polishing pad and scratch remover. Just like the rubbing compound, you want to keep light and even pressure as you work the area. 3M recommends working a little larger area that you did with the rubbing compound for a smooth transition.
Step 6: Admire Your Work!
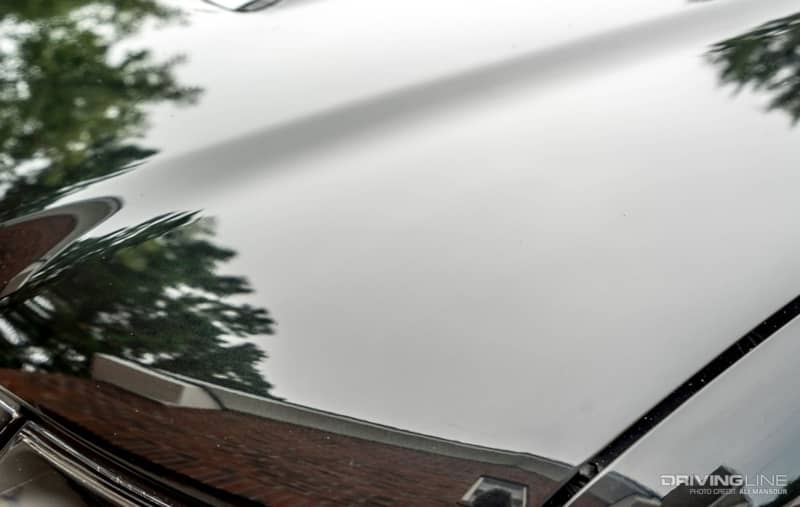
These types of kits either work or they don’t. In our case, we found the 3M Trizact Precision Scratch Remover Kit to work exactly as advertised. Even our expert was impressed with the kit and stated to us that there was more than enough compound and scratch remover left to knock out more trouble spots on our pickup.
For the low cost and ease of use, we say the kit was definitely worth it. Now, we just have to be more careful the next time we hit the trail...