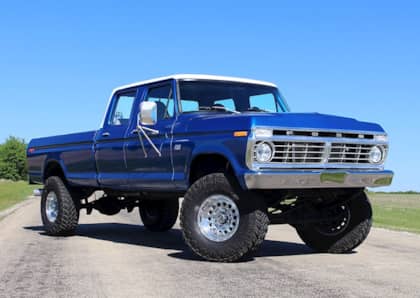
The Ultimate Homebuilt High-Boy, Part 2: One Step Closer to Perfection
For Part 2 of Steve Burris’ ’73 High-Boy build, the vintage F-250 receives its final body repairs. New panels are sourced, the 7.3L Power Stroke sees its first test-fit and the truck is prepped for paint. As we disclosed in the first installment, other than outsourcing a new rear driveshaft, Steve built this High-Boy 100 percent from the ground up. This meant that the project forced him to combine all of his automotive talents — none of which were more important than his self-taught auto body skills.
To achieve the perfect, finished look he was after, this portion of the build had to be executed to perfection. Follow along to see how he brought his dream truck one step closer to reality.
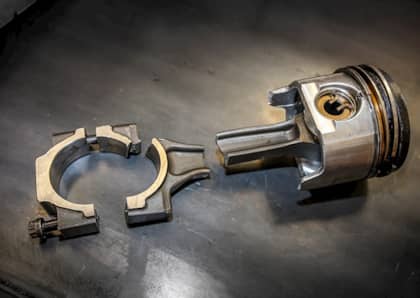
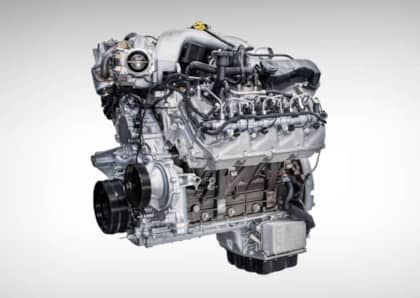
7.3L Mock Up
Once he’d set the Super Duty firewall in place, Steve performed his first mock up for the engine and transmission.

According to him, lining everything up was surprisingly simpler than expected, which can be directly attributed to the utilization of the Super Duty firewall (and ’99 floorboard to accommodate the ZF-6 transmission). The rust-free replacement front fenders were sourced from Texas and came off a ’74 model year High-Boy.
Modifying the Core Support
After tracking down a rust-free core support (from a ’73 model) and having test-fitted the engine, Steve modified it to accept the 7.3L’s massive radiator, intercooler and A/C condenser. Later on, Steve would opt to run a brand new, all-aluminum Champion radiator instead of the OEM Super Duty unit, with nothing having to be reworked in the already-customized core support.

Ford treated the ’73+ core supports (and all sheetmetal on ’73-’79 trucks for that matter) with a corrosion-resistant coating. So, it’s much more common for these original pieces to withstand the test of time vs. the untreated, rust-prone components used on the ‘67-’72 (bumpside) trucks.

Prepping for Primer
After considerable time was spent sanding, applying Bondo and re-sanding, the truck’s sheetmetal was ready for primer. Because the shop behind Steve’s house served as the back drop for the entire project, it had to be transformed from a body repair operation to a makeshift paint booth.

Ready for Paint
With weeks of prep work in the books, Steve began the process of applying primer

It’s worth noting here that in order to get away from the rust-riddled factory doors, Steve sourced cancer-free replacements from southwestern climates — and different model year trucks. The front doors once resided on a ’79 (and were found on Facebook), while the rears came off a ’73.
Fuel Door Relocate
If you know your High-Boys — and specifically the difference between true High-Boys and “Low-Boy” ’77.5-‘79 F-250s — the location of the fuel door in the bed may have you stumped. Due to the use of a ’79 bed and Steve’s desire to equip the truck with a 38-gallon tank robbed off a Super Duty, no High-Boy-specific, in-cab tank would be present.

However, the easiest way to make the Super Duty tank and its filler neck work (in relation to where it would be mounted under the truck) was to relocate the fuel door in front of the rear fender, rather than leave it behind it.
Big Foot Blue
From the first time Steve laid eyes on Ford’s Blue Flame Metallic paint, he knew he had to have it. When it came time to apply several coats to his High-Boy creation, he would use 6 gallons of PPG’s version of the hue (which Steve refers to as “Big Foot Blue”) before clear coat. Thanks to rust claiming the life of the original tailgate, Steve hunted down this replacement off a ’74.

DIY Bed Liner
Believe it or not, Steve didn’t build the truck to be a show queen. As such, he planned to haul (even tow) with the old Ford and naturally wanted to protect the floor of the bed. For utmost protection and a non-slip surface, Steve applied budget-themed, three-part epoxy from Liner Extreeme.

Bed Liner in the Cab
Not a huge fan of carpet, Steve decided to apply the Liner Extreeme bed liner to the floor of the cab as well. As you can see here, the cab is being prepped to receive the Super Duty dash.

To reuse the Super Duty windshield wiper motor, it had to be relocated to the far passenger corner, which required Steve to build a custom linkage for the wiper arms and extend the factory wiring harness in order to make everything functional.
Super Duty Dash
Multiple Super Duty donor trucks were picked over before Steve had all the parts required to complete the interior. The dash was pulled from an XL model, but the 40/20/40 front seats and rear bench that followed would come out of a Lariat optioned ’99.

As mentioned, Steve retained all Super Duty wiring harnesses to ease the integration process. As a result, everything but the turn signals and tail lights worked without any re-wiring being necessary.
Nearing Completion
To replicate the factory paint scheme he liked most, Steve painted the roof of the cab white. After sourcing parts from six different ’73-’79 Fords and four separate Super Dutys, there was finally some light at the end of the tunnel. In this close-to-finished state, only the ’74 grille, ’79 mirrors, ’79 frame horns and the front bumper are missing.

Months of work and more than a hundred late nights were about to pay off…
Make sure you join us for Part 3, where the final touches are added and a full walk-through of the finished product takes place.