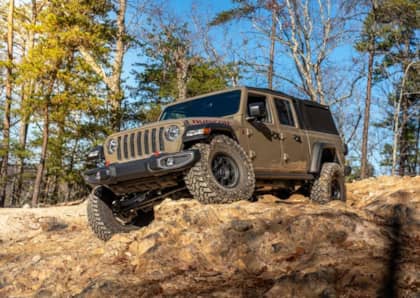
Project Paw-Paw: Part 10
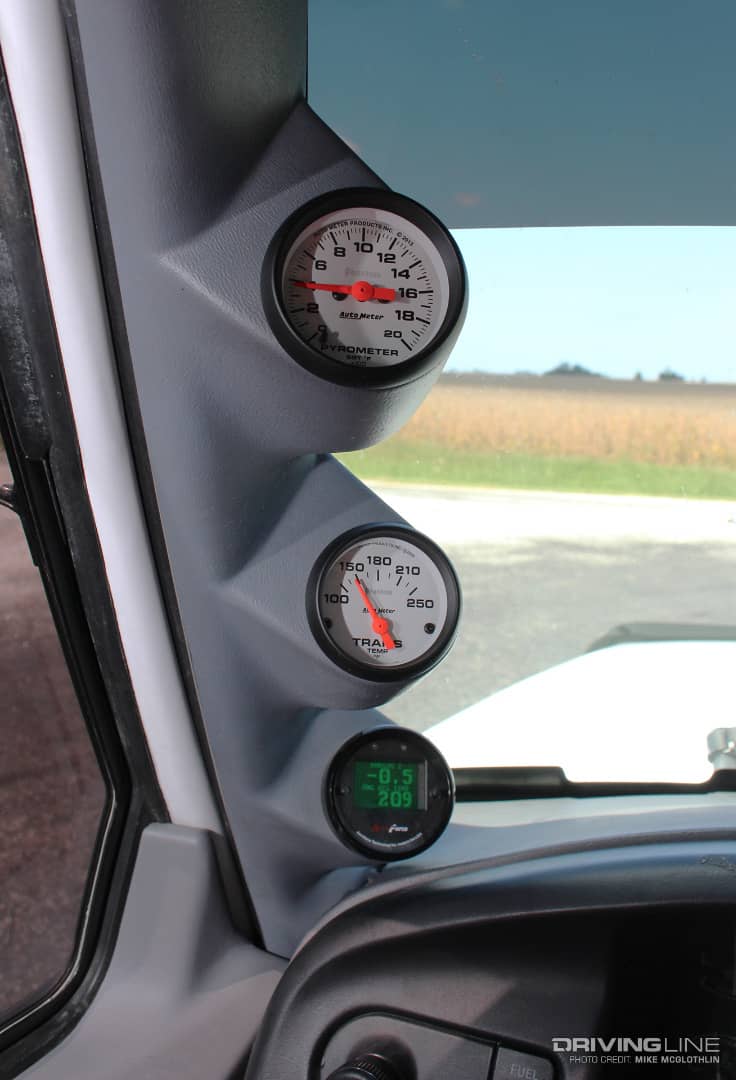
We’re just about ready for Paw-Paw’s first fire up, but before we let all of the truck’s newfound horses out to play we’re performing one final task—and it’s something that every diesel owner should do. We’re installing gauges. Mounted along the driver side A-pillar, the addition of an Auto Meter pyrometer will allow us to keep tabs on exhaust gas temperature (EGT) so we don’t melt a piston. Installed just beneath it will be an obligatory (and self-explanatory) transmission temp gauge, which will offer peace of mind. Below that, a dual parameter digital gauge from AeroForce Technology will track boost, ICP, engine oil temp and any other vital we feel like watching.
We don’t necessarily expect the numbers displayed on these gauges to get out of hand, but knowing where they’re at can be vital in keeping the 7.3L’s 216,000-mile factory rotating assembly alive. On top of that, the gauges will allow us to know for certain whether or not the injection system is running at maximum potential. And as a bonus, we can even use the gauges to diagnose a potential problem. Last but certainly not least, we’re installing a set of traction bars. Any time you double, triple or (in our case) quadruple the power output of a diesel truck, axle wrap becomes apparent. To take axle wrap out of the equation and help our F-350 get as much power as possible to the pavement, we’ll be installing a set of One Up Offroad’s short-gusset traction bars.
Next time will be the moment of truth, as Paw-Paw will pay a visit to the dyno and then head straight to the quarter-mile.
Seamlessly Integrating the Gauges
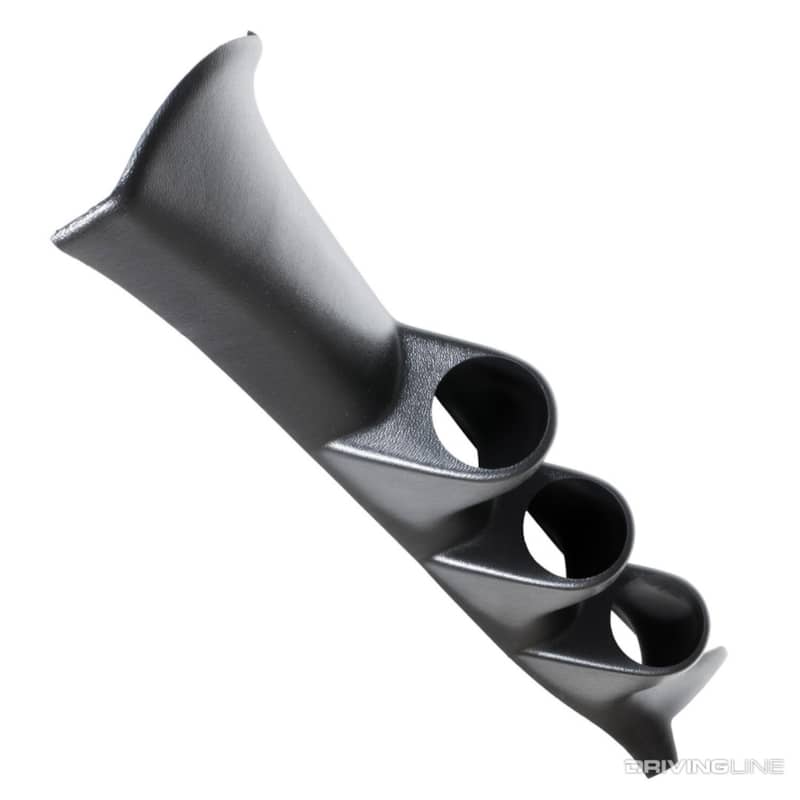
The three 2-1/16-inch diameter analog gauges we plan to run along the OBS Ford’s A-pillar will sit in this gauge pod from Auto Meter (PN 17303). A household name in the gauge industry and a major player in the diesel realm, Auto Meter offers application-specific pods and other mounting solutions for virtually every make and model on the market. Our pod arrived black, so in order to match Paw-Paw’s factory gray interior, we picked up a can of gray primer from the local parts house. Before applying it (in two coats), we used lacquer thinner to remove the release agent that’s present on the pod from the factory. We’ll also note that we obtained all of our Auto Meter products through Summit Racing, a very competitively priced retailer that’s more involved in the diesel industry than you might think.
A-Pillar Triple Gauge Pod: $82.99
2,000-Degree Pyrometer

A pyrometer is arguably the most important gauge you can add to a diesel. Because we plan to see EGT register more than 1,600 degrees F at the drag strip, we opted for Auto Meter’s 0-2,000-degree pyrometer rather than a standard 0-1,600-degree unit (Phantom series PN 5745). We know anything hotter than 1,250 degrees F is pretty toasty for a 7.3L, but the engine will only see this kind of heat for a few seconds while racing (and only while in the All Out tune mentioned in Part 9). The best way to rationalize the fact that it’s OK to see this kind of heat for a short period of time is easiest by comparing it to running your hand across an open flame. You can move your hand into and then back out of the flame quickly without being burnt, but if you keep it there you will be burned. The same theory applies to high EGT in diesels while racing. It’s important to remember that, during street driving and towing, the appropriate PCM tune (which calls for much less fueling) will easily keep EGT in check.
Pyrometer: $199.99
EGT Reading from the Exhaust Manifold
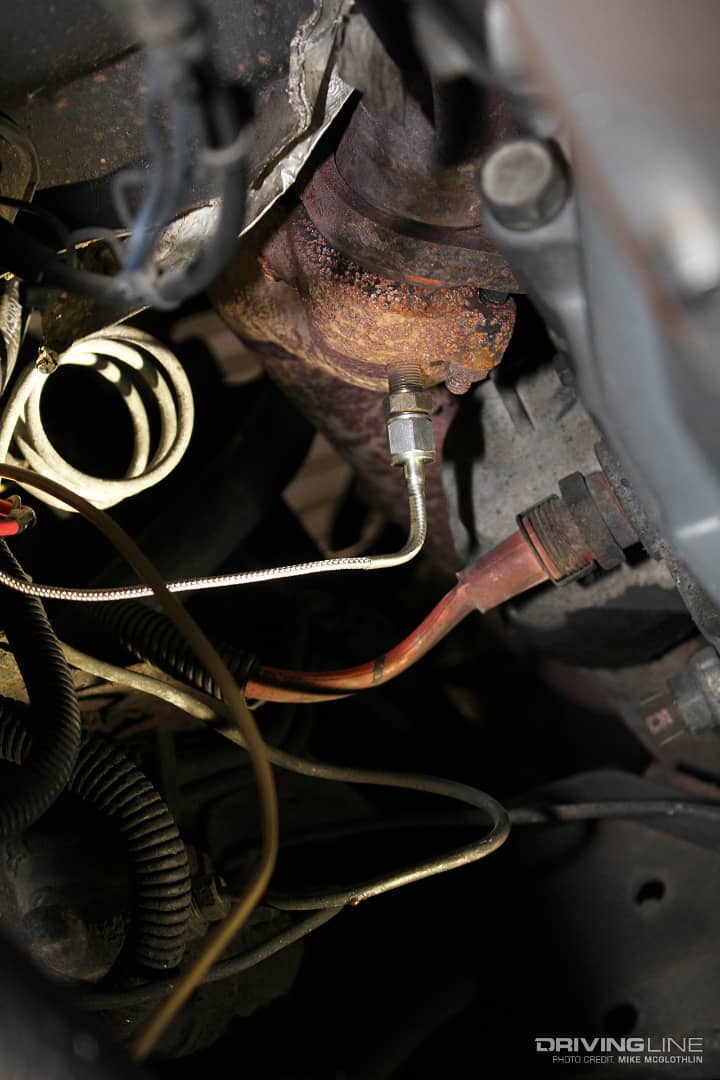
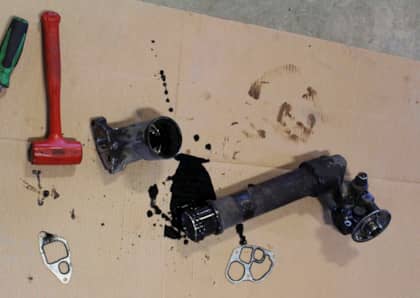
To get the best EGT reading possible, you want to mount the supplied thermocouple as close as possible to the source of heat. Since we don’t have the ability to install the probe directly in-cylinder (in-cylinder temperature being the number we really want to know), drilling, tapping, and installing it in one of the exhaust manifolds is the next best thing. On the 7.3L, the most convenient spot to install the thermocouple is at the back of the driver side exhaust manifold, which places the probe just a few inches from cylinder number 8. An added benefit of installing the probe on the driver side manifold is that there is plenty of left over wire once you string everything into the cab.
Weather-Tight Wiring
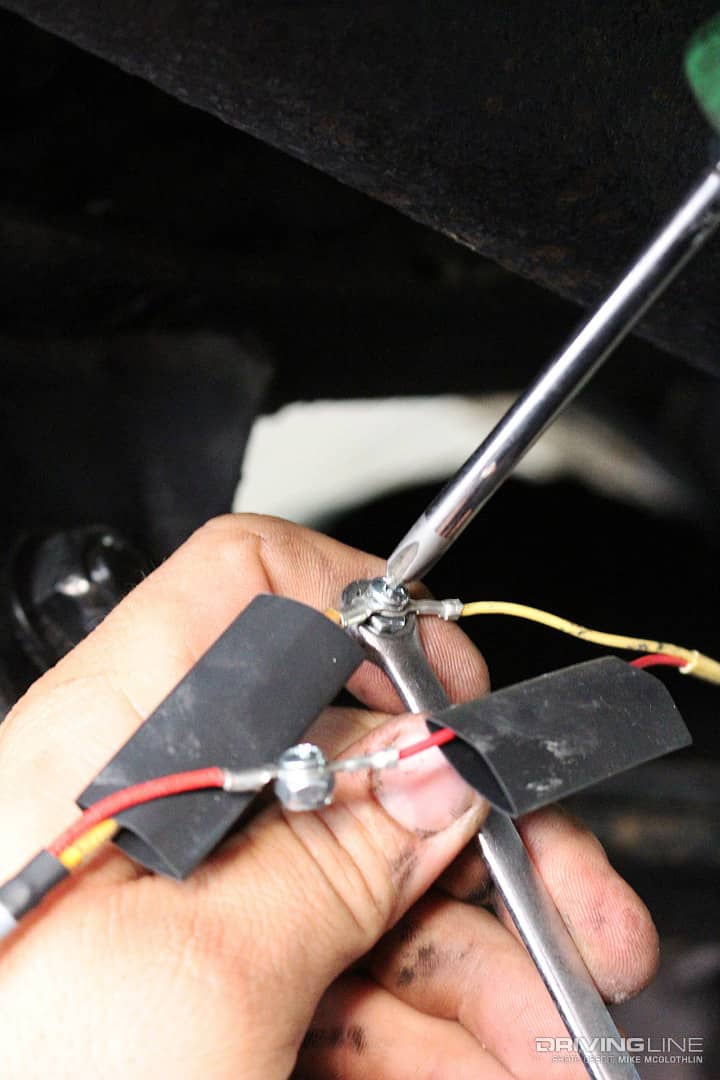
Wiring up the pyrometer was extremely straightforward. It entailed linking the color coded wires together via the supplied screws and locking nuts, and then the connection points being sealed by way of the included shrink tubes. The excess wiring in the thermocouple harness was zip-tied up under the truck (it’s vital that the harness’s length not be altered as it can throw off the accuracy of the gauge).
Transmission Temperature Gauge
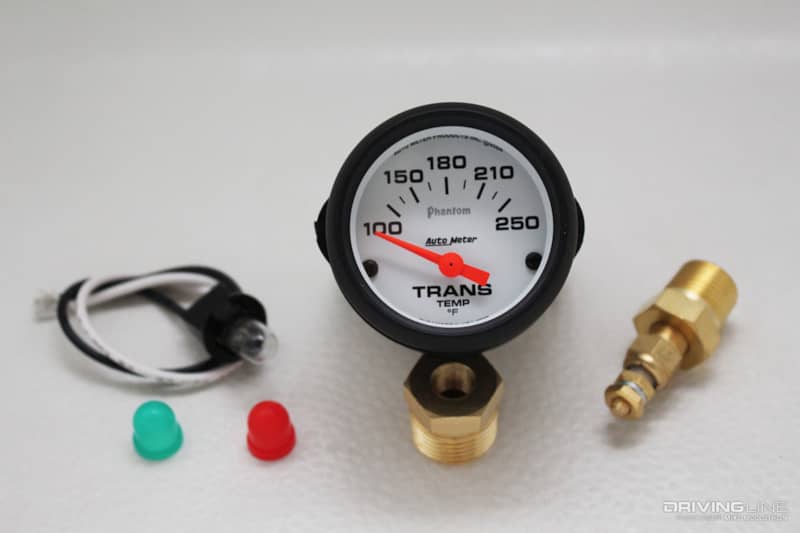
Although we have absolute faith in Paw-Paw’s E4OD thanks to the fresh build from John Wood Automotive and the Mishimoto transmission cooler, it’s still important to know what kinds of temps the four-speed is seeing. Just as a pyrometer can provide you the information you need to keep from melting an engine, a transmission temperature reading can give you the data you need to prevent a heat-related failure (heat being the primary cause of most transmission failures). Also sourced through Summit Racing, our Auto Meter transmission temp gauge is a Phantom series unit (PN 5757), and displays temperature in a range from 100 to 250 degrees F.
Transmission Temperature Gauge: $66.99
Trans Temp Wiring
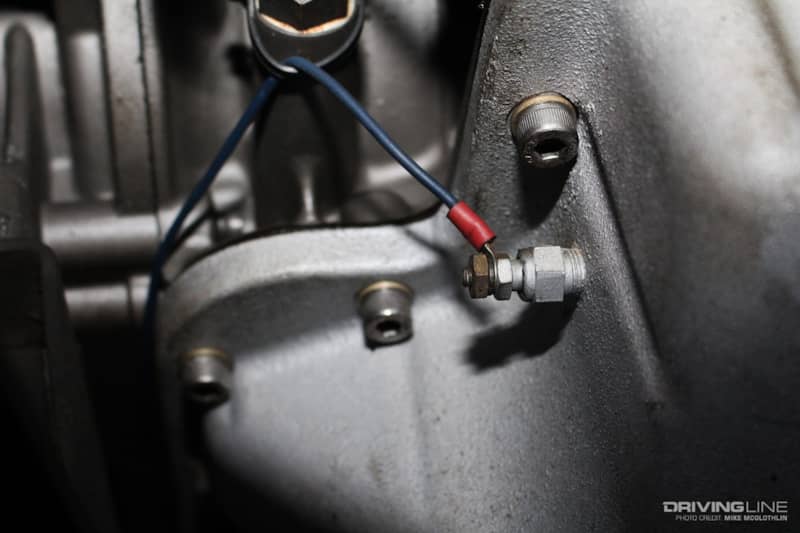
When wiring up the transmission temperature gauge, we routed the 18-gage wire alongside the transmission shifter cable in the floorboard in order to get it into the cab. At the transmission itself, the supplied 1/8” NPT temperature sender was installed in the port that’s incorporated in the Goerend extra capacity pan we’re running.
The AeroForce Technology Interceptor
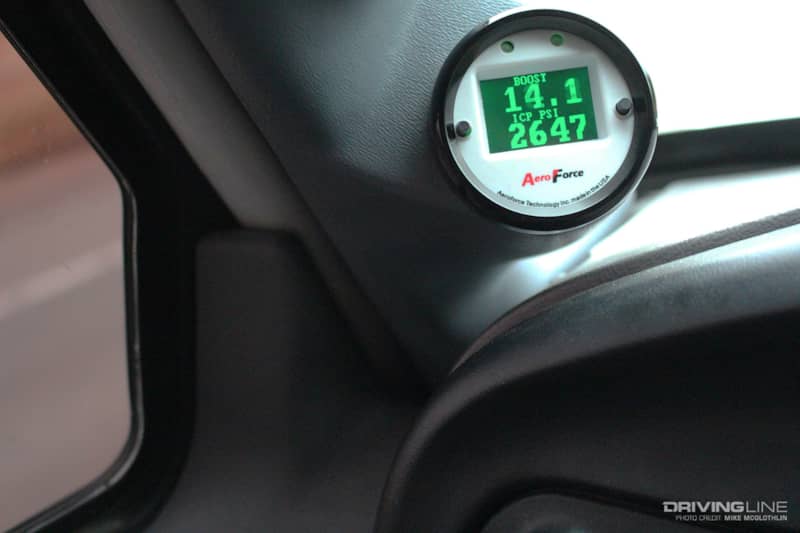
If we had to sum up AeroForce Technology’s FD Series Interceptor scan gauge in one word, that word would be “invaluable.” The digital display allows you to view two parameters at a time (which essentially makes it two gauges in one), monitors everything the PCM sees thanks to the supplied OBD-II connector and 5-foot-long cable, can read and clear DTC’s and also accommodate two additional analog inputs. What makes the Interceptor even more special is its ability to run a cylinder contribution test as well as a buzz test. These tests are vital in diagnosing a host of issues that can arise with the 7.3L, so having them available with the push of a button along the A-pillar is priceless. In the photo above, you can see boost and injection control pressure (ICP) under moderate acceleration.
Interceptor FD Series Scan Gauge: $249
100-PSI Boost Sensor
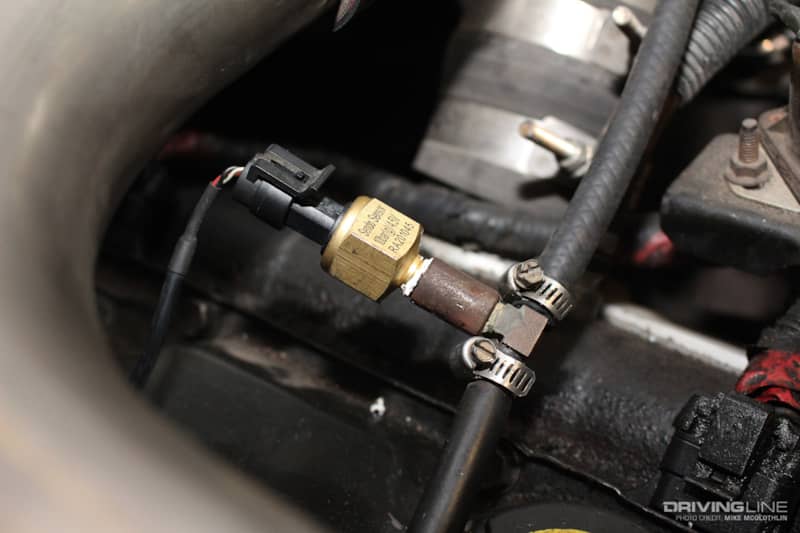
Because the factory PCM on Paw-Paw will only read up to 21-psi of boost, we also installed this 100-psi boost pressure sensor from AeroForce Technology, which it offers as an add-on analog item. The gauge end of the sensor features a pigtail that simply plugs into the back of the Interceptor. To give the sensor a 5-volt power source, we tapped into the stock MAP sensor’s return circuit wire. After properly configuring the analog input on the gauge (per AeroForce’s instructions), the 100-psi sensor is accurate to within +/- 1 psi. We plan to see 50 psi of boost when running the hottest tune in our arsenal.
100-psi Boost Pressure Sensor Kit: $65
Key Parameters We’ll Be Watching on the AeroForce Interceptor:
*ICP (high-pressure oil pressure)
*IPR duty cycle
*Injector Pulse Width
*Boost (factory boost)
*Analog 1 (add-on, 100-psi boost sensor)
*Engine Oil Temp
*Battery Voltage
*Intake Air Temp
Alternative to A-Pillar Gauges

If A-pillar gauges aren’t really your thing, the all-in-one Insight CTS2 monitor from Edge Products has become extremely popular over the years (and the original CTS was a must-have before that). The color touch screen monitor can display as many as nine parameters at once and can be affixed to your windshield with a simple suction cup mount. In our case, we felt the old-school A-pillar gauges were more era-appropriate for our pre-Super Duty Ford. After all, we are still running the factory 16x7 Alcoas…
Traction Bars: A Must for Any High-Powered Diesel
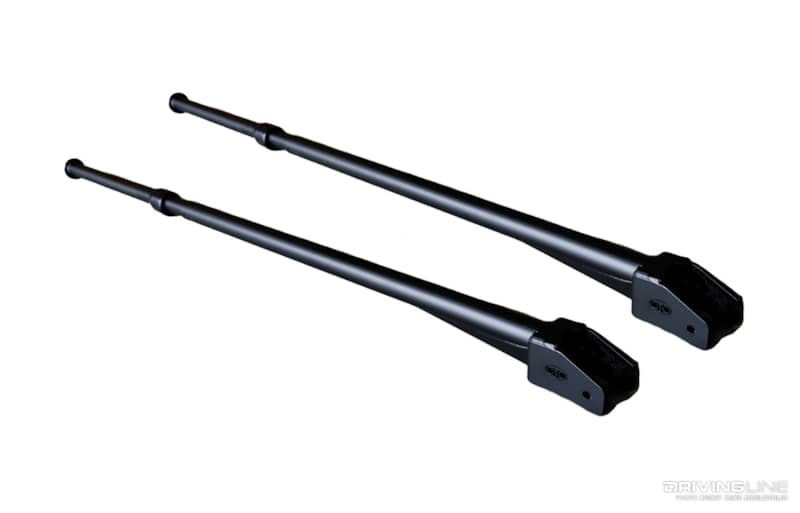
This one gives a little bit of the sleeper-ness away, but on the ’94.5-’97 Fords traction bars aren’t a maybe item. Even with as little as 300rwhp in the mix, rear axle wrap and leaf spring twist becomes a problem on ’94.5-’97 Fords, which in addition to lost traction can lead to worrisome driveshaft plunge, added U-joint wear and more stress on the pinion yoke. To make sure we don’t face any of the aforementioned issues while trying to send as much of our 600hp to the wheels as we can, we installed a set of short gusset traction bars from One Up Offroad.
Heavy-Duty Mounts, Grade 8 Hardware
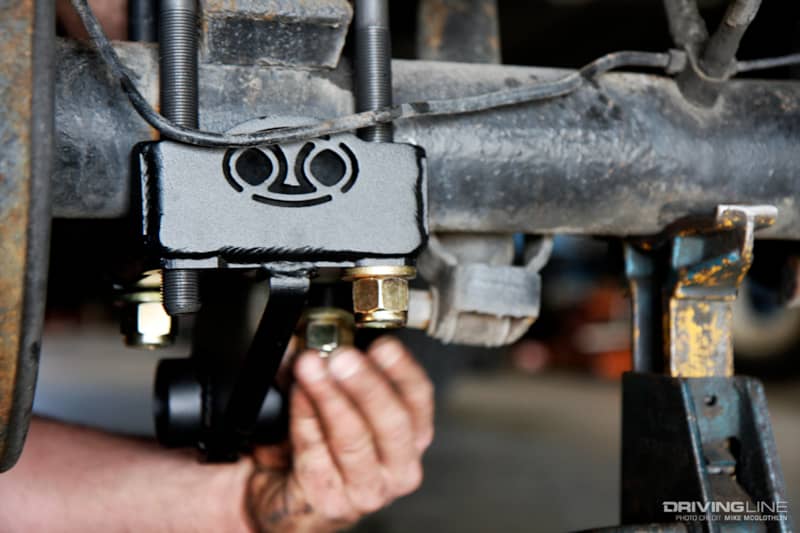
With the truck positioned in its natural state (i.e. at its normal ride height), the One Up Offroad bars were installed in a few hours’ time. The beefy, bolt-on frame brackets they shipped with utilize eight (yes, 8) Grade 8, 3/8-inch bolts per mount, while even more robust mounts—along with flipped, ¾-inch diameter U-bolts—wrap around the truck’s 3-5/8-inch axle tubes. Overkill in the extreme, these babies aren’t going anywhere.
If you missed the part where we explained how Paw-Paw will be capable of going from 350 hp to 600 hp with the push of a button, make sure you check out Part 9 of this build.