Project Paw-Paw: Part 2
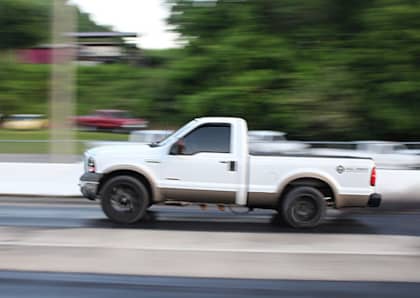
As the big brown truck continues to deliver box after box of go-fast goodies for Project Paw-Paw, thoughts of running down Camaros and wearing out newer trucks are unshakable. However, before we get carried away with our quest to build the ultimate sleeper, it’s time to be proactive. Structurally, the 7.3L is a pretty solid platform, but it does have its shortcomings—namely within the valvetrain. In order for the 216,000-mile engine to survive the added power it’s about to see, these weak links have to be addressed. For a bone-stock 7.3L, that means installing stiffer valve springs before a valve kisses a piston and replacing the flimsy factory pushrods with chromoly aftermarket units.
We’re also ditching the factory head bolts in favor of head studs this time to rule out any chance of popping a head gasket. While they may seem a bit mundane, the hard-part upgrades described in this installment pave the way for any 7.3L to cope with higher rpm, three times the power and triple the boost it made in stock form. The best part is that this is as far as we’ll have to go into the engine to prep it for 600rwhp. The only other modification that will take place beneath the valve covers will be when the hybrid injectors go in. Stay tuned for that next time, along with a quick tutorial on the types of modifications that can be made to improve the 7.3L injector.
Weak Factory Valve Springs

Upgrading valve springs with the heads on the block and the engine still in the truck is a tedious process. For one, you have to take the proper precautions so you don’t allow the valves to drop into the cylinder. For another, a telescopic magnet is vital in ensuring you don’t lose any of the keepers, not to mention that gaining access to (and working on) the rearmost springs can be a bit nerve-racking, as well as cramped. The process requires patience, a steady hand and several hours of your time. In the end however, it’s worth it, as a factory 7.3L valve spring only has a closed seat pressure of 79-lbs on its best day—and the 216,000-mile versions in our engine are anything but brand new.
Calling on Comp Cams

For over a decade, Comp Cams’ 910 single outer valve springs have been a go-to upgrade for 7.3L owners. Originally intended for big-block GM’s, they’re readily available, direct replacement valve springs that are cheap and have been proven to work well in mild to significantly-modified engines. At the correct installed height, the Comp Cams springs can provide significantly higher seat pressure than the stockers, which is optimal for guarding against valve float (high rpm) and valve creep (intake and exhaust valves opening early due to elevated boost or drive pressure).
Valve Springs Price: $84 - $90
Adding Even More Seat Pressure

While a direct swap of the Comp Cams 910 valve springs would’ve been better than doing nothing, in higher horsepower applications a higher closed seat pressure is required. To increase the closed seat pressure, the installed height of the spring itself has to be reduced. To lower the installed height, 0.030-inch thick shims were installed. Manufactured specifically for its valve springs, Comp Cams’ hardened-steel shims are a perfect fit around the 7.3L’s valve guides. For the sake of having options and because shims are inexpensive, we suggest buying Comp Cams’ variety pack (we did), which entails 0.015-inch, 0.030-inch and 0.060-inch shims all in one bag (PN 4754). As mentioned, we settled on the 0.030-inch shims, which bring our closed seat pressure to approximately 113-lbs (vs. 70 to 79-lbs stock).
Valve Spring Shim Kit Price: $21
Finding TDC

To install the valve springs in cylinder heads that are still bolted to the engine, you have to perform the work one cylinder at a time, which requires each cylinder you’re working on to be brought to top dead center. You’ll need a helping hand to manually turn the engine over while you check for TDC using the feeler tool of your choice. In our case it was a plastic probe, inserted into the glow plug bore. We’ll note that some installers are more comfortable with the injectors removed and out of the way. And we’ll also throw in the fact that now is an opportune time to swap in a set of fresh glow plugs.
Requisite Tool

The entire valve spring job revolves around the acquisition of a valve spring compressor tool. They can be had for roughly $50 to $60 or even borrowed from a fellow gearhead. With the rocker arms and pushrods out of the way, the compressor is first employed to press the valve spring retainer down enough to remove the keepers via telescopic magnet (make sure you take note of their original position). After that, the compressor tool and stock spring can come out, you can remove the valve seal, set the shim in place and install the compressor on a Comp Cams 910 spring for installation. Then the old valve seal goes back in, the new valve spring goes on and the keepers and retainers are reinstalled.
Weak Factory Pushrods

Though not quite as critical of an area to upgrade on a 7.3L, the factory push rods can (and often do) experience deflection when subjected to added power. Granted, an over-torqued rocker arm or a failing lifter are the most common reasons for bending one, but big power doesn’t do them any favors. Plus, when you’re already under the valve covers sweating out a valve spring swap, it’s the perfect chance to rule out another weak link. Above, one of our stock pushrods (left) is side by side with its replacement from Hamilton Cams (right).
Heavy-Duty, Direct Replacements

Hamilton Cams’ heavy duty 7.3L pushrods won’t deflect or bend under load thanks to their 4130 chromoly steel construction and 0.095-inch wall thickness. The outside diameter of the tube is 3/8-inch so there are no clearance issues associated with them (namely passing through the head gasket) and they’re also the same length as stock. Hamilton’s heavy duty pushrods are topped off with pressed-in, hardened 8620 steel ball ends. Another popular and proven pushrod option in the 7.3L world comes from Smith Brothers Pushrods, a company that offers a Stage 1 and a Stage 2 version.
Pushrods Price: $225 - $300
ARP Head Studs

Another area of concern that’s geared more toward peace of mind than anything else is the addition of head studs. While the 7.3L’s six bolts per cylinder head design can hold up to pretty serious boost, any time you’re venturing beyond 40-psi of boost (we’ll end up around 50 psi) added clamping force on the head gaskets is a good idea. Along with the valve spring and especially the pushrod upgrades we’re performing this time, there is no cheaper insurance policy than the addition of ARP head studs (PN 250-4201). Higher tensile strength and deeper thread engagement in the block are the key advantages of head studs over traditional head bolts.
Head Studs Price: $579 - $620
Swapping Them in, One at a Time

Though we’ll admit that pulling the cylinder heads completely, having the heads resurfaced, the block’s deck surface inspected and new head gaskets installed (i.e. doing it the “right way”) is ideal, swapping head studs in one at a time and retaining the original 200,000-mile head gaskets has been done successfully on high-powered 7.3L’s for years. Installing them one at a time saves you downtime, labor and (of course) money. Full disclosure: to get the rearmost (firewall) studs in, we had to loosen the motor mounts and tilt the engine using a jack and a block of wood.
Different Stud Lengths

It’s worth mentioning that, of the 36 head studs ARP supplies (18 per bank), eight fasteners measure roughly ¼-inch shorter than the length of the other 28. This is because the top four studs on each bank need to be shorter in order to clear the rocker arms. Don’t do any grinding or cutting!
Torquing the Head Studs

The 12-point nuts that come with ARP’s 12mm diameter head studs call for a 14mm socket and a final torque spec of 125 ft-lbs. For a little added insurance, we snugged ours up to 135 ft-lbs. We’ve seen ARP head studs keep head gaskets alive in a 7.3L making as much as 75 psi of boost. And that was on stock head gaskets and non-O-ringed (or non-fire-ringed) heads. Just an FYI, if you ever plan to reuse your head studs (you know, in case you blow your stock bottom end to smithereens…) stick with the 125 ft-lb spec. Clear as mud?
Now the Fun Begins

Stay tuned, because we did one more thing while the valve covers were off. Hint: it included four pairs of giant syringes—the first major step in taking Paw-Paw from 159rwhp to nearly 600rwhp.
Did jumping right in to Part 2 give you a false start? Get the lowdown on all of our plans for Project Paw-Paw, our 7.3L Power Stroke sleeper build, right here.


