Top 32 Play-by-Play: Formula Drift Rd 5 Evergreen Speedway
Fast forward to the Formula Drift Ford Top 16 or Nitto Final 4.
Air Force Top 32
Kenny Moen vs. Jeff Jones
Moen Lead: Kenny Moen starts the Top 32 off with a strong entry and remains high along the bank, showing why he’s the top qualifier. Jones runs a lower line on the bank, but catches up through the power alley. Jones Lead: Jones is higher on the bank on his lead run, and runs clean through the rest of the course. Moen looks to be closer to Jones through most of the course. Judges vote in favor of Moen by a split 2-1 decision.Charles Ng vs. Daigo Saito
Ng Lead: Saito finally looks to be settling in with his GT-R, finally driving it to its potential. Saito has great proximity on the bank and takes the lower line to maintain proximity through the exit of the bank and through the power alley, which puts him off line for the touch-and-go. Ng has a smooth lead run, but nothing spectacular. Saito Lead: Saito has a much better line through the touch-and-go while Ng is off line in nearly the identical locations as Saito’s chase run. Both of these drivers are making small errors; these are not the cleanest runs. Two judges vote for a one-more-time (OMT) while one judge votes for Saito to move on. Majority rules, we go one-more-time.OMT
Both drivers are running a VR38 engine, with Ng’s car featuring upgrades from GReddy while Saito’s car features an assortment of HKS parts. Ng Lead: Saito is much tighter on the bank in chase, and again takes the inside line through the power alley and around the inner clip almost mirroring his previous chase run. Ng fills the clipping points well, but isn’t as high on the bank as the judges have asked. Saito Lead: Saito again runs the higher line on the bank while leading as Ng takes the slower inner line. Exiting the bank, Saito starts to slow to set himself up for the touch-and-go but Ng slides into him and causes contact. Both drivers shut down and cruise through the rest of the course. Judges deem fault to Ng as the drivers were told that it was OK to slow down in that area to ensure they have the right line through the power alley, Ng’s line and shallow steering angle didn’t leave him room to slow down which caused the contact.Chris Forsberg vs. Nate Hamilton
Alec Hohnadell vs. Kyle Mohan
Hohnadell Lead: Hohnadell has a solid lead run, Mohan is several car lengths back on the bank and never really makes up any ground. Mohan is late to transition through the power alley, which pushes him off line at the touch-and-go. Hohnadell doesn’t have any obvious mistakes and is likely to have an advantage. Mohan Lead: Mohan goes deep into the bank, possibly rubbing his rear bumper along the bank just after entry, but again is late to come off the bank and transition on the infield which causes him to miss the designated touch-and-go zone and is off the prescribed line near the infield inner clip 1. Hohnadell’s chase is much closer than Mohan’s chase was and was within one car length through most of the infield section. Hohnadell earns votes from all three judges and gets the win.Ken Gushi vs. Brandon Wicknick
Gushi Lead: Gushi has been on a roll the past few events, his GReddy Racing Scion FR-S really looks dialed in. This run was no different as Gushi had a high run along the bank with plenty of smoke. Wicknick looks to get lost in Gushi’s smoke and goes completely off the course at the exit of the bank. Gushi completes his lead run flawlessly. Wicknick Lead: Wicknick isn’t as high on the bank as Gushi was, and Gushi is able to follow around two car lengths behind Wicknick almost with ease. Both drivers make the transition to the infield smoothly and hit the touch-and-go smoothly, Wicknick isn’t able to shake Gushi in his rear-view mirror. Judges vote unanimously for Gushi to move on.Pat Mordaunt vs. Tyler McQuarrie

Kristaps Bluss vs. Matt Coffman
Bluss Lead: Bluss has been hot and cold this season in his HGK Motorsports BMW. Bluss initiates to the bank and Coffman initiates shortly behind him. Bluss has a good run on the bank with a mid to high line, Coffman is about three car lengths behind. Coffman dives in through the power alley to close the gap. Bluss scrubs a ton of speed between the touch-and-go and the first inner clip. Coffman has to slow dramatically to avoid contact and may have dropped a tire at the clip, but likely did so to avoid the contact. Hard to determine fault at first look, but after watching the replay, it definitely looks like Bluss had a mis-shift. Coffman Lead: Coffman starts with a similar gap but Bluss narrows it towards the exit of the bank, much earlier than Coffman. Bluss closes the gap through the power alley similarly to Coffman, but loses ground again near inner clip two. Coffman finishes the run with a four car gap, much larger than the gap Bluss had. Judges side unanimously with Coffman.Justin Pawlak vs. Dean Kearney
Pawlak Lead: Pawlak has a strong run on the bank with great angle, while Kearney is close in pursuit but with shallower angle. Exiting the bank, Pawlak pulls away from Kearney but Kearney pulls tight again near the touch-and-go. Kearney’s line isn’t the smoothest, and he may have dropped a tire just before inner clip one. Pawlak pulls away around the final corner. Again, this looks like a battle of angle versus proximity. Kearney Lead: Kearney initiates later than most of the drivers have been initiating, but holds a good high line through the bank with JTP close behind. Coming off the bank, Kearney again transitions a bit late and hits the touch-and-go a bit later than requested from the judges, which causes a later transition towards inner clip 1. Pawlak is able to mimic the line well despite being unorthodox, judges vote unanimously for Pawlak and mention over the loudspeaker that Kearney’s late initiation into the bank may have been after the designated area to initiate.Ryan Tuerck vs. Geoff Stoneback
Tuerck Lead: Tuerck is another driver who has finally started to look comfortable in his car, and has multiple podium finishes this season as well as a high qualifying effort in Evergreen to prove it. Tuerck’s lead emulates his qualifying run through the bank and transitioning on the infield, though Stoneback isn’t far behind. Rounding the final turn of the infield and transitioning around the hairpin, Tuerck taps the wall with enough force to straighten the car out and lose drift, Tuerck must re-initiate and takes out the finish line cone. This will likely score a zero for Tuerck, an uncharacteristic mistake for the current points leader! In a later interview, it’s revealed that the differential gave out in Tuerck’s car, which is the same problem he had in Long Beach. Stoneback Lead: Stoneback has a huge advantage, but approaches the run calmly and takes a mid to high line on the bank. Stoneback isn’t as high as some, but is likely playing smart. Tuerck is aggressively chasing down Stoneback, trying to force a mistake. Transitioning around the first inner clip towards the hairpin, Tuerck surges forward to close the gap but has to brake quickly to avoid hitting Stoneback, which causes Tuerck to spin out. Stoneback earns the win as our points leader has been eliminated in the round of 32, this is likely to shake up the championship chase!Pat Goodin vs. Masashi Yokoi

OMT
Goodin Lead: Yokoi initiates almost identically to Goodin and is immediately just inches from Goodin’s door. Yokoi maintains the amazing proximity through the entire bank, then leaves just enough room for Goodin to transition onto the infield before closing the gap again. As Goodin slows for the touch-and-go, Yokoi hits Goodin. Goodin shuts it down, Yokoi stays in throttle and continues past Goodin, finishing the course with style and plenty of smoke. The crowd loves it, but Yokoi is likely at fault for the contact. Yokoi Lead: Yokoi has another smokey run, Goodin provides pressure but is consistently a few car lengths further behind Yokoi than what Yokoi showed on his chase run. Overall, the run is a bit conservative from Goodin, Yokoi takes the wrong line around the final corner and cuts the corner on the inside, likely putting two tires off. All three judges vote for Goodin to move on to the Top 16.Matt Field vs. Jhonnattan Castro
Field Lead: Field has a great lead run with plenty of smoke on the bank. Castro has trouble keeping up, particularly losing proximity exiting the bank and entering the infield section. Both drivers finish the course without any major mistakes, but the lack of proximity will likely hurt Castro. Castro Lead: Field is aggressive on Castro in chase, mimicking his every move. As the drivers transition onto the bank, Castro transitions late which pushes him off line past the touch-and-go. Castro finishes the course well, but Field’s proximity in chase was far superior. Judges vote unanimously for Field.Chelsea Denofa vs. Conrad Grunewald
Denofa Lead: Denofa’s car pulls away quickly from Grunewald in the bank, Grunewald is unable to make up much ground through the course. Neither driver is exceptionally deep on the touch-and-go or near inner clip 1, but the lack of proximity is likely a disadvantage for Grunewald. Grunewald Lead: Grunewald carries good angle through the bank and onto the infield, but Denofa is close behind. Denofa has shallower angle and a low line through the bank, but matches Grunewald’s angle and line through the infield portion of the course. Two judges vote for Denofa, one votes for a OMT.Fredric Aasbo vs. Dan Savage
Aasbo Lead: Aasbo is one of the drivers looking to capitalize on Tuerck’s early exit at a track where he earned his first career Formula Drift win back in 2012. Aasbo is running the high qualifying line, Savage is able to keep pace through most of the bank. Savage backs off a bit near the end of the bank and loses some angle, but not completely losing drift. Savage keeps good proximity through the infield, but definitely has less angle than Aasbo. Again, if you like proximity, Savage may have an advantage. If you want steering angle, Aasbo likely has the advantage. Savage Lead: Savage starts the run high on the bank with good smoke, but again has a major correction exiting the bank into the power alley and nearly straightens out. Savage gets the car sideways again and continues the run strongly, Aasbo is just a car length or two behind. Aasbo has similar proximity to Savage in chase, but has more angle and plenty of smoke. Judges vote unanimously for Aasbo due to Savage’s mistakes on both runs entering the power alley.Michael Essa vs. Dai Yoshihara
A battle of two former Formula Drift champions who are looking to regain their previous championship form. Essa Lead: Essa runs the bank smoothly with good smoke, although with several small angle adjustments towards the end of the bank and into the power alley. Dai also has some speed adjustments to try and maintain proximity, keeping around a car length in distance through most of the bank. As the drivers transition into the touch and go, Yoshihara gets a little too deep and taps the wall, straightening out. Yoshihara gets back on throttle and stays tight on Essa through the second half of the infield, but the advantage is likely to Essa. Yoshihara Lead: Yoshihara has a good clean run with good smoke, Essa is consistently one- to one-and-a-half car lengths behind. Yoshihara gets the transition into the touch-and-go correct on his lead run, Essa emulates the angle and finishes the run strong. Judges vote unanimously for Essa due to Yoshihara’s major mistake while following.Forrest Wang vs. Mike Whiddett
OMT
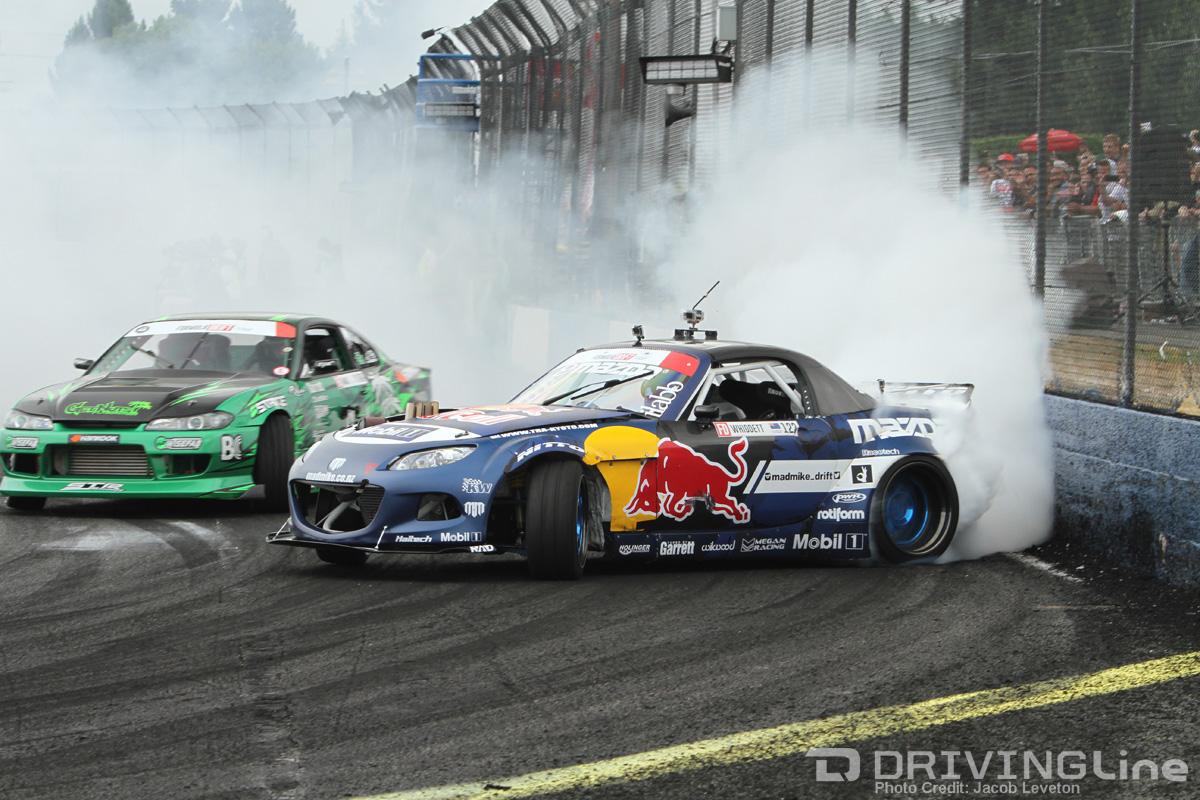
Wang Lead: Wang again has a good lead run with Whiddett aggressively on his door through the bank. Whiddett allows for a gap through the power alley, then closes it again after the touch-and-go and finishes closely behind Wang. Whiddett Lead: Wang again leaves a large gap on the bank which he slowly closes through the power alley and past the touch-and-go. Whiddett clearly has substantially more grip, especially on the bank than in rounds past, and has been improving with every run at this track. Two judges vote for another OMT, while one judge votes for Whiddett outright. We’re going to a third and final tandem!OMT x2
Wang Lead: Wang continues to run high, smokey qualifying lines on the bank. Whiddett’s car seems faster in drift than in a straight line, which doesn’t seem possible. As soon as Whiddett kicks the car sideways, he closes a five-car gap into a one-car gap. Whiddett backs off one to two cars, then closes the gap again, and repeats that process several times through the bank. Diving into the infield, Whiddett leaves room for Wang to tandem then closes the gap again. Whiddett is a little shallow on angle near inner clip one, but otherwise appears dominant in his ability to close the gap at will through the rest of the course. Whiddett Lead: Whiddett again opens up a four- to five-car gap on the bank. Both drivers are extremely high on the wall, Wang overshoots the transition into the power alley and goes off course in a half-spin. Whiddett continues the course flawlessly and finishes strong with plenty of smoke and style, Wang has eliminated himself from this round. Judges vote unanimously for Whiddett in what was easily the most entertaining set of tandem battles in the top 32. Whiddett actually got out of his car to high-five Wang while waiting for the verdict, definitely one of the best moments of the event so far.Odi Bakchis vs. Vaughn Gittin Jr.
Ford TOP 16
Kenny Moen vs. Daigo Saito
Moen Lead: Moen’s initial start knocked over a cone, which caused a re-start. On the second run, Moen crossed into Saito’s lane, which caused a second re-start. Both drivers ran the entire course and went on to hit the wall at the touch-and-go, which required a tow-off. We moved on to other runs before returning to this battle. Moen initiates on the re-run and takes the high line gloriously. Saito is around four car lengths back until Moen taps the wall exiting the bank and straightens out. Moen gets back into the throttle and gets the car sideways again, Saito has caught up and keeps close proximity through the touch-and-go and infield portion of the course. Saito Lead: Saito initiates much earlier than anyone else we’ve seen so far. Moen is shortly behind him and stays within half of a car length through most of the bank. Moen actually taps Saito in the power-alley shortly after the transition but before the touch-and-go, but Saito isn’t phased. Moen continues through the rest of the course within half of a car length, an amazing display of tandem skill! All three judges vote for Saito due to mistakes on both runs from Moen.Chris Forsberg vs. Alec Hohnadell
Forsberg Lead: Forsberg again runs a good high line on the bank, Hohnadell stays within one- or two-car lengths through the entire bank. Hohnadell has a small angle adjustment mid-bank, but otherwise is dead on Forsberg’s door. Hohnadell floats down to a lower line near the end of the bank, but sucks right back onto Forsberg’s door after the transition in the power alley and maintains less than a car length in distance through the infield portion of the course. Impressive run from Hohnadell despite the small mistake on the bank! Hohnadell Lead: Hohnadell has a fantastic lead run, but in the end, he crossed over the center line, forcing a re-run. Hohnadell initiates and quickly opens up a four car lead through the bank. Forsberg closes the gap via the transition into the infield, but Hohnadell keeps two car lengths through the rest of the course while pouring on more angle than Forsberg. Two judges vote for Hohnadell, one judge votes for Forsberg.Ken Gushi vs. Tyler McQuarrie

Justin Pawlak vs. Matt Coffman
Interestingly, when Coffman was a ProAm driver, he hired Pawlak to help give him some tips for tandem driving. Their lessons took place at Evergreen Speedway. This run is a chance for the student to show his teacher what he learned in class a few years back. Pawlak Lead: After a strike from JTP for hitting a cone, Pawlak manjis into the bank on a high line while Coffman closes the four gap down to just two cars mid-bank. Coffman takes a shallow line through the power alley and doesn’t get out to the touch-and-go, he also puts one tire off just before the first inside clip. Coffman’s angle is shallow for most of the infield. Pawlak’s lead is clean and he likely has the advantage going into the second run. Coffman Lead: Coffman’s line is a bit lower on the bank than most of the other drivers in the top 16. Pawlak is consistently only around two car lengths behind Coffman, closing the gap down to one car after the transition in the power alley. Coffman’s line is again shallow, and despite showing less steering angle through most of the infield, Pawlak stays tight on Coffman. Two judges vote for Pawlak, one votes for a ‘one more time’.Pat Goodin vs. Geoff Stoneback
Goodin Lead: This is one of the sloppier runs we’ve seen so far. Goodin’s line is a bit low on the bank, Stoneback is even lower and has multiple steering corrections to adjust his angle mid-bank. On the infield, Stoneback surges forward a few times and has several steering corrections while Goodin is marginally smoother on his steering but still a bit shakey compared to other runs. Stoneback Lead: Stoneback starts with a four car lead through the entire bank, Goodin slowly closes it down to three car lengths through the power alley and two car lengths at the first inner clip. Rounding the final inner clip, Stoneback straightens out and loses drift. Goodin earns all three votes, Stoneback may have earned the win or at least a “one more time” if he had maintained drift across the finish line.Matt Field vs. Chelsea Denofa

Fredric Aasbo vs. Michael Essa
Aasbo Lead: Aasbo has a higher line, more angle and more tire smoke on the bank than Essa. Essa uses a late transition in the power alley to close the gap, but with as much of an emphasis as the judges have placed on the bank, the infield performance isn’t likely to influence much. Essa’s likely at a disadvantage for his lead run. Essa Lead: Essa has a good high line, Aasbo uses a lower line and slightly less angle to stay close to Essa through the bank. Essa’s line through the infield is off the prescribed line while Aasbo keeps good proximity. Essa’s angle between infield clip one and infield clip two is good, but Aasbo’s proximity is likely to influence the judges. Judges vote unanimously for Aasbo. The win is likely to give Aasbo sole possession of first place due to Tuerck, Bakchis, Gushi and Forsberg all being knocked out.Vaughn Gittin Jr. vs. Mike Whiddett
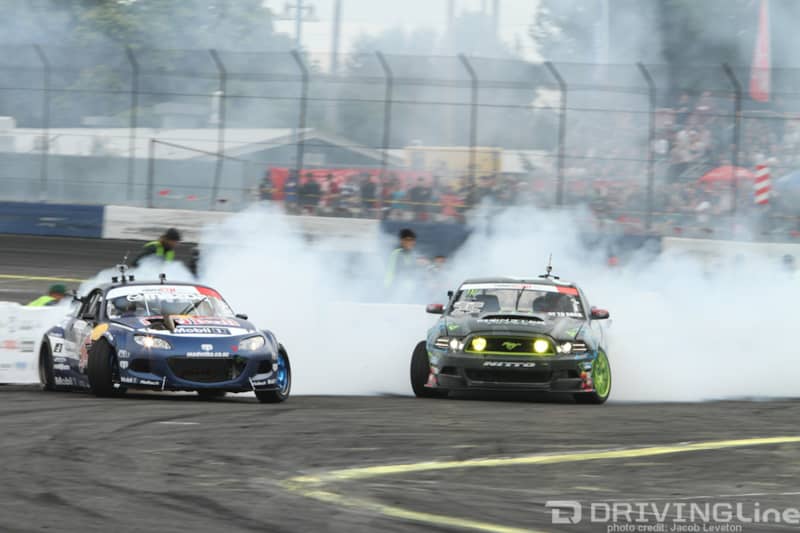
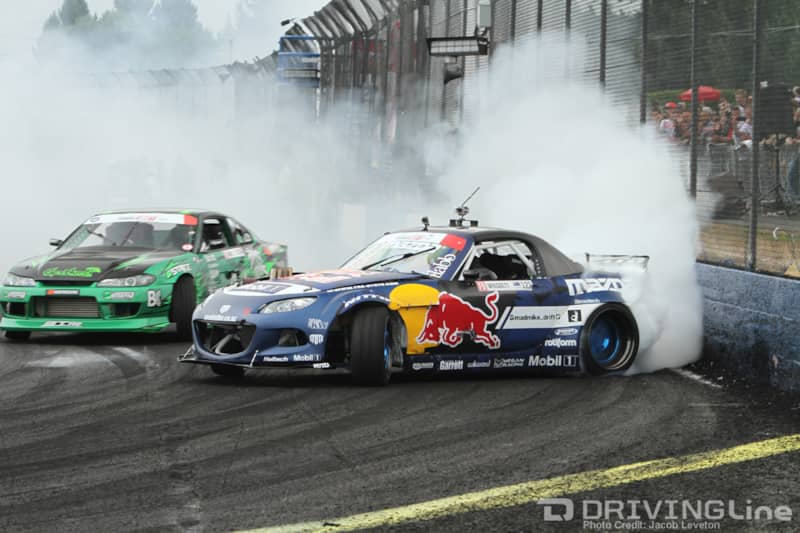
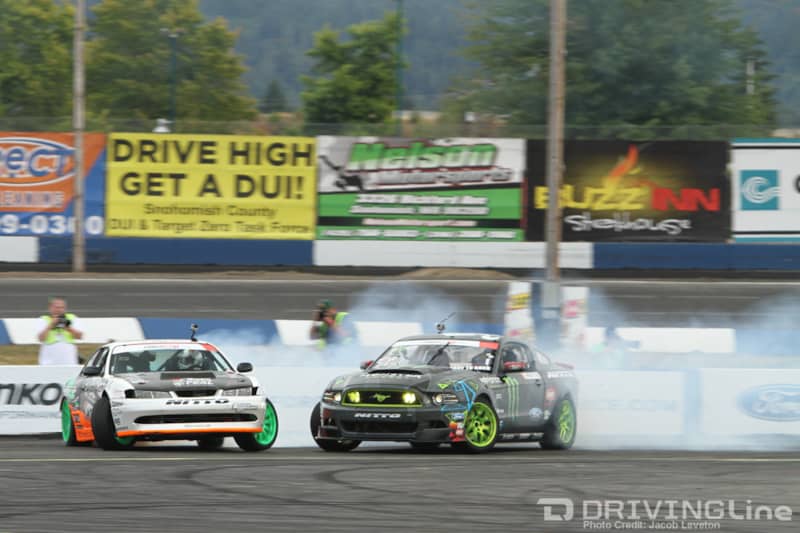
Yet another NITTO Tire matchup, Gittin Jr. is looking to remind Whiddett who the top driver on the team roster is. Gittin Jr. Whiddett mentioned in an interview between earlier runs that he plans to give Gittin Jr. some space after initiation but close it by mid-bank. Gittin Jr. Lead: Whiddett does exactly what he said in the interview, closing the gap to Gittin Jr. quickly after initiation. Whiddett has several steering corrections mid-bank and is surging to close the gap, which the judges often look down on. Whiddett keeps close proximity through the rest of the course, Gittin Jr. has a smooth line with plenty of smoke on a run that would likely have scored him in the high 80’s had it been a qualifying line. Whiddett Lead: Whiddett has incredible amounts of smoke and angle on the bank, but has a lot of adjustments to keep the car sideways due to the short wheelbase. Gittin Jr. hugs up on Whiddett after the transition in the power alley and is just inches from Whiddett through the touch-and-go and inner clip one. Gittin Jr. may have dropped a front tire over the line between inner clip one and inner clip two, but the level of prowess from Gittin Jr. to stay just inches away from Whiddett given the twitchy nature of the “RAD BUL” Mazda MX-5 is incredible! Replay shows that Whiddett may have lost drift a few feet previous to the finish line. Gittin Jr. gets the win.Nitto Great 8
Alec Hohnadell vs. Daigo Saito
Justin Pawlak vs. Tyler McQuarrie
Pat Goodin vs. Matt Field
Field Lead: Field initiates higher on the bank, but Goodin uses his momentum to slide up to the higher line. Goodin keeps one to two cars distance through the entire bank, minus a few small steering corrections. Goodin looks to dive in on Field just past the touch-and-go and appears to put at least one tire off and possibly two, Field keeps drift through the final two inner clips and keeps a good line. Likely an advantage to Field. Goodin Lead: Field is slightly shallower on Goodin, but closer through the first part of the bank. Goodin extends the lead through the second half of the bank to around two car lengths. Goodin pushes his car from the outside of the power alley through the touch-and-go past the final two inner clips smoothly, Field closed the gap again towards the end but wasn’t as close as Goodin at times. One judge votes for Field the other two vote OMT.OMT
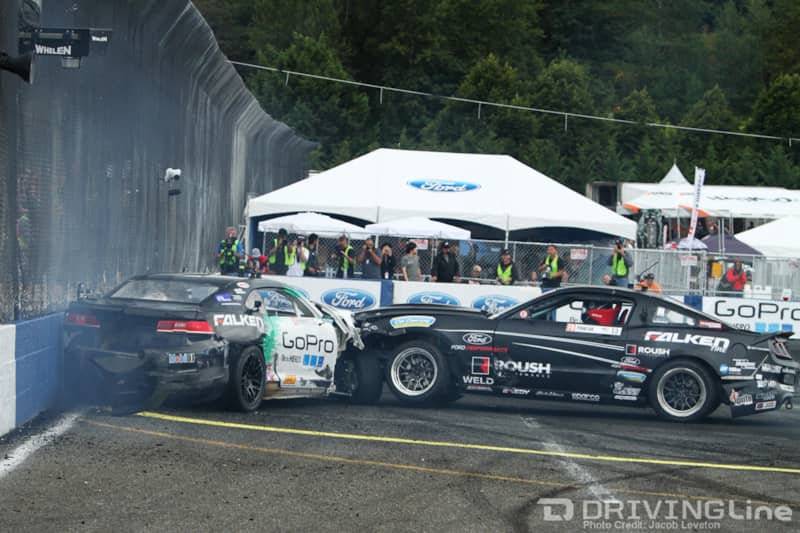
Rain has continued to fall since their initial battle, the track is very tricky to navigate at this point. Since practice on Friday and earlier on Saturday occurred in the partial wet, drivers will not be given a shakedown run to test traction levels. Additionally, Field’s team protested the first set of runs, claiming that Goodin had two tires off course which would result in a zero, the protest was ruled to be invalid. Field Lead: Field has a clean run, high on the bank with consistent steering and angle. Goodin is around three car lengths back, a safe distance considering that the conditions are slippery, especially on the infield. Field has a smooth transition into the infield and keeps a good line through the rest of the track, Goodin also keeps a smooth line but is unable to put any pressure on field. Goodin Lead: Field decides to be more aggressive, keeping close to Goodin for much of the bank. Field must back off at times to prevent hitting Goodin, but keeps applying pressure at will. Field takes a low line through the end of the bank and into the power alley while Goodin pushes out towards the edge of the track on his transition, which sets him up nicely for the touch-and-go. Field continues to press the proximity card against Goodin, surging forward multiple times on the infield although occasionally with shallower angle. Field’s chase was shakier in steering, but had substantially closer proximity. If you reward proximity, Field is the clear winner. If you reward smoothness and fluidity, Goodin is likely the winner. Judges give Goodin the win, although one judge went for a OMT. Replay shows that Field may have initiated past the point of last initiation, Goodin may have also dropped one tire exiting the bank.Fredric Aasbo vs. Vaughn Gittin Jr.
Entering this run, Gittin Jr. has defeated Aasbo seven out of nine times. Aasbo is sitting higher in the points currently, and would love to earn the win here. Just before this battle, the precipitation has started to fall. Aasbo Lead: Aasbo initiates high on the bank and shortly after initiation, Gittin Jr.’s Mustang snaps straight again. Aasbo continues to drift the bank, Gittin Jr. re-initiates drift a few different times but can’t keep the car in drift. Media members report seeing sparks under the car as Gittin Jr. tries to get the car sideways several times through the infield. Gittin Jr. parks the car in front of the grand stands near the final turn and gives the universal "she’s done" throat slice gesture. Gittin Jr. retires due to mechanical issues, Aasbo gets the win.Nitto Final 4
Alec Hohnadell vs. Justin Pawlak

Fredric Aasbo vs. Pat Goodin
Aasbo Lead: Aasbo is likely the most experienced driver in adverse conditions left in this competition, and it shows in his lead run. Although the speeds are low, Aasbo, has a good run high on the bank and with consistent angle. Goodin has a lot of steering corrections, and is never less than three or four cars away from Aasbo. Aasbo hits all the clips as prescribed, it almost looks like a slow motion version of a 90-point qualifying run but without the tire smoke. Goodin keeps the car sideways through the entire course, which is a feat in itself. Goodin Lead: Aasbo initiates and sticks around one car length away from Goodin, on the bank and keeps the proximity through the entirety of the bank. Both drivers are audibly modulating the throttle a ton, Goodin just can’t shake Aasbo. There’s no question about who won this battle as Aasbo was never more than two car lengths away from Goodin in chase but Goodin was never closer than three car lengths away. Aasbo unanimously earns a birth into the final. Because Goodin qualified lower than Pawlak, third place goes to Pawlak.Go Pro Finals
Fredric Aasbo vs. Alec Hohnadell