From Rust to Righteous: How to Transform a Used JK into an Adventure Ready Jeep
Over the years, we’ve covered countess Jeep builds. Some of our own and many built by gearheads from across the country. With so many used Jeep Wrangler JK’s on the market these days (many of which can be picked up for less than 10k), we wanted to revisit one of our previous Wrangler builds that also started off life as a pre-owned Jeep.
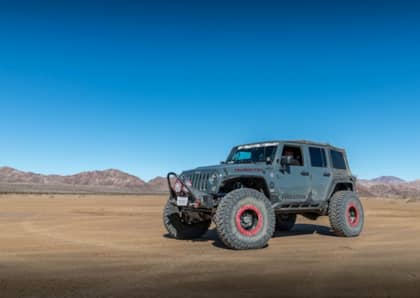
Around 2015, we picked up a very worn and weathered 2007 Jeep Wrangler Unlimited Rubicon. This purchase went against most of our own advice, which is to avoid 2013 and older JK’s with manual transmissions (learn why here). The allure of a great price is what drew us in. So, with a bit of hesitation, we took an empty trailer to Virginia and brought home a project we jokingly referred to as the Ali-Lander. This was a bit of a play on the Overlanding trend and us having some fun with EVO Mfg. owner Mel Wade, who had his own adventure JK build dubbed the EVO-Lander.
While this build wouldn’t be without a few hurtles along the way, for the most part, our transition of a rusty and trail tattered JK went extremely well. Since many of our build articles were scattered throughout the years, we never did any sort of wrap up to show the evolution from start to finish. So, we’ve condensed as many of the critical modifications that we could into one article and what we learned about each over our time with the Jeep.
The Build Begins
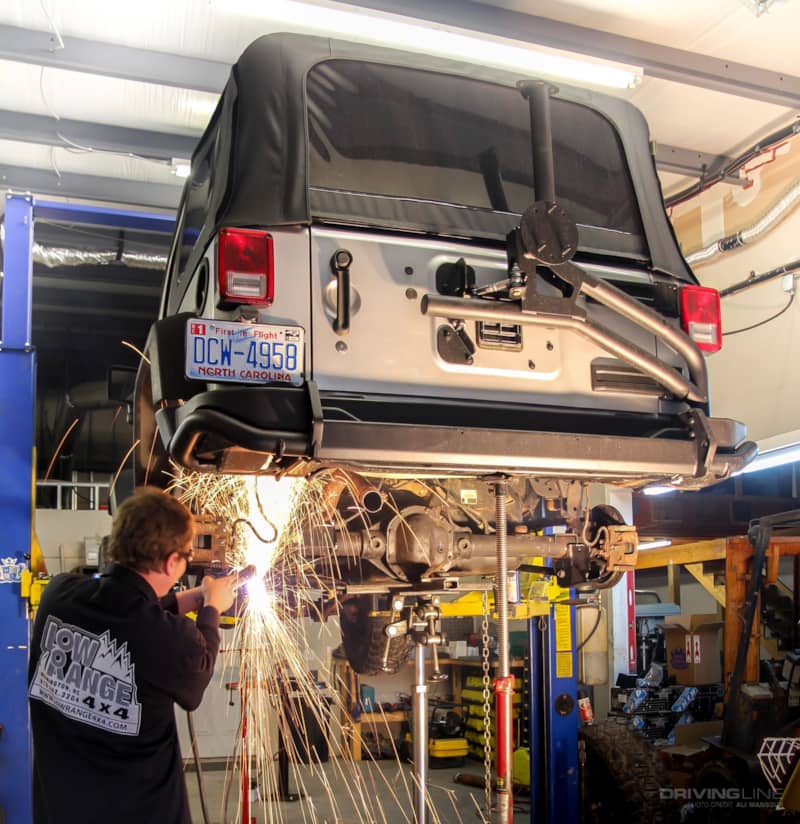
The original plan was to chip away at the build a little at a time. That’s always the best plan as it keeps the stress levels (and cost) down and paces out the workload. While we started off the first leg of the build at home, our travel schedule and workload put us behind on where we needed the Jeep to be. Our personal goal was to have it ready for that year’s Easter Jeep Safari in Moab, Utah. The reason? It would serve as a shakedown run for the Nitto JK Xperience trip that would come just a few weeks after. To make that a reality, we ended up enlisting the help of the experts at Low Range 4x4 in Wilmington, North Carolina.
Bolt On’s
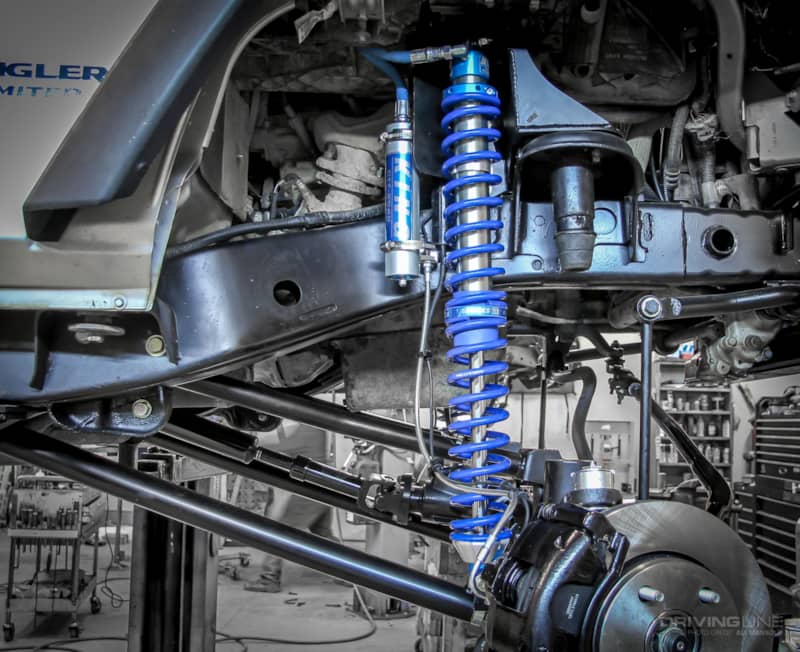
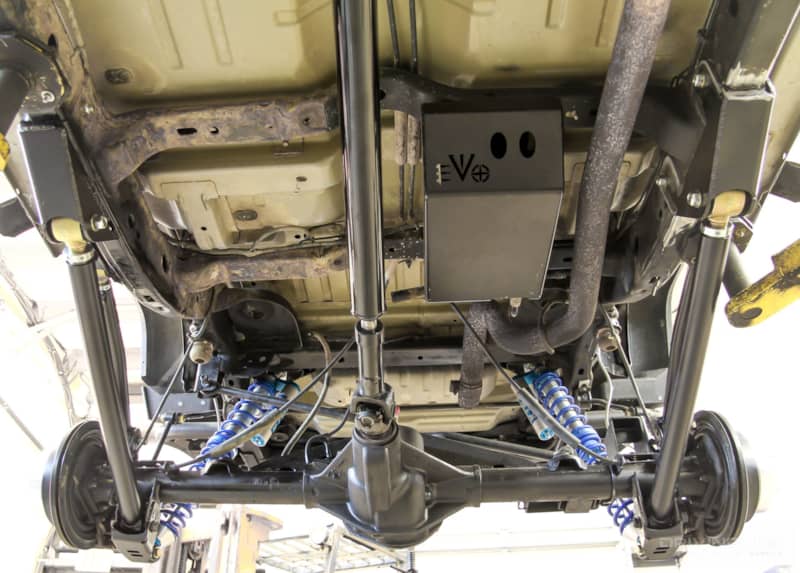
Saving money on the purchase price of the Jeep meant we could invest in better parts out of the gate. One area we knew we wanted to have quality parts was the suspension. At the time, EVO Mfg. had just released its bolt-on coilover setup. This kit would place 12-inch-travel EVO-spec King coilovers at each corner of the Wrangler, doing away with the traditional shock-and-coil setup. By far, this remains on of the best riding spring/shock setups we’ve ever had. While we did need to adjust the rear of our coilovers a bit to compensate for all of the extra weight we ended up with, the system overall was well worth the investment.
Going Long
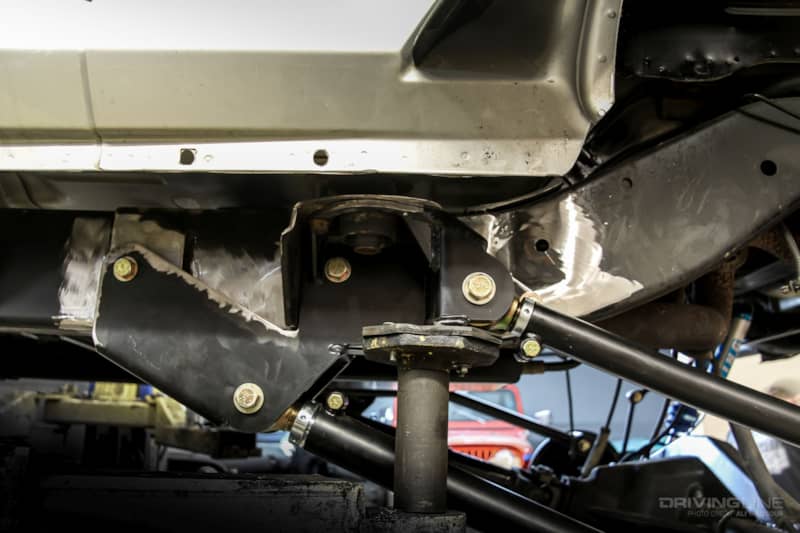
When we picked up the JK, it already had an entry level suspension system. We didn’t realize just how rough the condition of the lift components was until we raised it in the air at the shop. The original plan was to stay with a short-arm setup as we tend to prefer that on the JK when only running around 3.5 inches of lift or less. Unfortunately, the arms and mounts on the frame side were in bad shape. Ultimately, it was all removed and replaced with a Double D long-arm setup from EVO Mfg. The only issue we ever had with this kit was the fact that the rear lower control arm brackets would hit on obstacles more frequently that we would be liked. Thankfully, EVO offers a high-clearance setup that is better suited for those looking to get the most ground clearance.
Rough Rubi’s
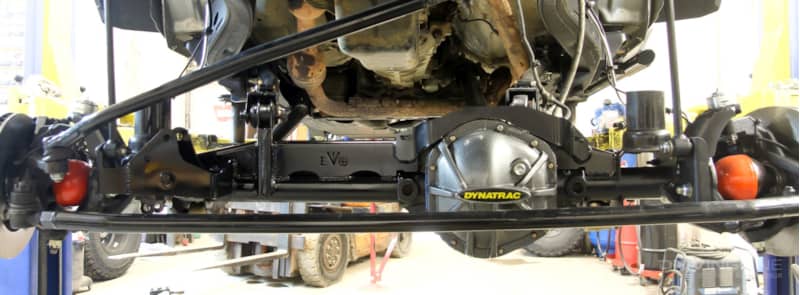
We opted for the Rubicon because it came with the Next Gen Dana 44 axles, which already had Tru-Lok differential lockers. Thankfully, we found neither axle to be bent or damaged. We ended up fitting the front axle with an EVO Mfg. axle truss, RCV performance axleshafts, Dynatrac ball joints and diff cover, and used 5.13 differential gears. A Dynatrac ProRock 44 would have been a better investment overall, but we didn’t have any issue out of our setup.
Rear Rubi
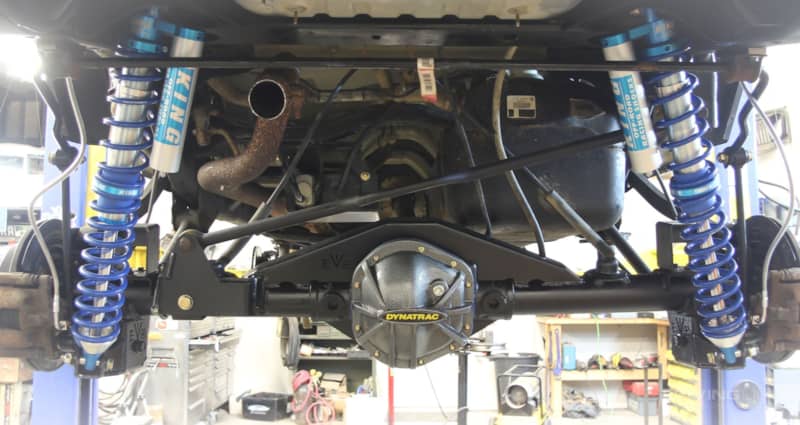
Out back, the rear axle got the same EVO truss treatment, along with RCV axleshafts and 5.13 gears. Also like the front, the rear was setup with a bolt-on coilover system from EVO Mfg.
Drivetrain
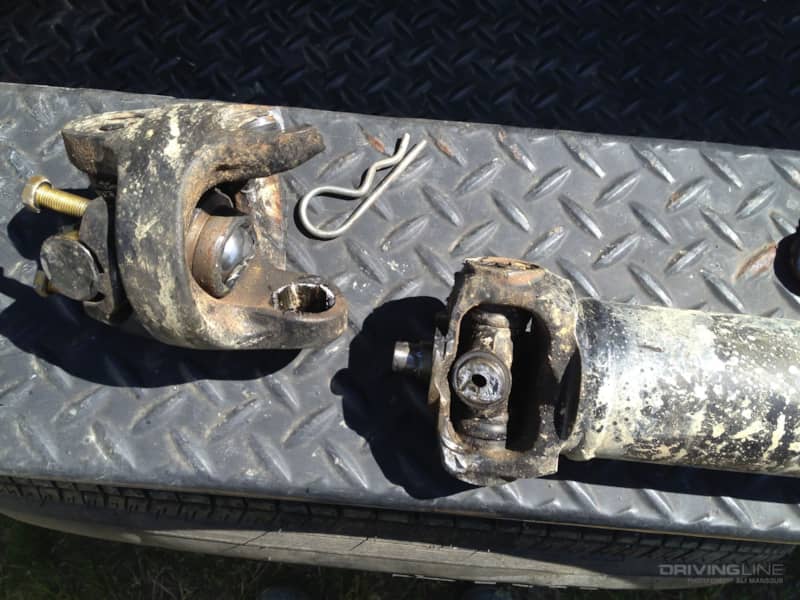
This JK was fit with the stock six-speed manual transmission and factory 241OR transfer case. Aside from swapping out the fluid, we didn’t have to do anything else. The one big upgrade came by way of all-new driveshafts from Rugged Ridge. These would be fit with 1310 U-joints. If we had to do it over again, we would have gone with 1350s for sure. More on why later.
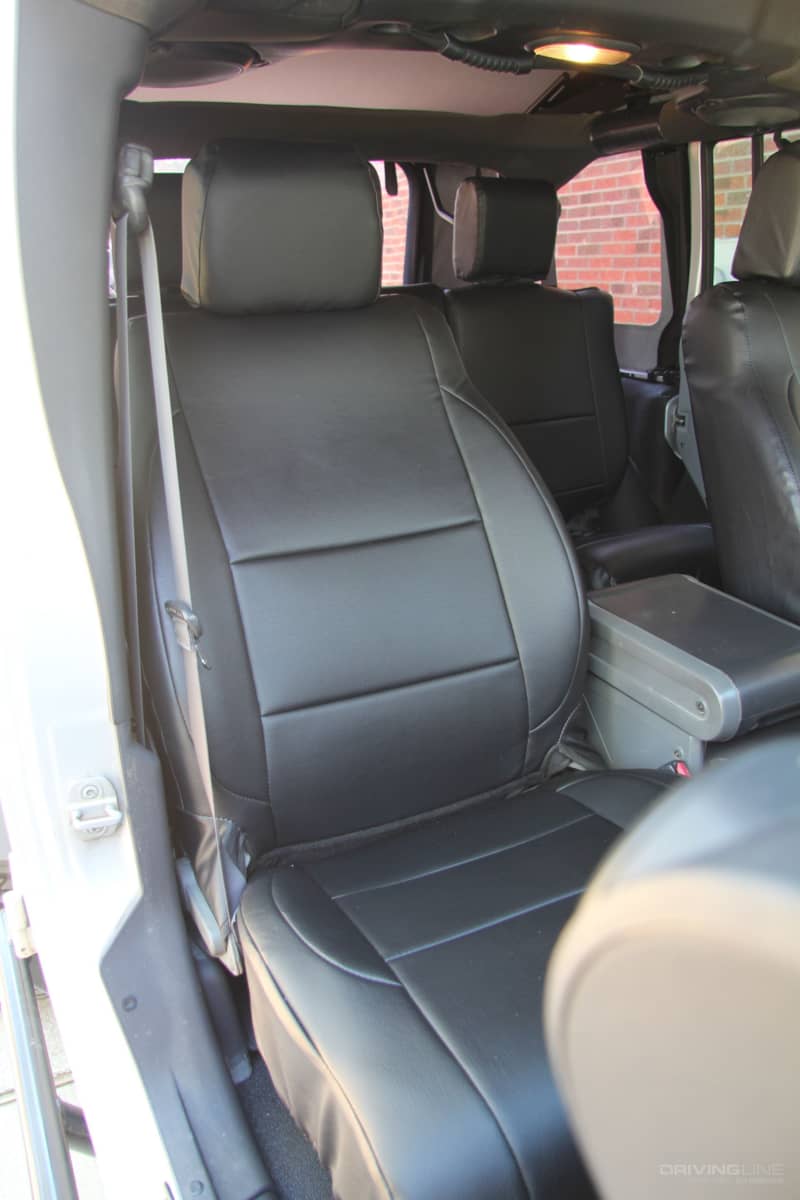
Interior Rehash
Whoever had owned the vehicle before us had pulled the carpet out. We are not big fans of running without, so we got a drop-in interior kit from Bed Rug. This helped tremendously with heat and cleaning up the overall look of the Jeep. The seats were also mud stained and torn (again, the Jeep was a REALLY good deal). So, we ordered up a set of Iggee seat covers from eBay. These leather-ish covers were an improvement, but in hindsight, recovering the factory seats would have been a better investment.
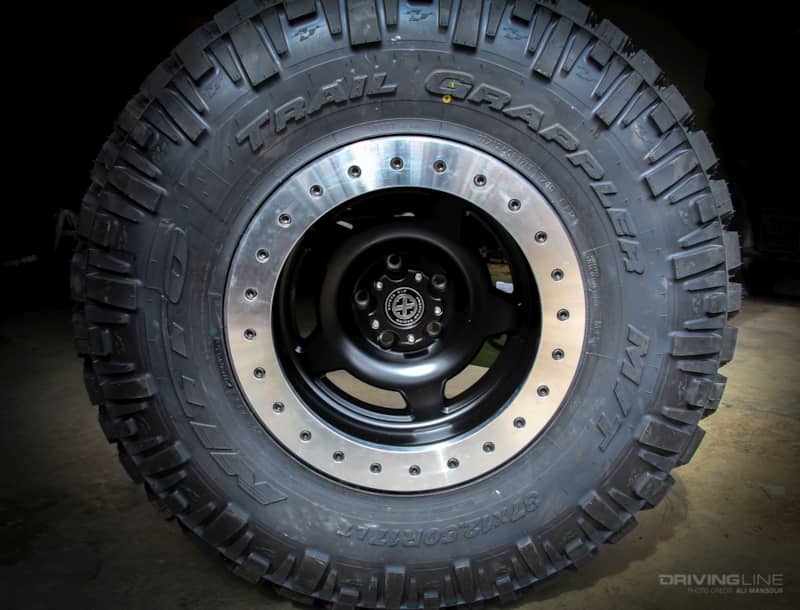
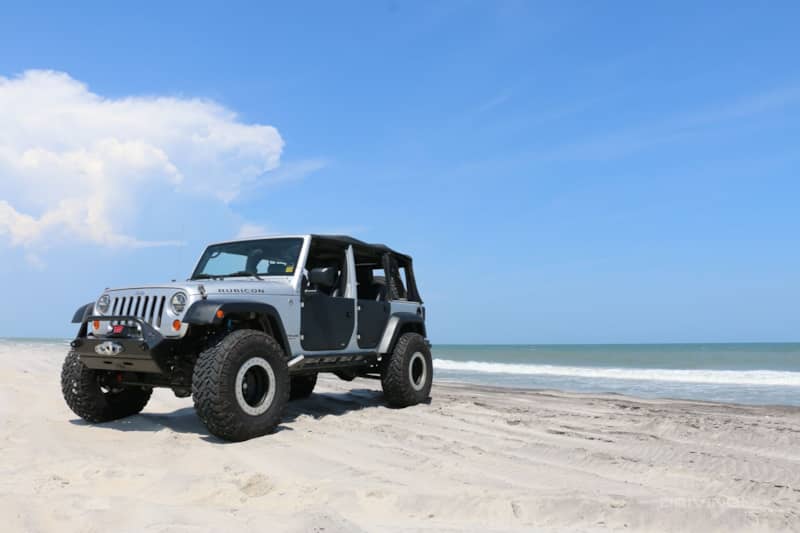
Tires and Wheels
We knew we wanted to be on 37-inch-tall tires and beadlocks would be a great addition given the adventures we had planned. Ultimately, we opted for a set of 37x12.50R17 Nitto Trail Grapplers. We had used the Trail Grapplers on Jeeps in the past and were impressed with not only how well they worked, but how many miles we were able to squeeze out of them. Pairing them with a 17x9 KMC Slab series beadlock worked out great as we were able to get the backspacing we needed and a quality aluminum beadlock for a good price. These would ultimately live on the Jeep for the entire time we owned it. Battling an assortment of terrain all over the U.S., we never had a single issue.
Front Bumper
We had a few trips lined up that would require a winch. To check that box, and give the Jeep a better approach angle, we installed a Warn Zeon 10-S Platinum winch inside of an EVO Mfg. Pro Series stubby front bumper. While the approach angle gains were an obvious benefit of the bumper, the one thing we really learned from this setup is that we don’t care for the Wi-Fi remote on the Premium series winch. Call us old fashioned, but we still prefer to plug it in. There was also the issue of us always forgetting to charge the wireless remote. Every time we did need it, we had to plug it into a power source in the Jeep. We still love the Zeon 10-S, but we can do without the WiFi controller.
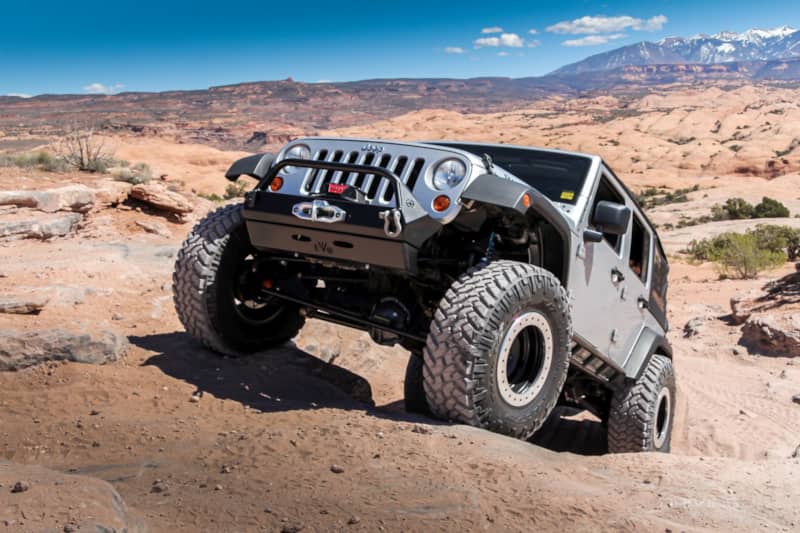
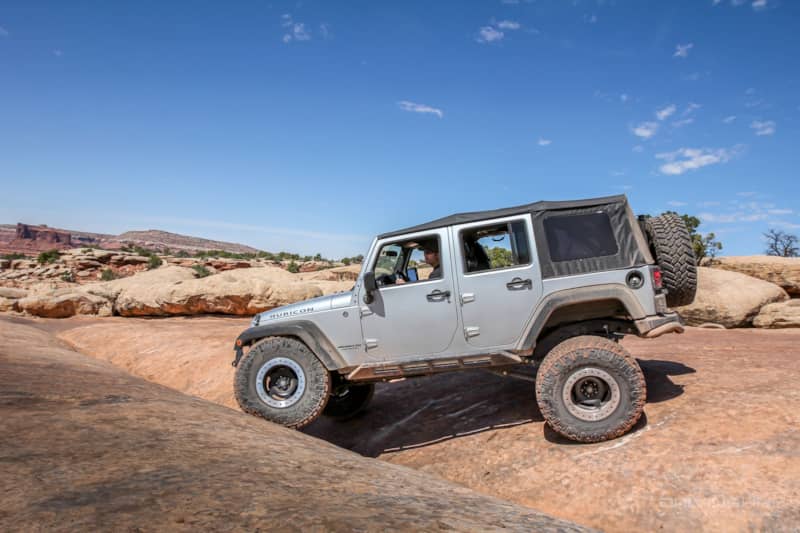
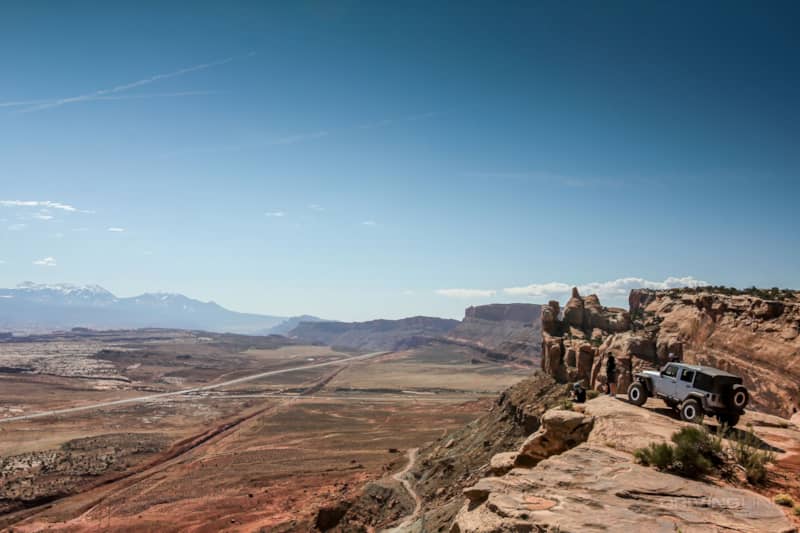
Maiden Voyage
Our first real wheeling test would be on the red rocks of Moab, Utah. Since the build was so fresh, we towed the Jeep out instead of driving it. This would prove to be a great decision as the 3.8L V6 would start burning oil and fouling plugs around day two of our adventure. It got so bad; we were changing spark plugs on the trail every few miles. More on this later.
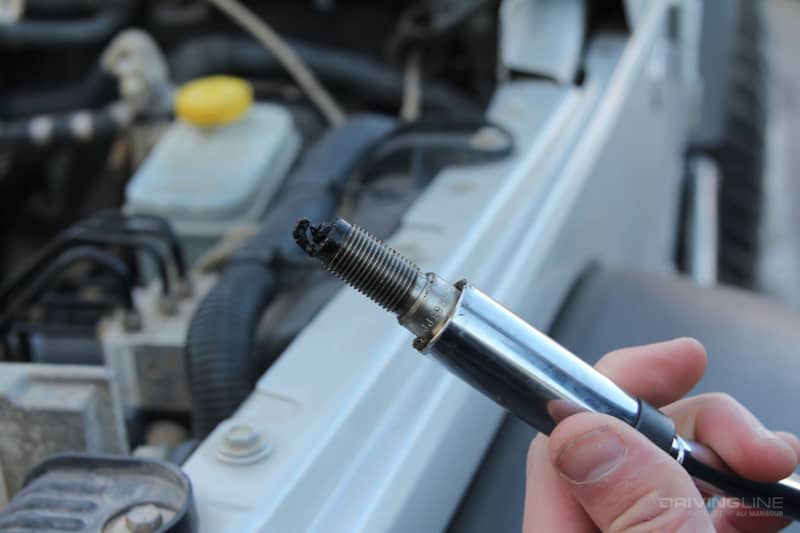
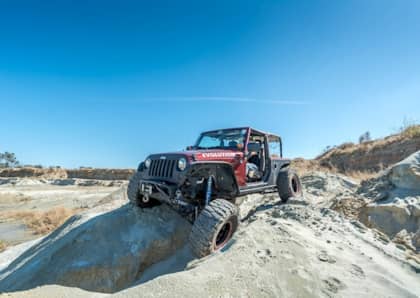
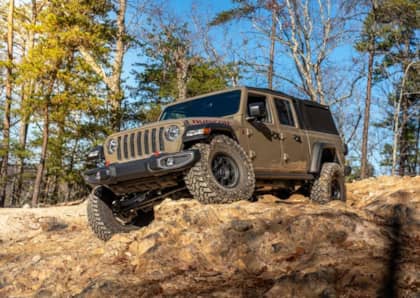
Trail Tested
Armed with extra oil and plugs, we marched on through the week. Despite being down on power, the Jeep worked surprisingly well. Aside from the aforementioned engine issues, the only other minor issue we ran into was the fact that the Jeep had so much articulation that it would occasionally pop the rear fender snaps that secured it to the body. Luckily, we had a feeling this might happen, so we actually had an entire bag of spare snaps with us.
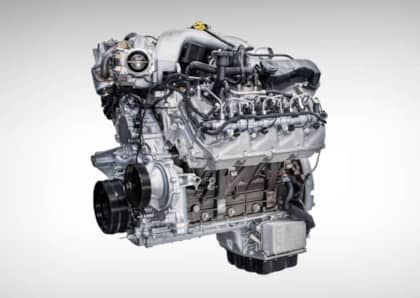
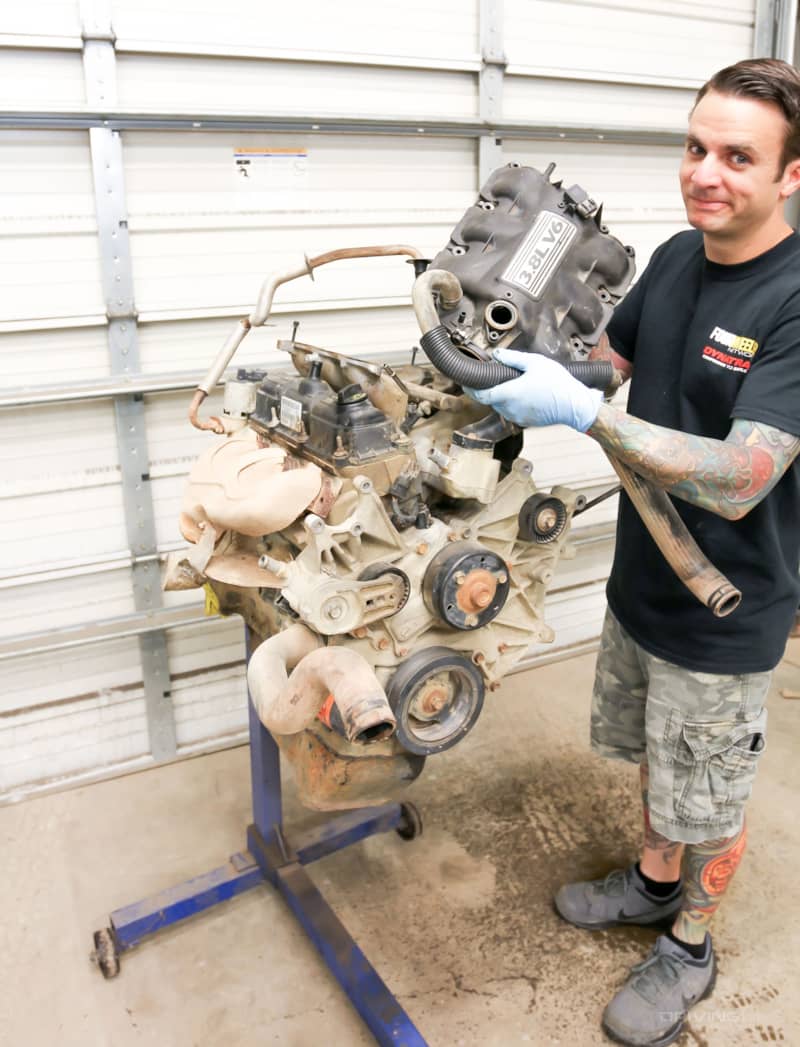
Engine Swap
After a week of wheeling, we got the JK back to the shop and started to tear into the engine. We soon realized that a new long-block was going to be our easiest solution. If time wasn’t such a big factor, we would have liked to have found a way to install a 3.6L. A V8 swap wasn’t worth the investment, and nearly every one we had been with on the trail, had battled overheating issues at some point. We weren’t thrilled about another 3.8L, but in the end, it was the most budget friendly and timely solution.
JKX
After getting the new engine in, we spent as much time as possible putting on miles and dialing in the Jeep before leaving for the East Coast JK Experience. And, our JKX was off to a great start until….
We Broke
Remember when we mentioned that we wish we would have gone with a 1350 series U-joint driveline instead of the 1310? This is why. Blowing the driveshaft apart was a mix of slightly undersized parts and a bad line decision on our part. Could this have easily been a ring and pinion if we had a stronger shaft? It’s possible. Thankfully, we were able to get another driveshaft the next day and finish out the trip without any additional issues.
In The Groove
After a few months of non-stop wheeling and adventure with our JK, we finally got to take it easy with the Jeep. With warmer weather, we swapped over to our Rugged Ridge half doors and enjoyed some open-air wheeling on a more local scale. For those considering this door setup, we’ll say this: these are great second set of doors. If you are expecting them to seal and feel as solid as the factory-offered half doors, you’ll probably be a disappointed. However, given these are half the price of Mopar half doors, we still think they are a good overall half-door solution.
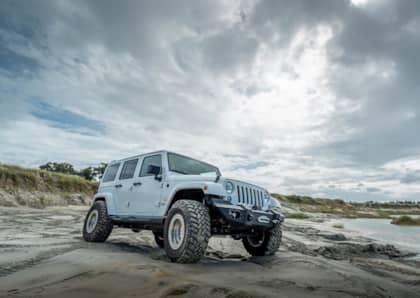
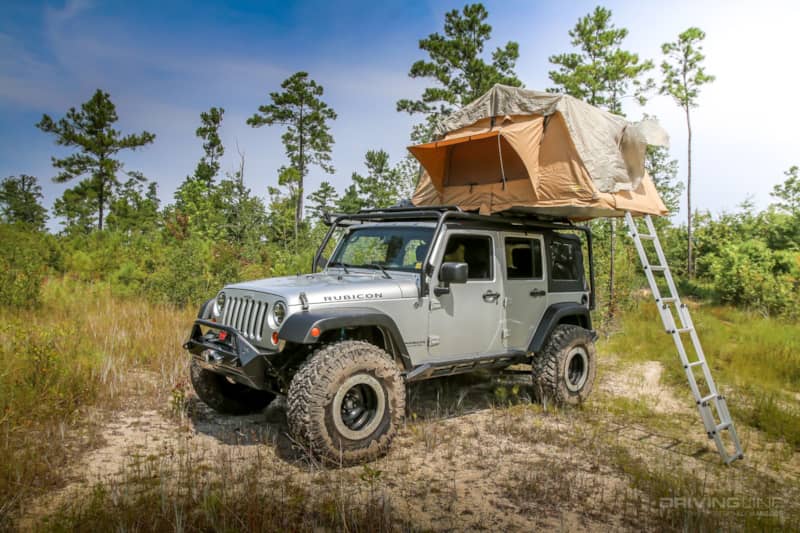
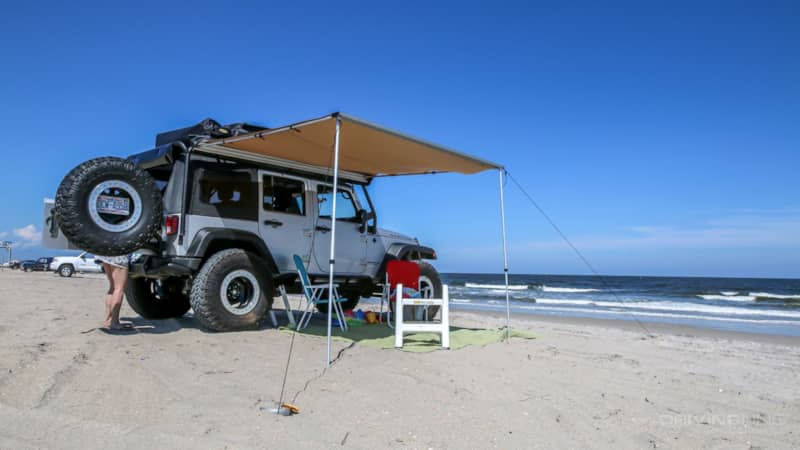
Overlanding
While our 14-mpg average was nothing to get excited about, we enjoyed how diverse our Wrangler was. As such, we started transitioning it into a more long-distance camping friendly rig. This was accomplished by installing a Smittybilt rack system, which allowed for the addition of a roof top tent and awning. Living in costal North Carolina, we got plenty of use out of the awning. And though our Smittybilt roof top tent was pretty comfy overall, we did not like what it did to the handling of the Jeep. Coupled with the fact that the JK would move more than we liked we you rolled around in the tent; we can’t say that we’d recommend a roof top tent on a Wrangler.
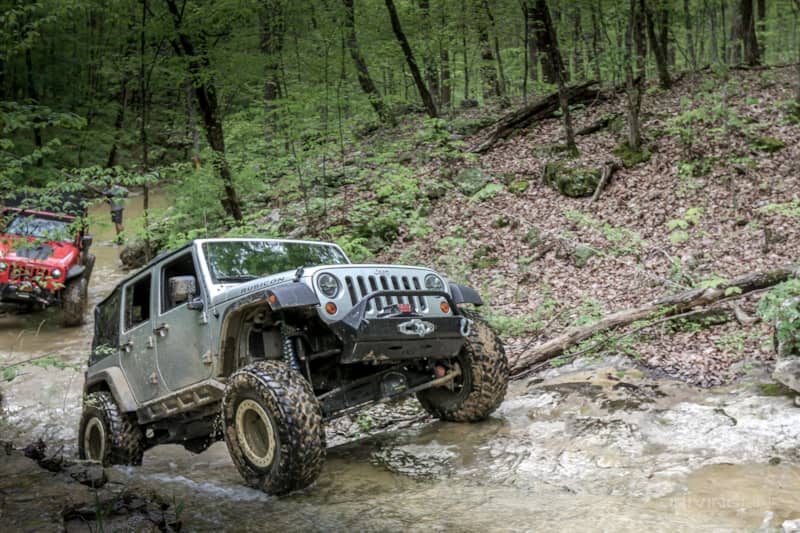
Body Damage
We had done a decent job at protecting the body of the Jeep. Using an AEV tire carrier and bumper combo out back and EVO Mfg. weld-on sliders, we had some great protection. Unfortunately, we still managed to mangle the driver’s door, b-pillar, and rear door wheeling at the Windrock. While this didn’t bother us much at first, after staring at it for a year, we were ready to do something about it.
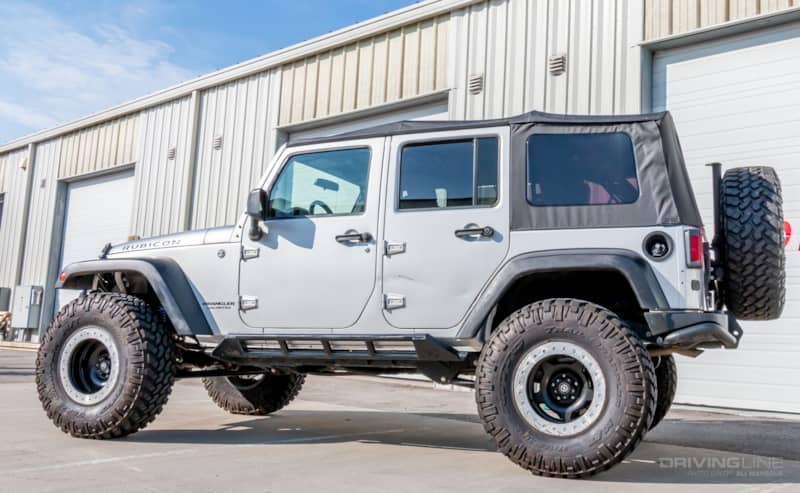
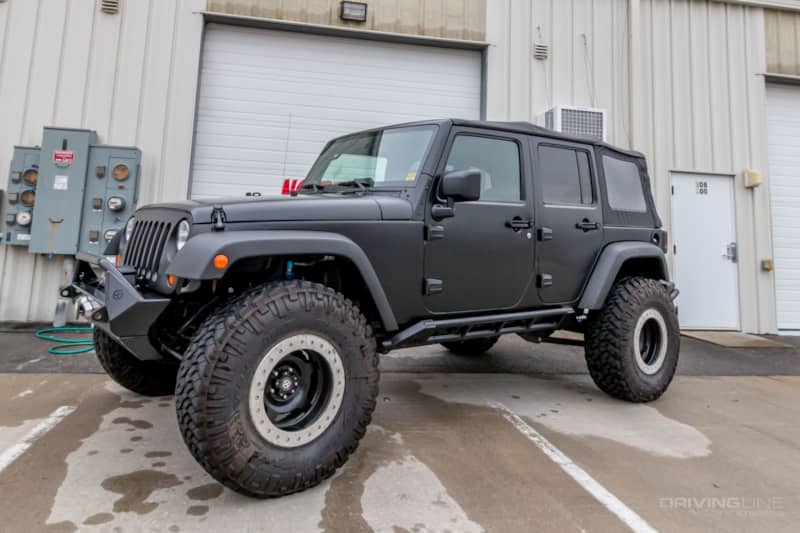
That’s A Wrap
That something ended up being a 1080 3M vinyl wrap. We documented the entire conversion, which you can read about here. This wasn’t our first go-round with a vehicle wrap, but the Wrangler presented a few unique challenges thanks to exposed door hinges and the aforementioned body damage. We were very happy with the look once it was complete. The only real thing worth mentioning is that it didn’t take well to scratches. Which was a real problem on tree-lined trails in the southeast. It wasn’t so much the wrap was tearing, but rather the satin black color would easily show the trail markings. If we had opted for a lighter color and/or a gloss finish, this would likely not have been as much of an issue.
Parting Thoughts
While this build started off rocky, in the end, it was a very reliable Jeep. Given the amount of money we had to fork over for a new engine and the number of rusty bits we had to deal with, we would have likely been better off in the long run starting off with a newer (and nicer) JK. Ultimately, this build delivered on many fronts and allowed for some amazing adventures while we owned it. Hopefully, you too will find our build journey helpful and grab some bits of build inspiration along the way.
Thinking about JK build all your own? Here's what you need to know before you build.