skip to content
Driving Line Mark Logo

A JK Build That's a Level Up

20140921_6766 When I first bought my 2007 Jeep Wrangler JK my goals were modest; just a small lift and bigger tires to get me where I wanted to go. I had only recently moved to California and quickly learned that a stock SUV wasn't keeping up with the places I wanted to explore. I joined a local Jeep group to learn more about adventuring off-road in my new environment and the obsession quickly took hold. I thought I'd gone far during Phase 1 of the build, but since completing Phase 2 (pictured above) I'm beginning to realize just how endless the possibilities are!

JK Build Phase 1

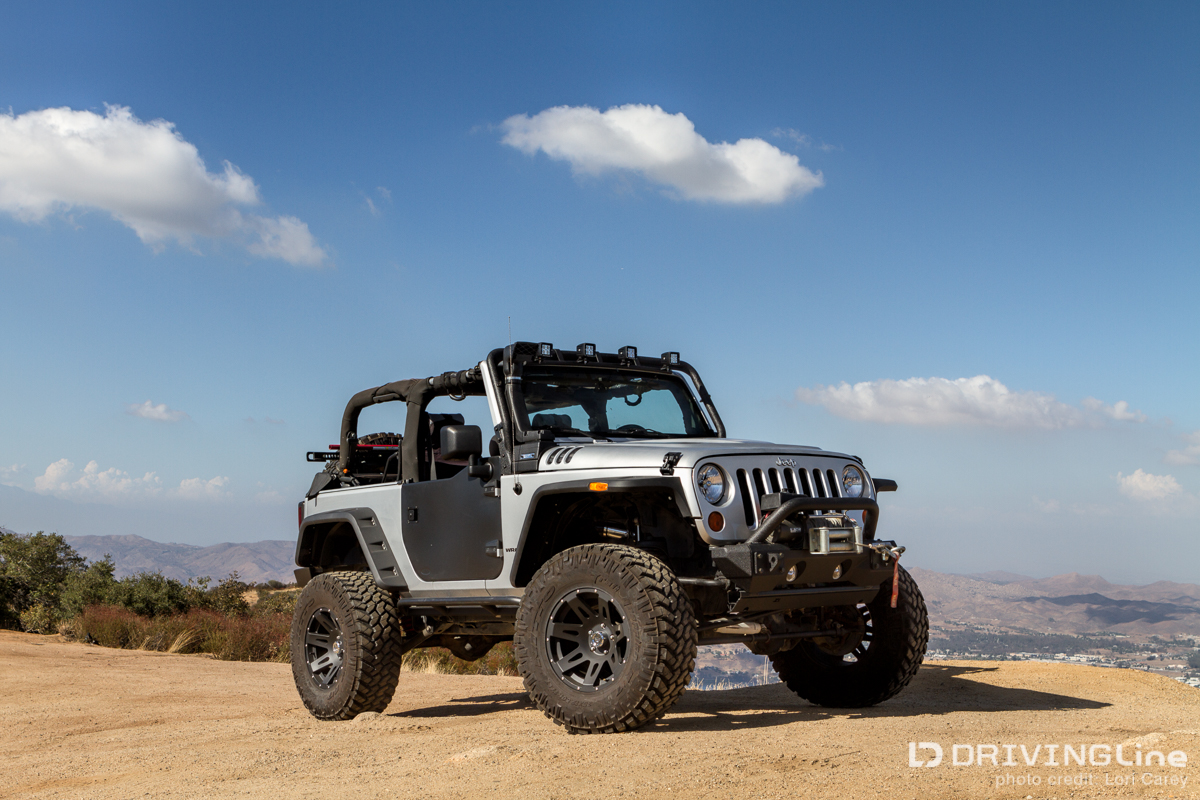
When the planned three inch lift turned into a five-inch plus lift, it set in motion a chain of events... DL201307_18 Both drive shafts needed to be upgraded because the angle was too steep. A track bar relocation bracket and a drop pitman arm were added to help dial in the suspension for the perfect compromise of on pavement handling and off-road performance. Longer upgraded brake lines and heavy duty shocks were required. Bigger tires meant regearing from 4.10s to 5.13s, and also new wheels. Since I decided that I like rocks, I needed to add steel…rock rails/sliders that also double as a step for me to climb into my Jeep, a front stubby bumper that gave my tires plenty of room for clearance, and a rear bumper with a heavy duty tire carrier for a heavy off-road spare as well as trail racks to carry jerry cans of fuel and water for extended treks. Then came the little things like lights, a deep cycle battery, a transmission cooler, seat covers, grab handles, a CB radio so I could communicate with friends on the trail…the list was endless. Since the JK model Wrangler was brand new at time of purchase, replacing the TJ, the aftermarket options were limited but I had done a lot of research and never regretted any of it. DL_CarrizoPlain-7 My Jeep easily handed any trail I took her on and never let me down, but on the outside her looks were deceiving. She didn't look as capable as she was, and unless I was standing next to her and you noticed that I could just barely see in the window (I am only 5’5”!) or she was parked next to a stock Wrangler, you wouldn't even realize how big she is. When I recently had an opportunity to do some modifications, giving her a more aggressive look was high on my priority list.

JK Build Phase 2

20140921_6836 For starters, my fenders were the stock fenders. I had trimmed them to make room for the tires when fully articulated, but they weren’t exactly street legal. My tires extended several inches beyond the fenders and I knew it was just a matter of time before I was ticketed for not having mud flaps. My new Rugged Ridge Hurricane Flat Fenders keep me street legal while maintaining the tire clearance I desired. 20140921_6768 I'm fortunate to live in Southern California where the weather is beautiful most of the year and we can take full advantage of the ability to take the top and doors off our Jeeps, but I never liked how the stock full doors look on a 2DR JK when the top is down. The full doors look awkward because they end abruptly, so half doors were high on my wishlist.  The half doors give a nice straight line down the body of the Jeep that just looks right, and I like half doors better than riding without doors because they help cut down on the wind. It was a tough decision whether to paint them to match the body or leave them black, but I decided to stick with black. Right now my Jeep is sporting her summer look, but when winter comes or I’m in a dusty environment I can seal up tight with the matching soft upper doors. 20140920_6794 When I have the top down I keep the strong SoCal sun from beating on my head with a SpiderWebShade J-kini. The woven mesh blocks up to 90% of the sun’s UV rays and keeps the interior up to 27% cooler, but still gives that open air feel. The best thing about it is that I can leave it on when I want to put the softtop or hardtop on. The SpiderWebShade never has to be removed. 20140920_6761 The JK 3.8L engine runs HOT and doing something to vent the heat is tops on the list of most rock crawlers. There are several aftermarket companies making vents you can install which require cutting holes in your stock hood, or you can replace your hood with a performance vented hood. I love the aggressive look of this hood. And since the stock plastic hood catches were faded and beat up looking, we added some new aluminum hood catches to match the hood. 20140921_6757 You might think I’m dreaming by adding a snorkel in drought-ridden California, but the Rugged Ridge XHD Low-High Mount Snorkel  is perfect for the dusty deserts of California and the modular functionality lets me adapt it for any situation. When I’m in the desert I can just run with the prefilter low mount, which sits just below the windshield to draw in cool air from outside the engine compartment. If I expect water crossings I can put on the high mount to raise the intake 21 inches higher. There is also an additional prefilter that can be added to the high mount (not shown in these photos). The installation directions were intimidating but although the install was time consuming, it really wasn't very difficult and only required minimal cutting of the fender. I had to remove a cold air intake to install the snorkel and I didn't want to lose the  ability to clean the air filter after every trail run, so I went with a K&N high flow air filter that can be cleaned instead of needing to be replaced. 20140920_6822 You can never have too many lights, especially if you spend a lot of time prowling around the desert in the dark. When you add a light bar and a snorkel, you need to make sure there is enough room for them to clear each other. The Rugged Ridge Snorkel was designed to work with their light bar so there was no problem with fitment. The light bar lowering kit reduces wind noise and eliminates clearance concerns out on the trails by allowing me to mount lights below the top of my Jeep. 20140921_6787

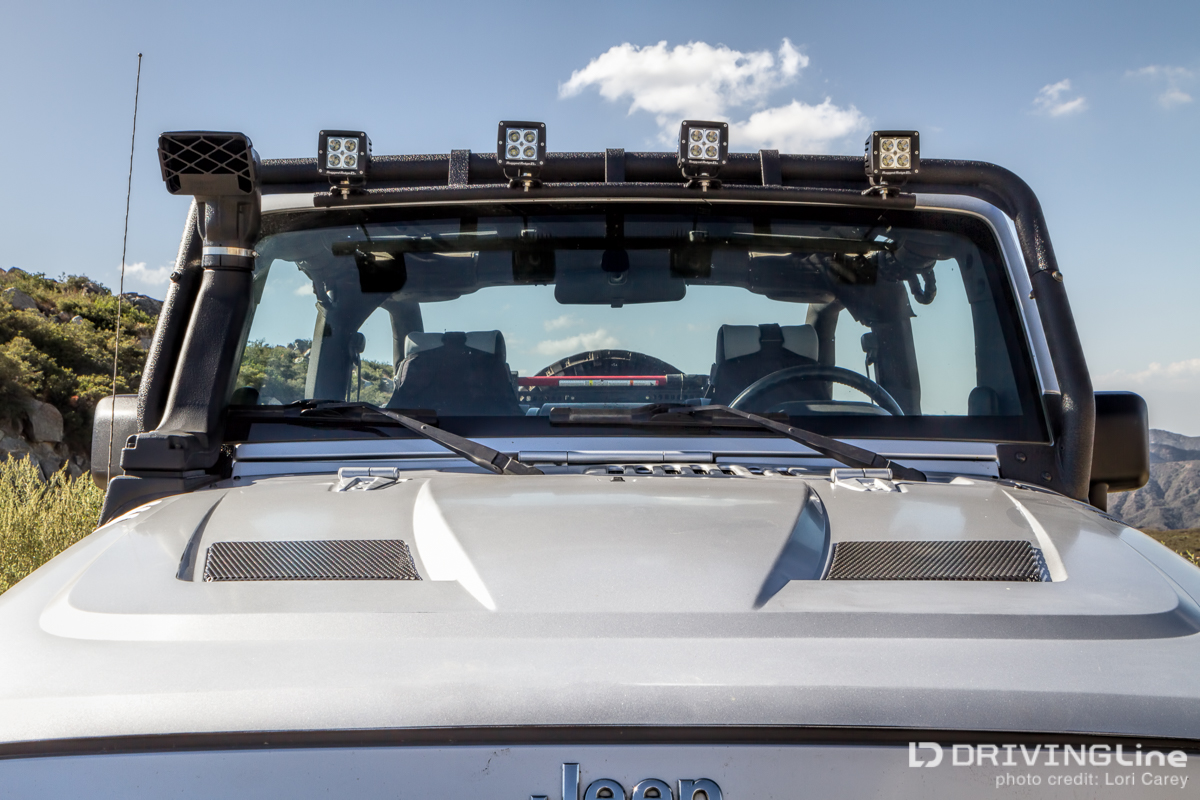
Now that’s more like it!

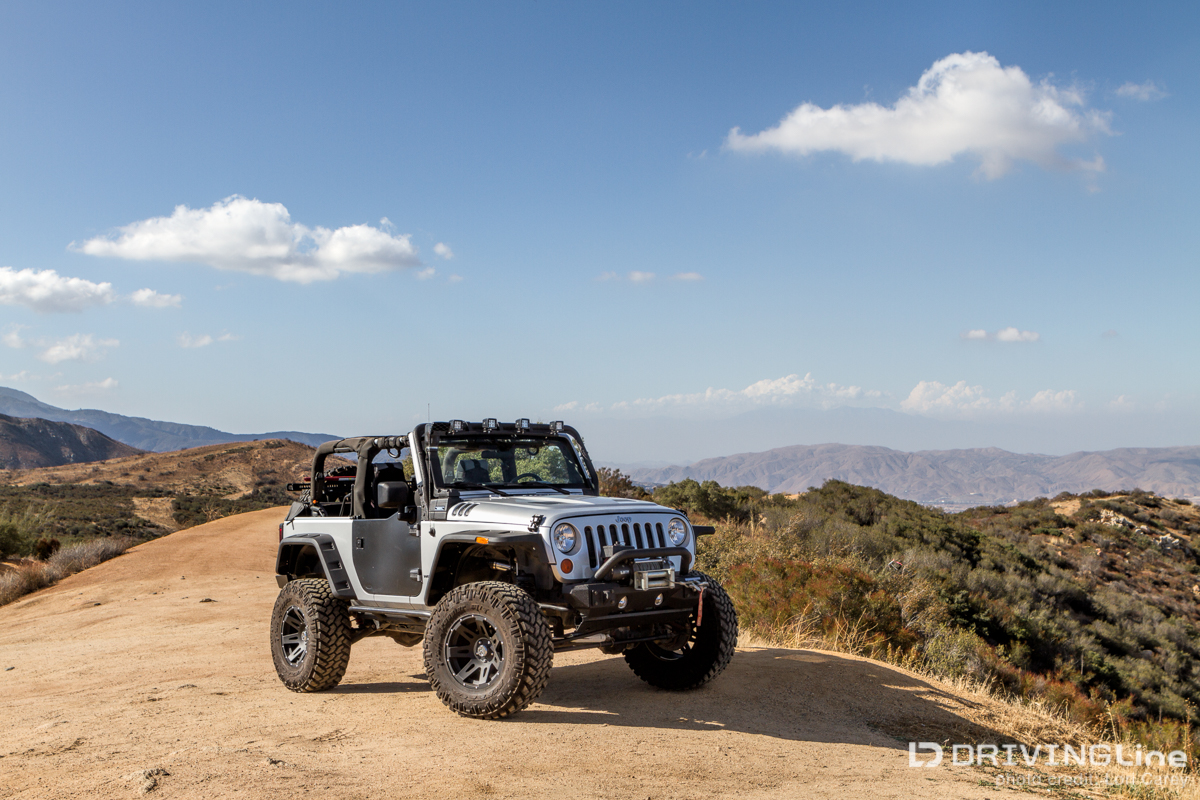
After weeks of wrenching my Jeep is looking like the beast she is! BeforeAfter-JK-Build So am I finished? Not a by a long shot. I need to finish installing lights, I need to replace and upgrade the suspension because it’s been wheeled hard for seven years and components are starting to wear, I need to install another antenna for my new ham radio, I need to replace my tire carrier soon because I’m concerned that having a heavy tire bouncing around on the rocks has weakened the joints over the years, I'm working on designing an interior cargo system that will make it easier for me to work out of a fully loaded Jeep - I need, I need, I need… There’s a reason we say that Jeep stands for Just Empty Every Pocket! What's your Jeep build experience been like? Leave a comment below!
Return to beginning of article

Recommended For You

Loading ...