2017 Formula Drift Long Beach Top 32 Play-by-Play
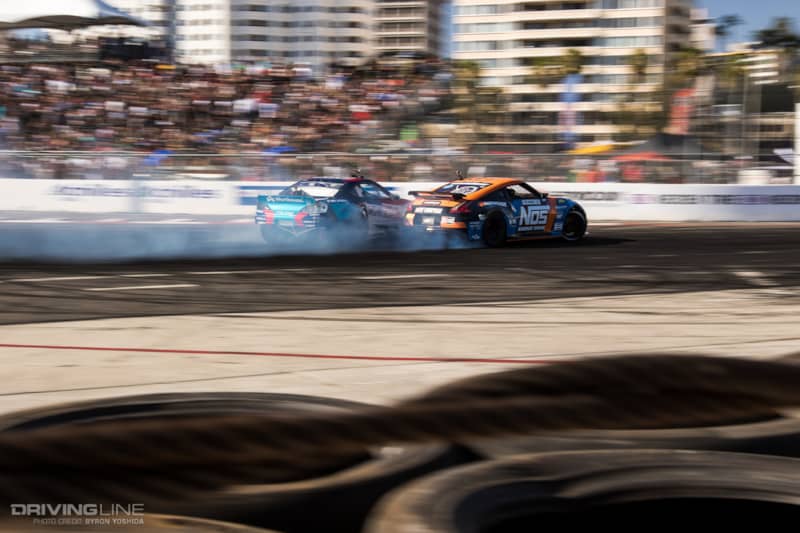
Since 2006, the famed circuit of the Streets of Long Beach has hosted the season opener of the Formula Drift Series. At this year's opener, the 14th annual Formula Drift featured an abnormally lean roster of 30 cars attempting to qualify for the tandem eliminations. However, the roster was the only lean thing in sight, as fans filled the stands to capacity as well as a record-breaking 1 million viewers tuned into the Livestream.
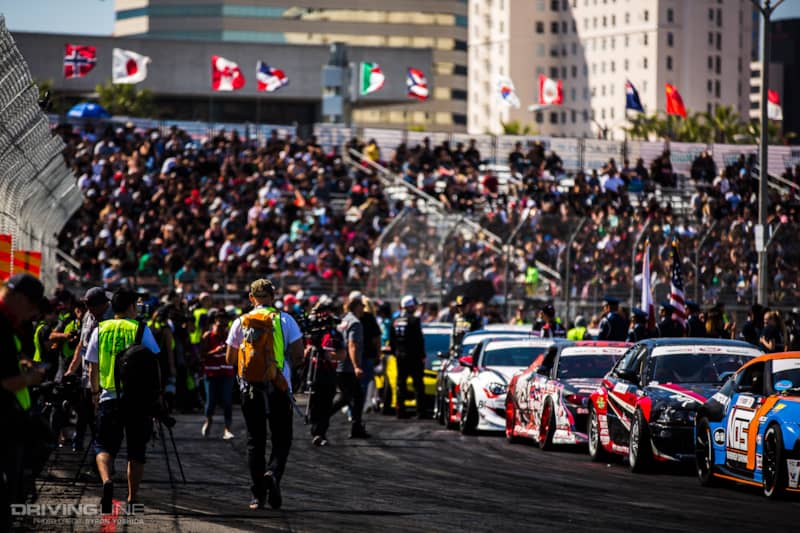
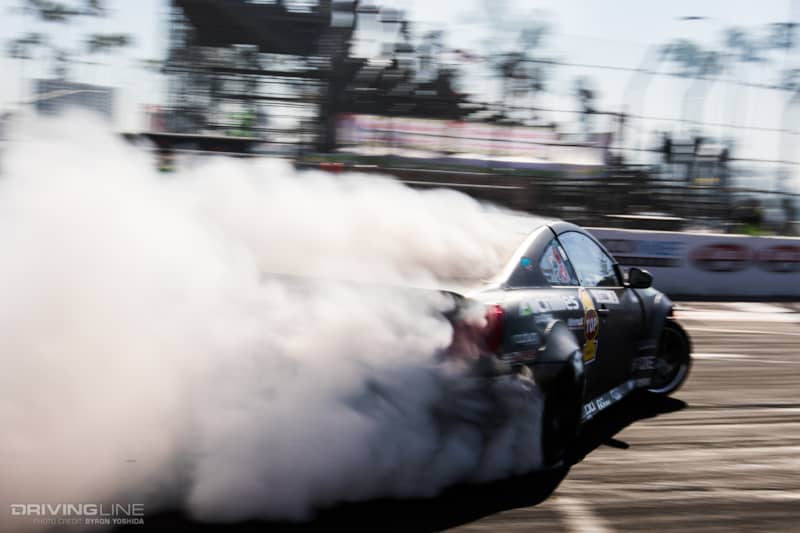
THE STREETS OF LONG BEACH COURSE
Formula Drift utilizes turns 9, 10 and 11 of the traditional Grand Prix circuit, which connects the back straightaway on Seaside Way with the front straight on Shoreline Drive. While both straightaways are actual city streets, the asphalt in between those streets is actually a parking lot during most of the year, which leads to an inconsistent surface that can be tricky for the drivers to navigate at times.
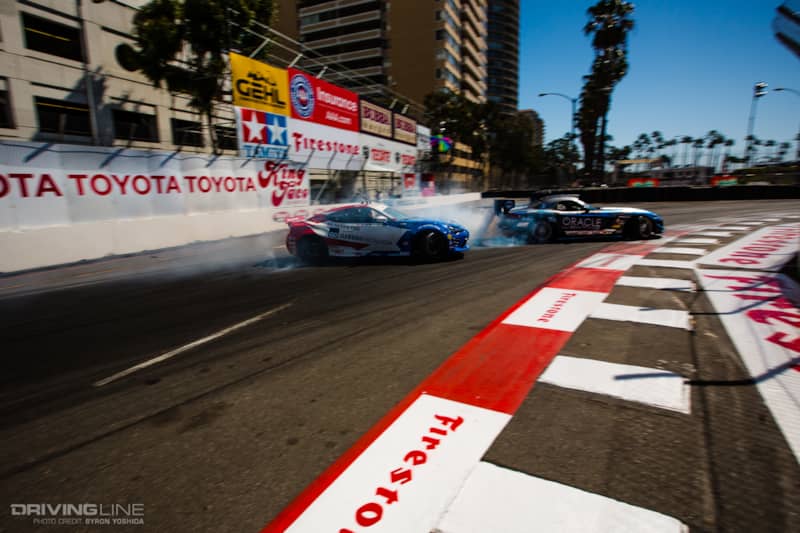
Drivers will launch on the back straight into turn 9, which is a 90-degree right hand turn that is effectively blind until initiation. After pushing out to the outside wall before the turn, they will carry speed and angle to a "touch-and-go" zone along wall at the exit of the turn before transitioning under a passenger footbridge, which has become one of the most iconic aspects of the Long Beach track.
From there, the drivers will push towards an outside zone along the wall in front of both the judges and the main grandstand before continuing through turn 10 of the grand prix course and transitioning for an inside clipping point at the tip of the peninsula that makes up turn 11. Drivers will power out of the peninsula clipping point towards the outside wall, then finish down Shoreline Drive in front of the General Admission grand stands.
QUALIFYING
While last season’s qualifying session was rained out, we had nothing but blue skies and perfect 70-degree weather for Friday's qualifying session. Thirty drivers took to the grid, but only 27 were able to put a score up on the board as Faruk Kugay, Kyle Mohan and Charles Ng will look ahead to Orlando Speedworld for their first tandem battles of the season.
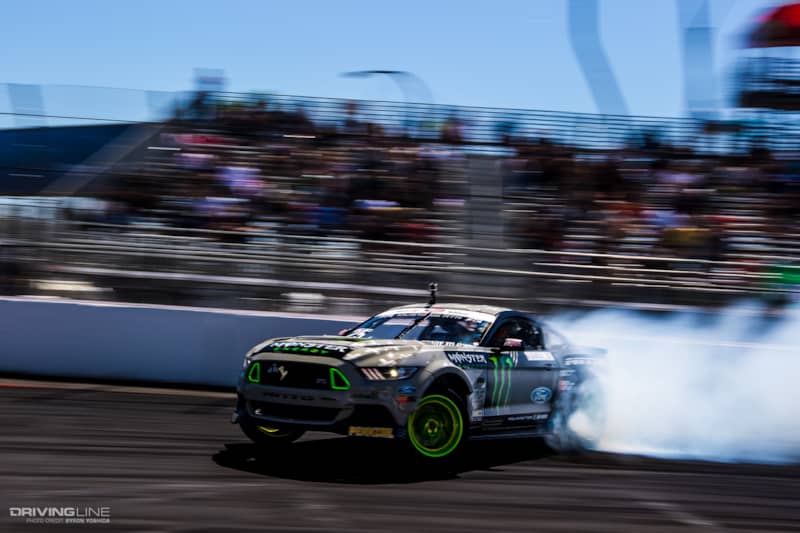
Nitto Tire's Vaughn Gittin Jr. came out all guns blazing, throwing down a 97-point run on his second run that would stand as the top score. European champion James Deane threw down a 91-point initial run that was the score to beat early in qualifying, but would top that with a 96 on his second run to slot into the second qualifying position. Ryan Tuerck, who also scored a 96 on his second run, would take the third qualifying position by virtue of having a lower 90-point run on his first run — the tie-breaker between him and Deane. 2015 FD Champion Fredric Aasbo and 2016 Rookie of the Year Alex Heilbrunn both put down 91-point runs for qualifying, with Aasbo edging out Heilbrunn in the tie-breaker.
AIR FORCE TOP 32
With only 27 qualified drivers, there will be five bye runs in the Top 32 tandem round. Read on for a full play-by-play of each run at FDLB.
Vaughn Gittin Jr. – Bye Run
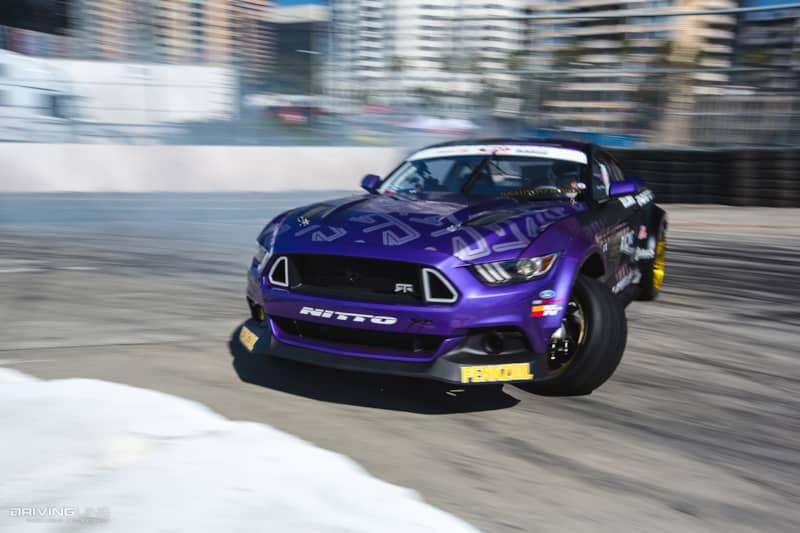
GITTIN JR. LEAD – As the top qualifier, Gittin Jr. is one of five drivers who will receive a bye in the first round. In addition to having Chelsea DeNofa join his team in the offseason, Gittin Jr. completed three full days of testing in his 2017 Ford Mustang RTR before this week, and it shows. His 97-point run in qualifying was one of the best we’ve ever seen at this track over the years, and he looks motivated to repeat his 2011 championship season, in which he began with a top qualifier and event win in Long Beach. Gittin Jr.’s run is a bit conservative, but understandably saving his car for an actual opponent in the Top 16.
Dean Kearney vs. Jhonnattan Castro
KEARNEY LEAD – Kearney brushes the outside wall of the first turn nicely, but doesn’t go as deep into the outside clipping point along the wall under the bridge. Castro leaves a bit of a gap through the power alley, but closes the gap by taking the inside line in front of the judges stand and is close again around the peninsula. Castro takes out the inside clip, while Kearney finishes the run cleanly. Kearney likely has a slight advantage to due to a better line and more steering angle through most of the track.
CASTRO LEAD – Castro initiates a bit later than Kearney did and is shallow on both of the first turn entries. Kearney is about a car length behind of Castro, but this seems to be a calculated move to give him room in case Castro makes any mistakes. Kearney closes in tight around the final inside clip and avoids knocking out the clip, which shows strong car control from Kearney. Judges vote unanimously for Kearney.
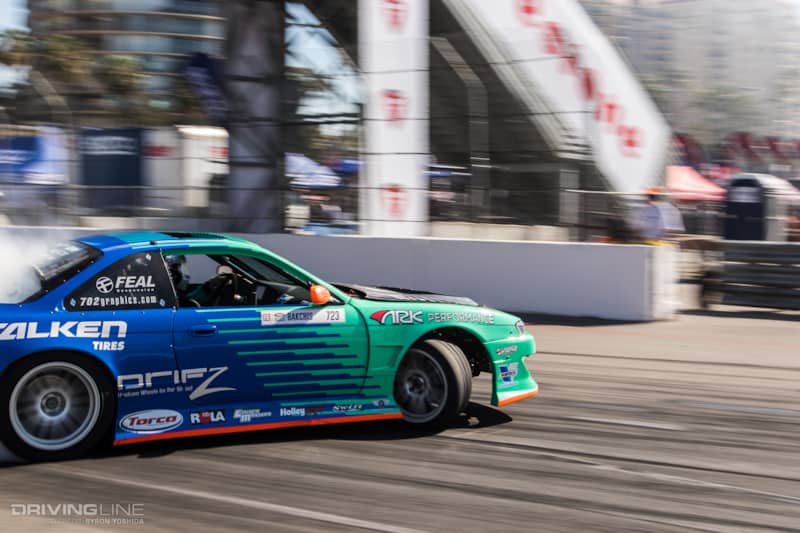
Odi Bakchis vs. Cameron Moore
BAKCHIS LEAD – Bakchis has great steering angle on his lead run and pushes the car pretty far along the first two outer zones. More’s new FR-S seems to be down on grip compared to Bakchis’s S14, and really doesn’t apply much pressure until the final turn. Moore notably has less steering angle and an inner line to try and stay close, which will probably work against him in the judges eyes. Looks like a slight advantage to Bakchis after the first run.
MOORE LEAD – Moore initiates much closer to the outside wall on his lead run, Bakchis takes a bit of a conservative line through the first turn but closes the gap nicely under the bridge and through the big sweeper in front of the judges. Moore has a nice snappy transition under the bridge and carries a nice line through the second half of the course, but the proximity from Bakchis is clearly superior. Bakchis earns the win from all three judges.
Piotr Wiecek vs. Chelsea DeNofa
WIECEK LEAD – Wiecek has a great initiation, DeNofa is very close behind him to apply pressure to the Formula Drift rookie into the first turn. DeNofa has a slight steering correction before his transition under the bridge, then over-rotates behind Wiecek and spins out in front of the fans. Wiecek has a smooth run, not quite as deep as other drivers in the outside zones but keeping the car in drift is probably all he needs to move on. DeNofa touched the tire barrier that lines the wall in front of the judges, but it doesn’t look like there’s any major damage. This will be a major advantage for Wiecek, but he will still need to stay aggressive.
DENOFA LEAD – DeNofa goes for big angle into the first turn and stays deep into the first outside clipping zone, but Wiecek isn’t far behind. Wiecek leaves about a car length between the cars as DeNofa transitions cleanly this time under the bridge. Wiecek slowly closes the gap over the rest of the course, looking calm and controlled. DeNofa finishes strong around the peninsula, but with no major mistakes from Wiecek, he will easily earn the victory.
Fredric Aasbo – Bye Run
AASBO LEAD – Aasbo has replaced the Scion tC that he drove over the past six seasons with a Toyota Corolla iM that is powered by the same 2AR-FE engine. The odd conversion has definitely turned heads, but Aasbo already looks quite comfortable in the car. Aasbo makes a full pass of the course and looks ready for his first tandem battle in the Top 16.
Kristaps Bluss vs. Robbie Nishida
BLUSS LEAD – Bluss has big angle into the first outside zone; Nishida has a good run but clearly not as deep into the outside zone. Nishida keeps around a car length of distance behind Bluss for most of the run, with no major pressure on Bluss through the course. Bluss is deep again on the outside zone in front of the judges, which will earn him some brownie points from the judges. Nishida nudges the final peninsula inside clip slightly, but doesn’t knock it over. Bluss will have an advantage into the second run due to having a much stronger line and better steering angle, but it’s not an insurmountable lead for Nishida to overcome.
NISHIDA LEAD – Nishida is in his 2016 Infiniti G37 car as the GTR he will be using for the rest of the season wasn’t quite ready in time for this event. The car appears to be underpowered compared to Bluss, or at least lacking in forward bite. Nishida has a good initiation into the corner; Bluss is close behind him. Nishida still isn’t going too deep into the outer zones, while Bluss over-rotates slightly on the transition under the bridge and has to slow slightly to avoid hitting Nishida. Bluss gets back on throttle and closes the gap again down to Nishida, but this is probably considered an equal mistake to the lack of proximity from Nishida in his chase. Two judges vote for a “One More Time," while one judge votes for Bluss. Majority rules: We’re going "One More Time"!
One More Time
BLUSS LEAD – Bluss again with the deep line into all of the outside zones, Nishida is much tighter on Bluss in this chase run. Nishida is utilizing a bit shallower line and angle to keep up to Bluss; the judges are likely to reward Bluss for the strong steering angle and line but also give some credit to Nishida to stay close. It would be tough to call an advantage after this run as an argument could likely be made for either driver. Judge Ryan gets on the mic and explains his perspective. Sounds like he saw some deductions from Bluss due to being off throttle and some small steering corrections that allowed Nishida to stay closer to him. He might be leaning towards Nishida after that run.
NISHIDA LEAD – Nishida again looks much better on his lead run, pushing much deeper into the outer clipping zones with a lot more tire smoke overall. Bluss leaves around two car lengths after initiation, but dives in tight to Nishida after the transition under the bridge and stays within a single car length of Nishida around the final half of the course. Nishida didn’t make any major mistakes, but the chase run from Bluss looked very strong. Two judges vote for Bluss, one judge votes for a “One More Time” but majority rules. Bluss moves on!
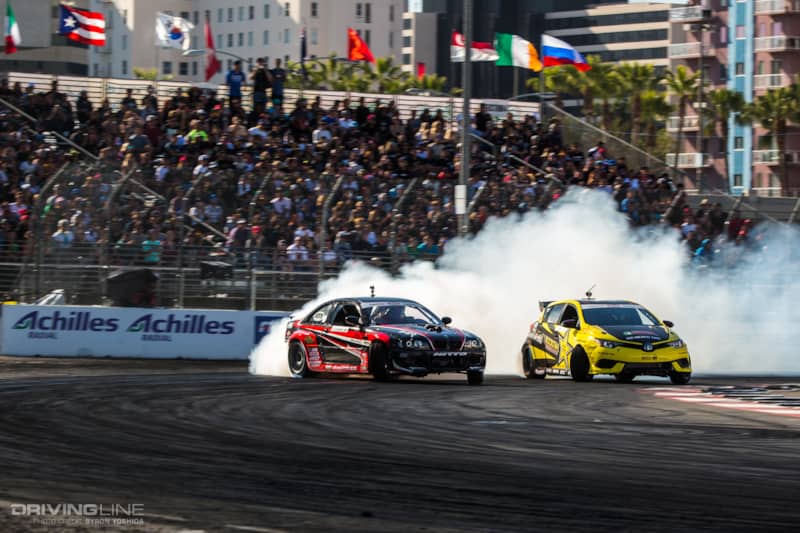
Alex Heilbrunn – Bye Run
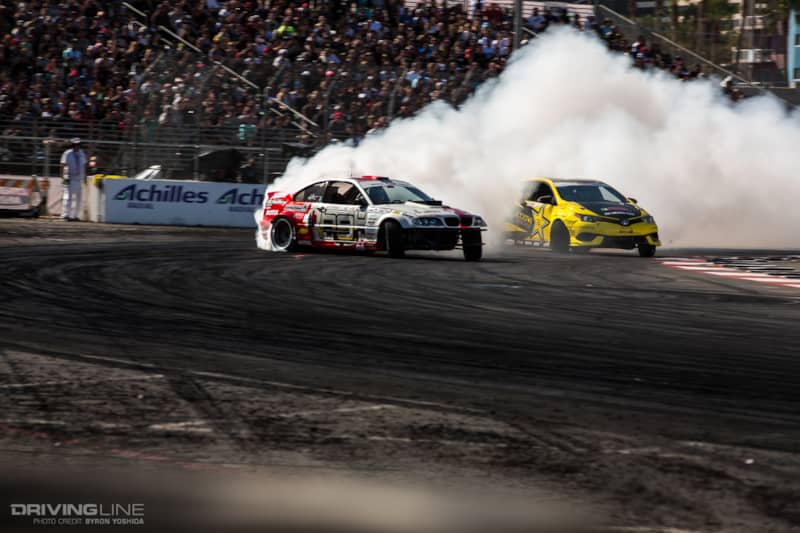
HEILBRUNN LEAD – Heilbrunn has looked great in his BMW E46 this weekend, which is debuting a new suspension setup that he worked with RTS to build for this season. Heilbrunn takes the opportunity in his solo pass to burn off a set of Nitto Tires for the fans. Even in his bye run, Heilbrunn has some of the most dramatic steering angle exiting the first touch-and-go clipping zone that we’ve seen all weekend!
Juha Rintanen vs. Jeff Jones
RINTANEN LEAD – Rintanen with good angle on initiation, Jones looks a little twitchy on initiation but gets the car sideways before the first turn. Rintanen has great steering angle into the first turn; Jones doesn’t get to full angle after transitioning under the bridge and has very shallow angle and line in front of the judges, almost losing drift at one point. Rintanen has a smooth run with plenty of tire smoke. This run looks to be an advantage for Rintanen.
JONES LEAD – Jones looks much better on initiation on this lead and goes much deeper into the outer clipping zone than on the previous run. Rintanen has substantially more tire smoke than Jones, but is a full car length or two behind Jones for most of the course. Rintanen has much smoother transitions and looks much more fluid over the entirety of the course. All three judges vote for Rintanen to move on.
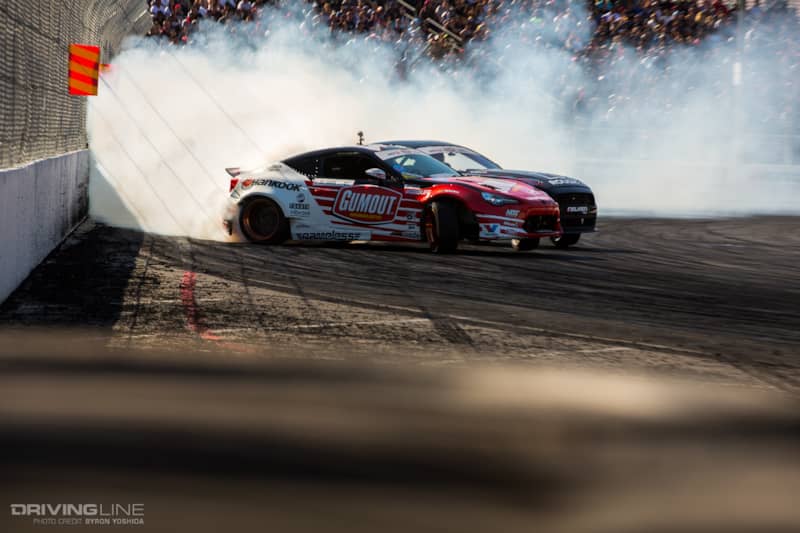
James Deane – Bye Run
DEANE LEAD – Deane has looked solid all weekend, leading the first qualifying round with a score of 91 and backing up with a 96 on his second run that put him into the second qualifying position. Deane makes a run sans front bumper, but still pushes fairly deep into the first two clipping zones before backing off a bit to save it for the Top 16. Deane pushed Tanner Foust to a “One More Time” here in Long Beach back in 2010, and should definitely be considered one of the threats to win the event this weekend!
Michael Essa vs. Dai Yoshihara
ESSA LEAD – Essa has a smooth initiation and good line; Yoshihara is a bit conservative on initiation but closes the gap down after the first turn. Essa runs a good line under the bridge and has good speed in front of the judges gap, while Yoshihara’s car snaps out of drift just before the wall in front of the judges stand but thankfully avoids hitting Essa. We see Yoshihara pull off track and flagging a worker down. This will be an incomplete run from Yoshihara and a major advantage to Essa.
Yoshihara calls his competition timeout. Sounds like a belt either broke or slipped off a pulley, so the car should be fixable.
YOSHIHARA LEAD – Yoshihara with a good initiation into the first turn and pushes fairly deep into the first turn; Essa is hot on his trail. Yoshihara has some big steering angle around the first turn and transitions smoothly under the bridge. Essa is around a car length behind Yoshihara, probably a calculated move given that Yoshihara had issues in the first pass. Yoshihara maintains drift on this pass and finishes the course with Essa in chase, but with no major mistakes from Essa, he will move on to the Top 16.
Chris Forsberg vs. Alex Hohnadell
FORSBERG LEAD – Forsberg is in his 2016 competition car as he had major engine issues earlier in the week in his 2017 competition car. The 2016 FD champion car is powered by a V8, while his planned 2017 car will utilize a twin turbocharged VQ motor once the bugs are worked out. Forsberg has a good initiation. Hohnadell starts shallow on his angle but pushes to deeper steering angle after the transition under the bridge. Forsberg has a good clean run with plenty of tire smoke; this almost looks routine for Forsberg. Hohnadell is a bit shallower on his angle but the proximity is very good from him; he doesn’t look intimidated by the defending champion.
Just before the final transition leading up to the peninsula, there’s contact between the cars. Hohnadell spins out to a halt on track, while Forsberg is able to complete his transition and finish the run. Hohnadell looks to be at fault for the contact as this is a deceleration area, but the judges will review all replays before making a determination. If Forsberg is at fault for the contact, Hohnadell will be given an opportunity to fix his car without any penalty. However, if Hohnadell is deemed to be at fault, he will have to utilize his competition timeout to fix the car.
Fault is handed to Hohnadell, so Hohnadell will be at a disadvantage for the second run. Forsberg wants to look over his car, which he’s allowed to do since he wasn’t determined to be at fault, while Hohnadell calls his competition timeout as expected.
HOHNADELL LEAD – Hohnadell is back on the starting grid sans front bumper and looks ready for battle. Hohnadell has a good initiaition, Forsberg is about two car lengths behind Hohnadell and takes a bit of a conservative line around the track. Hohnadell has a pretty strong lead run. Forsberg never really applies pressure and stays fairly far from the walls, but given the major advantage he’s carrying from the first run, it likely won’t matter. Hohnadell takes out the final inside clip at the peninsula, while Forsberg keeps drift around the entire track. Forsberg wins unanimously.
Ken Gushi vs. Georgy Chivchyan
GUSHI LEAD – Gushi has a big initiation and tons of angle; Chivchyan initiates early into the first turn but can’t maintain drift behind Gushi and has to pull out of drift. Gushi stays on the throttle and finishes the course with tons of tire smoke and good steering angle around the course. This would have been a very high scoring run for Gushi even if Chivchyan didn’t have the incomplete run.
CHIVCHYAN LEAD – Chivchyan has a much better initiation on his lead run and good steering angle through the first turn. Gushi has a shallow line through the first turn as he transitions under the bridge, but good proximity to Chivchyan. Chivchyan has deep angle along the wall in front of the judges and looks to be slowing down a bit earlier than some of the other drivers; Gushi makes contact with Chivchyan and spins out. After reviewing the replays, Gushi is given the unanimous win.
Ryan Tuerck – Bye Run
TUERCK LEAD – Tuerck is back in the same chassis he drove last season, which is now badged as a Toyota GT86. He has looked strong all weekend in the car, with his third-place qualifying run earning him a bye run. Tuerck makes a clean pass and is arguably one of the favorites to podium this weekend.
Justin Pawlak vs. Pat Goodin
PAWLAK LEAD – Pawlak goes deep into the first clipping zone with good steering angle, with Goodin hot on his tail! Pawlak goes to transition under the bridge, but Goodin is too close, and there’s contact between the cars. Goodin smacks into the wall that acts as the outside clipping zone under the bridge, while Pawlak is able to limp his car through the next turn and off course under its own power. Looking at the replay, it looks like Goodin is at fault for not allowing room for Pawlak to transition. Goodin needs to be towed off course, so we have a bit of downtime between runs.
GOODIN LEAD – Goodin is unable to repair his car, so Pawlak makes a bye run with plenty of tire smoke to give the fans a show. His car is definitely looking 100 percent after the collision. Pawlak will face off against Tuerck in the next round.
Matt Coffman vs. Dan Burkett
COFFMAN LEAD – After a false start from Coffman, the run ends before the first turn. Burkett looks to be trying to catchup to Coffman after the launch and initiates very late and on the inside line, which pushes him into Coffman and then into the tire barrier. Coffman slows up and rolls away from the collision, while Burkett needs to be towed towed out of the tire barrier. Upon review, the collision is clearly Burkett’s fault and will be a major advantage to Coffman.
BURKETT LEAD – Burkett initiates a little early, cutting the first turn sooner than most of the other drivers. Coffman leaves some room ahead of him to allow for room in case Burkett doesn’t hit the prescribed line. Burkett is shallow on nearly every outside zone, but has good tire smoke and steering angle. Coffman keeps about two car lengths of distance between him and Burkett, which probably won’t earn him a win in future rounds but is enough for this battle. Due to Burkett causing the collision in chase, Coffman gets the unanimous win.
Matt Field vs. Nate Hamilton
FIELD LEAD – Field has a good initiation although not as deep on the touch-and-go as some of the other drivers have been. Hamilton is very shallow on line and angle around the course, while Field is shallow on the first touch-and-go zone, but fills the zone under the bridge and in front of the judges stand nicely. Hamilton is very shallow in steering angle transitioning before the peninsula and might have even lost drift completely for a period. Field takes out the final peninsula clipping point, but will still have a fairly substantial advantage going into the second run.
HAMILTON LEAD – Hamilton is shallow again on his steering angle in the first turn and taps the rear of his car against the wall of the touch-and-go, which causes him to straighten and has to re-initiate. Field leaves some space ahead of him and is a bit shallow on steering angle after Hamilton taps the wall, but likely to avoid contact. Field maintains consistent proximity through the course, albeit a good two car lengths behind Hamilton, which will likely be enough to move on. All three judges send Matt Field into the Top 16.
FORD TOP 16
Before kicking off the Opening Ceremonies, 22 young recruits of the United States Air Force are sworn in on the track in front of the main grandstand and the National Anthem is sung by a current U.S. Air Force member. All 16 remaining drivers are introduced in front of the crowd, and we get some burnouts and donuts to get the crowd hyped up. As the top qualifier, Vaughn Gittin Jr. earns $500 cash on behalf of Black Magic, presented during the driver introductions.
Gittin Jr. vs. Kearney
Gittin Jr. and Kearney have battled five times previously, with Kearney winning three of those five battles. Several of those battles have ended in contact, so we could be in for an exciting pair of runs to kick off the Top 16 tandem battles.
GITTIN JR. LEAD – Gittin Jr. with a good initiation, Kearney is hot on his tail and mirrors Gittin Jr.’s line and angle through the first corner very nicely. Gittin Jr. pushes out to the clipping zones much better than Kearney and stays wide around the peninsula clipping point nicely. Kearney has good proximity, but nudges the final inner clip, which will be a slight deduction. No major mistakes from either driver will make this a very important second run.

KEARNEY LEAD – The initial attempt at starting this run is red-flagged due to Kearney hitting a cone in the start chicane. The second start is clean, but Kearney initiates early and smashes his wing end plate against the chain link fence in the first outer touch-and-go zone. Gittin Jr. isn’t phased and continues hot on Kearney’s tail. Kearney has good steering angle through the second outer zone, while Gittin Jr. is a bit shallow on his steering angle and line through the outside zone in front of the judges. Gittin Jr. transitions a little early heading into the peninsula clipping point and doesn't have enough momentum to make the corner, so he has to shortcut the corner which pushes him into Kearney’s line, causing contact. Kearney is unable to finish the run; Gittin Jr. is determined to be at fault for the contact, and Kearney moves on to the Great 8.
Bakchis vs. Wiecek
BAKCHIS LEAD – Bakchis has a good smooth line through the course, but the story of this run is Wiecek in the follow position. Wiecek is very aggressive on Bakchis after initiation and super tight on his door under the bridge and in front of the grandstands. Bakchis has more steering angle, but the proximity is just as impressive from Wiecek. Wiecek transitions before the peninsula clip to try and dive in on Bakchis, but miscalculates his timing, causing him to straighten out without the momentum to carry him around the peninsula clip.
WIECEK LEAD – Bakchis initiates several car lengths behind Wiecek and stays three or four car lengths behind Wiecek for most of the run. Wiecek fills the outer clipping zones well and has good steering angle; Bakchis dives in on Wiecek nicely towards the final turn to help keep the proximity close around the final turn, but nudges the inner clip in the process. Overall, Wiecek’s run was great, but his mistake on the chase run is too much to overcome. Bakchis will move on to face Kearney.
Aasbo vs. Bluss
AASBO LEAD – Aasbo has a great lead run; he’s really pushing his Toyota Corolla iM deeper into the outside zone under the bridge than any other driver. Bluss is only a car length or so behind Aasbo, and remains that way throughout most of the course. After the touch-and-go in front of the judges, Bluss gets over-aggressive and taps Aasbo, which causes Bluss to spinout. Aasbo finishes the course cleanly, while Bluss requires a tow truck to move off course. Bluss is considered to be at fault for the contact, so Aasbo will be allowed to look over his car if he likes. Based on how the car was towed off, it looks like Bluss may have broken one of the front suspension or steering arms.
BLUSS LEAD – Bluss is all over this track on his lead run... but in a good way. Bluss initiates several car lengths ahead of Aasbo, and Aasbo noticeably loses ground on Bluss between outer zone 1 under the bridge and outer zone 2 near the judges stand. Aasbo probably has to back off specifically to be able to see where he was going; this is by far the smokiest run we’ve seen so far! Unfortunately, the mistake from Bluss in the lead run is too much, and Aasbo will earn the win into the Great 8.
Heilbrunn vs. Rintanen
HEILBRUNN LEAD – Heilbrunn initiates much earlier than Rintanen, but both drivers have an almost identical line through the first corner. Heilbrunn smashes his rear bumper on the wall under the bridge while holding full angle on his lead. Rintanen is several feet off on the zone, but keeps consistent proximity through the course. Rintanen closes the gap a bit in the final transition and sticks tight to Heilbrunn around the final corner, also nudging the final inner clipping point. This feels like an advantage to Heilbrunn if you consider how deep he ran against the wall under the bridge.

RINTANEN LEAD – Both drivers initiate almost simultaneously, Rintanen’s car is a bit slow to hit full angle and is shallow on the first outer zone. Heilbrunn is much more conservative in his line while chasing Rintanen; Rintanen loses some angle due to tapping the wall under the bridge, which allows Heilbrunn to close the gap and mirror the line with Rintanen much better. Heilbrunn earns votes from all three judges; however, this feels like a win due to Rintanen’s mistake on his lead more than anything else.
Deane vs. Essa
DEANE LEAD – Deane initiates very quickly, with Essa several car lengths behind him. Deane smashes his rear bumper against the wall under the bridge and briefly loses some angle, but stays in the throttle and pulls away from Essa before the next wall in front of the judges. Essa tries to brake late entering the peninsula to close down the gap, but is off the line he needs to be to go around the final turn. He spins out at the peninsula clipping point. Deane will have a big advantage into the second run, and rightfully so after that impressive lead run.
ESSA LEAD – Essa has great tire smoke in his lead run and goes pretty deep into the outer zone under the bridge, but Deane stays calculated and cool behind him, maintaining consistent proximity throughout the entire course. Essa nudges the final clipping point around the peninsula, but his mistake on the first run will seal the deal. All three judges votes for James Deane to advance to the Great 8.
Forsberg vs. Gushi
FORSBERG LEAD – Forsberg has a good lead run with good steering angle around the first turn, Gushi with a steering correction after the first corner but stays close in proximity to Forsberg. Gushi sacrificed the driving line a bit to maintain that proximity, but looked very good doing it which is always a major part of the judging. Gushi looked especially looks strong around the final turn, which has been a problem for several drivers today.
GUSHI LEAD – Gushi and Forsberg look nearly identical on the initial initiation, Gushi has much more angle and is deeper on the first touch-and-go but Forsberg has good proximity. Gushi also appears to have more steering angle after the clipping zone in front of the judges, but overall, no major issues from either driver. Judge Ryan explains that Forsberg probably had a better lead run, but Gushi probably did a better job following Forsberg. In the end, all three judges vote for Forsberg to move on to the Great 8. Several fans try to start a chant for a “One More Time," but the decision has been made.
Tuerck vs. Pawlak
TUERCK LEAD – Tuerck with a clean lead run, Pawlak’s Ford Mustang doesn’t transition well under the bridge, and there’s a bit of a delay for the Mustang to get to full lock before the clipping zone by the judges. Tuerck doesn’t make any major mistakes and has plenty of steering angle, while Pawlak makes another mistake and dives in late around the peninsula clipping point. Pawlak knocks over the final clipping point, Tuerck finishes cleanly, giving him a slight advantage going into the second lap.
PAWLAK LEAD – Pawlak initiates much closer to the wall than Tuerck; Tuerck is shallower both in line and steering angle through the first two clipping zones but maintains consistent proximity to Pawlak. Pawlak finishes the run cleanly with good smoke; Tuerck looks to be a bit conservative on his run, but justifiably so considering his advantage after the first run. All three judges vote for Tuerck to move into the Great 8.
Coffman vs. Field
COFFMAN LEAD – Coffman with big angle through the first two turns and tons of tire smoke. We can hardly see Field behind him, although on the replay, we get a glimpse of Field behind Coffman with some shallow steering angle near the outside zone under the bridge. Coffman is running the desired line through the entire course, while Field is noticeably shallower and might be down on power. Field tries to dive in just before the peninsula, but Coffman pulls away due to the awkward line Field took.
FIELD LEAD – Field with a much better line on his lead, Coffman takes a slightly shallower line around the first corner but sucks in nicely to Field in front of the judges stand. Coffman dives in late entering the peninsula, but does so much more smoothly than when Field made the similar move. Both drivers finish the car side-by-side, this was a good chase run from Coffman! One judge votes for a “One More Time” while two other judges vote for Coffman.
NOS ENERGY DRINK GREAT 8
Bakchis vs. Kearney
BAKCHIS LEAD – Bakchis has a good initiation and is a little shallow on the line entering the first corner, but has a good transition and is close to the wall under the bridge. Kearney has great proximity in the chase position and mirrors the transition and line of Bakchis under the bridge and through the second half of the course. Both drivers mirror each other nicely in front of the judges stand, and Kearney times his dive in on Bakchis nicely before the peninsula. Bakchis takes out the final inner clip near the peninsula, which may be a slight deduction.
KEARNEY LEAD – Kearney has a good lead run; Bakchis is much further back behind Kearney for the first turn and under the bridge. Kearney pushes out to the outside zone in front of the judges nicely; Bakchis improves his proximity in the same area. Kearney transitions smoothly, while Bakchis surges ahead through the transition to stick to Kearney’s door for the final turn. Kearney nudges the peninsula clipping point, but it only moves a foot or two. This is a very close run from both drivers. Two judges vote for a “One More Time,” while one judge votes for Bakchis, so we’ll see them run again!
One More Time
BAKCHIS LEAD – Kearney calls his competition timeout just before the cars grid for their “One More Time” battle. We return to battle, and Bakchis has a smooth initiation. He’s not too close to either of the first two walls, but isn’t terribly off line either. Kearney maintains about a half-car length of proximity to Bakchis throughout most of the run; Kearney allows for the gap to open up through the transition going into the peninsula turn but then closes it around the final turn. Kearney takes out the final peninsula clipping point with the front of his bumper, but that's his only noticeable mistake on this run.
KEARNEY LEAD – Kearney initiates much earlier and much more slowly to the wall than Bakchis; Kearney pushes hard out to the wall, while Bakchis stays very tight to Kearney in the chase position. Kearney definitely has the better line, but the proximity from Bakchis might be enough to sway the judges. One judge votes for a “One More Time” battle, but the other two judges vote for Bakchis. We’ll see Bakchis in the Final 4.
Aasbo vs. Heilbrunn
AASBO LEAD – Aasbo has big angle at the first touch-and-go; Heilbrunn is only a car length or so behind Aasbo throughout most of the run. Heilbrunn has a bit shallower line under the bridge; Aasbo extends his lead by an extra car length between the bridge section and the section in front of the judges. Heilbrunn closes in on Aasbo before the peninsula clip, but is probably at a slight disadvantage to Aasbo entering the second run.
HEILBRUNN LEAD – Heilbrunn has a good initiation and shows major steering angle under the bridge, nearly rubbing his rear bumper along the wall again under the bridge. This is a very solid lead run for Heilbrunn — likely a score in the mid-90s if this were a qualifying run. Aasbo stays about two car lengths behind Heilbrunn for the first half of the course, then closes the gap near the wall by the judges tower, staying tight on Heilbrunn around the final peninsula corner. While a great lead run by Heilbrunn, it's also a good run by Aasbo. One judge votes for Aasbo, but the other two want to see these two battle “One More Time.”
One More Time
AASBO LEAD – Both drivers have a clean initiation. Heilbrunn transitions very early before the bridge and is way off line under the bridge, but yanks the e-brake and is able to maintain drift through the mistake. Aasbo’s line is much better through the course; on replay it seems like Aasbo’s transition under the bridge is much slower than Heilbrunn might have been expecting, throwing Heilbrunn’s timing off. Heilbrunn maintains really good proximity throughout the second half of the course, but the mistake on the transition after the first turn is a memorable one, putting him at a disadvantage for the second run.
HEILBRUNN LEAD – Heilbrunn rubs his rear bumper on the first outer zone, then transitions very cleanly into the outer zone under the bridge. Aasbo makes almost the identical mistake following Heilbrunn in almost the same area, transitioning a bit awkwardly before the bridge. Heilbrunn finishes the run smoothly, another great lead run from Heilbrunn. Looking at the replay, it actually looks like Aasbo may have lost drift during the transition period, which may result in a bigger deduction than will Heilbrunn’s mistake. One judge votes for another “One More Time” battle, but the other two vote for Heilbrunn to advance to the Final 4.
Deane vs. Forsberg
DEANE LEAD – Deane has big angle on the first touch-and-go zone; the rest of the run looks almost identical from both drivers. Forsberg has a great chase run, with good proximity and nearly identical steering angle and line for the run. On the replay, we can see that Deane was much deeper into the outside zone under the bridge while Forsberg was a few feet away from the zone. There’s likely a very slight advantage to Deane based on that shortcoming from Forsberg, but nothing that can’t be overcome easily by a strong chase from Deane.
FORSBERG LEAD – Deane initiates almost at the identical time as Forsberg on initiation, Forsberg is off on his line through the outside zone under the bridge, but Deane’s follow strategy is masterful on this run! Deane is extremely tight under the bridge and stays hot on Forsberg’s tail through the outside zone near the judges stand. Deane transitions very early before the peninsula clipping point, which causes him to fall back a bit, but Deane closes the gap again and finishes within inches of Forsberg’s door. This is a great run, definitely our tightest of the day. All three judges vote for Deane to move on to the Final 4.
As the highest remaining qualified driver, Deane is guaranteed a podium position.
Tuerck vs. Coffman
TUERCK LEAD – Tuerck again with a good initiation, he keeps good steering angle and a strong line through the first two corners. Coffman is about two car lengths behind Tuerck under the bridge, and is a few feet shallower than Tuerck under the bridge and through the touch-and-go near the judges. Coffman tries to brake late in the final transition area to close the gap, but miscalculates the speed and collides with Tuerck’s door in the middle of the peninsula. The damage doesn’t look too substantial as he still finishes the course strong, but Coffman will surely be determined to be at fault. Coffman will call his competition timeout to check over the car.
COFFMAN LEAD – Coffman pushes all the way out to the wall in the first turn, with a very slow and methodical transition under the bridge; Tuerck looks to be maintaining a safe distance behind Coffman as a precaution. Coffman dumps a ton of angle in the outside zone in front of the judges, and Tuerck uses an inside line to close down the proximity with shallower steering angle while still in drift. Tuerck finishes the run around two car lengths back from Coffman — not the most aggressive chase run from Tuerck, but enough to advance. All three judges vote for Tuerck to move on to the Final 4.
BLACKVUE FINAL 4
Bakchis vs. Heilbrunn
HEILBRUNN LEAD – Heilbrunn initiates early and close to the wall, while Bakchis initiates much later and not as close to the wall. Heilbrunn again taps the wall under the bridge, breaking the lens of his taillight, with Bakchis very close in chase behind him. Bakchis dives in hard behind Heilbrunn through the transition before the peninsula, his bumper appears out of the tire smoke
BAKCHIS LEAD – Bakchis and Heilbrunn initiate simultaneously, Bakchis has big steering angle at the first touch-and-go, Heilbrunn uses a slightly shallower line to keep close proximity to Bakchis and mirrors Bakchis’s line and angle nicely along the next two outside zones. Heilbrunn transitions early and dives in on Bakchis again near the peninsula, both drivers finish side-by-side across the finish line. This is a tough set of runs to call, it feels like Heilbrunn had the better lead run but the dive in near the peninsula wasn’t as pretty. One judge votes for Bakchis, the other two want to see a “One More Time” so we’ll see them run again!
One More Time
HEILBRUNN LEAD – Heilbrunn again pushes out to the wall, Bakchis has been shallow on the line around the first corner all weekend. Heilbrunn has a great line on the outside zone under the bridge and carries the outside line in front of the judges, Bakchis takes the inside line again in front of the judges. Bakchis transitions early and dives in on Heilbrunn before the peninsula, both drivers narrowly make it around the final peninsula clipping point without moving it. Tough judge to score.
BAKCHIS LEAD – Bakchis taps the wall in the first touch-and-go, that’s the line we just noticed that he wasn’t getting out to on the previous run. Bakchis drops his bumper, Heilbrunn has a good chase run and looks much more consistent in chase than when Bakchis is chasing. Bakchis has a strong finish to the course, but Heilbrunn just looks much more stable on his runs. All three judges vote for Heilbrunn.
This will be Heilbrunn's first podium since last year's third-place finish at Wall, New Jersey.
Deane vs. Tuerck
DEANE LEAD – Deane is already guaranteed a podium spot, but he’s clearly fighting for the event win. His run is almost identical to his last few lead runs, going deep into the touch-and-go zone with tons of steering angle and plenty of tire smoke and style! Tuerck has a good chase run, just a car length or so behind.
TUERCK LEAD – Tuerck has a nice initiation; Deane is hot on his tail. Tuerck has a good line, but isn’t nearly as close to any of the outside zones as Deane. Deane has much more steering angle near the first touch-and-go zone and maintains strong proximity throughout the entirety of the course. Tuerck doesn't make any major mistakes, but the story of this battle is clearly Deane’s nearly-flawless runs! All three judges vote for Deane advance to the Final Battle.
With his higher rank over both Bakchis and Heilbrunn, Tuerck secures the final podium spot.
BLACK MAGIC FINAL BATTLE
Two drivers, whose paths to Formula Drift look very different from the other, now meet in the Final Battle. Heilbrunn moved to the U.S. several seasons ago and pursued his Formula Drift entry via the Pro-Am and Pro 2 series, going on to win the 2016 Formula Drift Rookie of the Year award. On the other hand, Deane stepped away from Formula Drift seven years ago after also winning Rookie of the Year. He competed — and dominated — in Europe, waiting for the right opportunity to make his return to the Series. With strong teams behind both drivers, we’re excited to see this Final Battle: Peru vs. Ireland!
Deane vs. Heilbrunn
DEANE LEAD – Deane has another textbook lead run, coming within a foot of nearly every wall with plenty of steering angle. Heilbrunn transitions from the first touch-and-go a little early and is shallow under the bridge, but stays close to Deane and has a good run overall. Heilbrunn has good proximity, but there's not a single mistake from Deane anywhere on the course. This is still anyone’s race to win, but the judges may be slightly leaning towards Deane after the first run.
HEILBRUNN LEAD – Heilbrunn has a nearly perfect lead run, but Deane's chase run is absolutely amazing. Deane initiates at almost the same time as Heilbrunn and stays hot on his door, narrowly leaving enough room for Heilbrunn to transition before diving in on Heilbrunn’s door. Heilbrunn puts his BMW in all the right places — what a great lead run! Deane dives in tight on Heilbrunn around the final peninsula clipping point. There’s contact between the cars; it's hard to tell whether it was from Deane being too aggressive, or if it was from Heilbrunn taking an awkward, unexpected line. Overall, a great run from both drivers! This could easily be called for a “One More Time," and nobody would be upset.
ROUND 1 FINAL STANDINGS
Both drivers are brought in front of the crowd, and Deane is announced as the winner, earning his first-ever career victory (not to mention, at his first Formula Drift event since 2010). Deane becomes the 24th different driver to win a Series event. After driving like a maniac today, this victory is well-deserved. Heilbrunn's solid performance earns him a close second-place finish, his second career podium. In third place, Tuerck brings home his 12th career podium. See complete standings at FormulaD.com.

For more action from the Streets of Long Beach, check out our event recap gallery. Stay tuned for Round 2, coming at you April 28 and 29 in Orlando, Florida.
(Photos: Byron Yoshida)