2017 Formula Drift New Jersey Top 32 Play-by-Play
Wall Speedway in New Jersey has been a mainstay on the Formula Drift schedule since 2005, falling off the schedule only once since then during a period when the track was under an ownership change. The 30-degree banking is the steepest on the series schedule, and the transition from the banking to the flat-bottom that happens right in front of the main grandstands and judging station is one of the trickiest transitions for the drivers to handle. Many drivers have special suspension setups that they bring to Wall which have substantially more shock travel than what is typically required for drifting.
In addition to that, the judges require that the drivers push their rear bumpers close to the guard rail which lines the top of the banking. While that may seem fairly straight forward, the guard rail is far from straight after many incidents over the years. Drivers who push too close to the rail may get snagged by a section which can destroy bumpers and may even cause the car to swap ends and end your weekend.
All in all, fans love the threat of carnage that New Jersey brings to the Formula Drift circuit, and we always expect a sold-out crowd. We had a rain shower roll in overnight, but the rest of the day looks dry from a precipitation perspective.

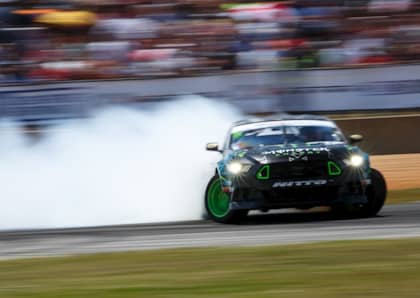
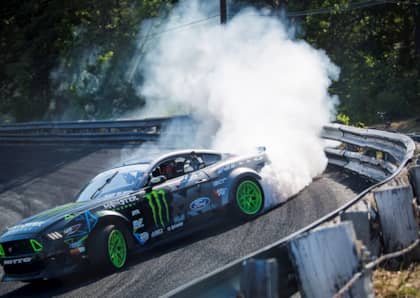
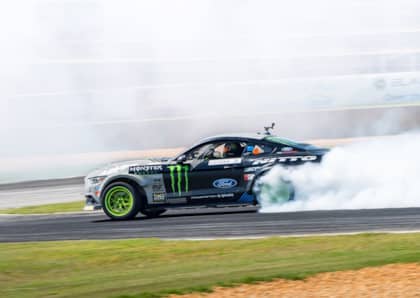
(Photos: Andrew Jennings)
QUALIFYING
Friday’s qualifying session brought some very high scores, showing that the tandem battles should be amazing. Nine drivers put up a score of 90 or higher, with the top five drivers separated by two measly points. Chelsea DeNofa topped the qualifying charts with a score of 96 — his first pole qualifier of his career.

Three drivers tied with a score of 95, with Ryan Tuerck besting Justin Pawlak and Kristaps Bluss by virtue of the tiebreaking secondary run qualifying score. Tuerck’s score of 94 pushed him ahead of Pawlak’s score of 91, while Kristaps Bluss had an Incomplete on his secondary qualifying run which left him in fourth place. Current points leader James Deane earned a 94 on his top qualifying run, which put him into fifth place and gave him the final bye run. Only 28 drivers made a qualifying pass, but Taylor Hull’s double Incompletes in qualifying meant only 27 drivers would be slotted into the tandem bracket.
TOP 32
Chelsea DeNofa – Bye Run

DENOFA LEAD – After his teammate took the top qualifying spot in Atlanta, Chelsea DeNofa earned his first top qualifier honors this weekend. DeNofa has had a love/hate relationship with this track, as he has had several major crashes in previous seasons. He pushed the limits of his Nitto Tire Ford Mustang RTR, but came out ahead on his qualifying run. Unfortunately, DeNofa had a major crash at the end of practice this morning, so the bye run came at a good time. We will see how well the car is repaired come time for Top 16 introductions.
Dan Burkett vs. Dai Yoshihara
BURKETT LEAD – Burkett has a good initiation, Yoshihara is right behind him. Both drivers are about a car length away through the bank, Burkett taps the Black Magic clipping point on the switchback out of the way, Yoshihara has very consistent proximity through the first half of the track. Steering angle from both drivers is also similar through the second turn on the apron, both drivers finish the last turn cleanly. Yoshihara closed the gap down especially around the final turn, so perhaps he will have a slight advantage, but both drivers had clean runs.
YOSHIHARA LEAD – Yoshihara has a good initiation and is very high on the bank, Burkett is on a much lower line. Yoshihara opens up a big lead across the switchback, Burkett cuts the line entering the second turn to try and close the gap but then overshoots the apex and is way offline through the rest of the turn. Yoshihara exits the second turn with around a four car gap, but overshoots the transition around the second switchback and has a very funky line through the final turn. Both drivers with some substantial mistakes, this was a much sloppier run. Two judges vote for Yoshihara to move on, one judge wants to see a “One More Time” but is outvoted. Yoshihara will face DeNofa in the Top 16.
Michael Essa vs. Ken Gushi

ESSA LEAD – Essa with a good high line on the bank, Gushi starts lower on the bank but closes the gap shortly after initiation. Gushi has to back off to avoid contact, then keeps consistent proximity through the second sweeper. Essa opens up a brief gap after the second switchback but Gushi closes it down again. Essa again opens up the gap towards the end of the run. Overall, that was a strong run from Essa, while there were some mistakes from Gushi
GUSHI LEAD – Gushi again is lower on the bank than the judges want to see, Essa stays very close to Gushi and keeps good proximity through the entire bank. Gushi had better steering angle, but the proximity from Essa was very close and consistent through the bank and the entire second turn. Gushi finally opens up a bit of a gap around the final turn, but it might be too little too late. All three judges vote for Essa to move on to the Top 16.
Vaughn Gittin Jr. vs. Dean Kearney
Gittin Jr. had a major collision with Juha Rintanen at the end of practice that caused some suspension damage. The team was already working on DeNofa’s car, but was pulled off to try and fix Gittin Jr.’s car prior to this matchup. The Ford Mustang RTR is at the line and ready for battle; hopefully the car is repaired back to 100 percent.

GITTIN JR. LEAD – Gittin Jr. with a manji entry, Kearney stays close behind him and runs a high line around the bank about a car length behind Gittin Jr. Coming off the bank, Gittin Jr. opens up a two car gap in proximity after the switchback but Kearney slows late into the second turn to close the gap down. Looks like there might have been contact between the two cars, then Gittin Jr.’s Mustang spins out. Judges look at several replays and don’t deem fault to either driver. That means that the situation may be determined to be a spin from Gittin Jr.
KEARNEY LEAD – Kearney with a great initiation and high on the bank, Gittin Jr. is hot on his tail and keeps the gap between the cars down to less than a car length for the entire banking. Kearney opens up the gap to around two car lengths across the switchback, Gittin Jr. closes down the gap again and stays close to Kearney through the rest of the run. This was a good chase run from Gittin Jr., but the decision will likely come down to how the spin on the first run is interpreted. Judges have come to a conclusion: Two judges vote for Gittin Jr., while one judge wants to see the drivers run “One More Time.” Gittin Jr. will be moving on to the Top 16.
Judges explain that there looked to be contact as there were rubber marks on Gittin Jr.’s car, and the start line official indicated that he believed he saw contact as well. Replays were very hard to decipher as the camera angles were poorly chosen to try and see contact in that particular area of the track.
Kristaps Bluss – Bye Run
BLUSS LEAD – Bluss is coming off of a podium finish in Atlanta, and has looked strong all weekend. Entering the weekend, he was tied with Heilbrunn for seventh place in the standings, but moves ahead by a point based on qualifying. Bluss is running a special livery this weekend to promote the HGK Drift Challenge which takes place in two weeks at Bikernieki Racetrack in Latvia. Chris Forsberg and Daigo Saito will be joining Bluss in the competition, which should be exciting to watch.
Nate Hamilton vs. Pat Goodin

HAMILTON LEAD – Hamilton high on the bank, Goodin is three or four car lengths behind Hamilton through the bank. Hamilton has a good line through the track, Goodin is a bit sloppy and off several of the clipping points. Hamilton stays consistent on his lead run while Goodin can’t make up much proximity through the entirety of the run. Across the finish line, Hamilton has plenty of smoke and looks to have an advantage while Goodin looks like he was struggling to try and keep up, sacrificing his line and style to try and close the proximity.
GOODIN LEAD – Goodin initiates close to the wall, Hamilton is around two car lengths behind Goodin through the big bank. Goodin opens up the lead to around four car lengths across the switchback, Hamilton closes the gap midway through the second sweeper to around two car lengths and stays close across the second switchback and the final turn. Overall, there was noticeably better proximity from Hamilton in chase than on the first run. Two judges vote for a “One More Time." We’re going to see these two run again!
One More Time
HAMILTON LEAD – Hamilton is a bit lower on the initiation than Goodin, but Goodin is around four car lengths behind Hamilton again through the bank. Goodin uses a manji entry, which definitely looks to slow him down. Goodin takes out several of the Black Magic inner clipping points, Hamilton looks much more consistent around the course. Definitely feels like an advantage will be in Hamilton’s corner for the second run.
GOODIN LEAD – Hamilton again is closer to Goodin after initiation and keeps the proximity down to around two car lengths through the bank. After the switchback, Hamilton closes the gap down to a single car length through the second turn, this is definitely a much stronger chase run than we saw in the first battle. Goodin opens up the gap briefly before taking out another inside clipping point, Hamilton stays close again around the final turn. All three judges vote for Hamilton to move on to the Top 16.
James Deane vs. Bye Run
DEANE LEAD – Deane pushed his car into the final bye run slot on the last run of qualifications yesterday, and will earn a few extra championship points for the effort. Probably most impressive about Deane and his Worthouse teammate Piotr Wiecek is how many spare body panels they brought this weekend, already painted up and stickered in case of carnage. They’re clearly ready for multiple run-ins with the wall!
Alex Heilbrunn vs. Cameron Moore

HEILBRUNN LEAD – Big lead from Heilbrunn on initiation, Moore closes it down briefly in the bank by running a slightly shallower line. Heilbrunn has more steering angle around most of the track, Moore takes an inside line around both the second and third turns to try and keep the proximity close. Heilbrunn should have a small advantage going into the second run as that was one of the better lead runs we’ve seen all day.
MOORE LEAD – Moore has a major correction midway through the bank and loses drift. Heilbrunn adjusts nicely to avoid contact. Moore recovers nicely and continues drifting; this could be considered an Incomplete run for him despite doing very well around the rest of the track due to how much drift Moore lost. Heilbrunn kept around a car length or two of proximity behind Moore around the rest of the track, possibly leaving a bit of extra room in front of him in case there was another mistake from Moore. All three judges vote for Heilbrunn to move on to the Top 16.
Ryan Tuerck – Bye Run

TUERCK LEAD – Tuerck is looking comfortable in his Toyota GT86, and is one of only two drivers who had advanced to the Top 8 in each of the first three events alongside Dean Kearney. With Kearney out of the competition, Tuerck could become the lone driver to make it to the Top 8 in each round through the first half of the season if he can win his next tandem battle.
Odi Bakchis vs. Piotr Wiecek
BAKCHIS LEAD – Bakchis has a very good consistent lead run, while Wiecek has a very consistent, close chase run behind him. Wiecek was within a single car length of proximity around the entire big bank and again through the second sweeper. At times, Wiecek sacrificed some angle to maintain proximity, but it looked great. Shortly before the finish line, it looks like Wiecek lost drift and may have straightened out, which would be an Incomplete. Wiecek pulls off course and has to be towed to the pits, there may be a mechanical issue that was limiting him from completing the run. Wiecek had an issue yesterday when warming up his tires for his second qualifying run that caused him to miss the run, this could be the same issue returning for him.
WIECEK LEAD – Wiecek called his competition timeout, looks like the output shaft from the transmission is broken and the team was unable to fix the car within the allotted time. Bakchis will move on to the Top 16 after making a quick bye run.
Fredric Aasbo vs. Chris Forsberg
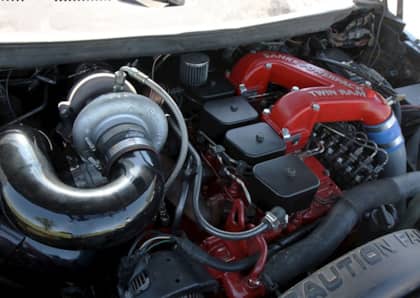
Forsberg is finally in the V6 twin turbo car that he was supposed to debut earlier in the year, but reliability problems kept the team from debuting the car until now. This is a battle between the past two Formula Drift champions, Aasbo has been the winner more often than not when facing Forsberg in the past. Let’s see how this battle shakes out.

AASBO LEAD – Aasbo is high on the bank, Forsberg is very close to Aasbo through the entire bank and across the switchback. Forsberg keeps the gap close entering the second turn, but goes a bit deep on the line while Aasbo is able to pull away midway through the turn. Aasbo doesn’t go deep into the touch-and-go at the exit of the second turn, Forsberg isn’t able to close the gap down through the rest of the course. Aasbo finishes with around a three car length gap, while Forsberg had a shallower line around the final turn. Perhaps a slight advantage to Aasbo, but not much.
FORSBERG LEAD – Forsberg with a good initiation, Aasbo isn’t quite as close to Forsberg on the bank but maintains much better proximity entering the second turn. Forsberg has a good line and angle around the second turn and switchback, although he leaves the second outside zone a bit earlier than the judges wanted to see, Aasbo is keeping good proximity in the chase run. Around the final turn, Forsberg’s car appears to grip up a bit and lose speed and angle. Forsberg maintains drift around the final turn, but nearly straightens out. Aasbo tries to adapt and nearly loses drift himself. Two judges vote for Aasbo to move into the Top 16, while one judge votes for a “One More Time.” Aasbo will be moving on.
Juha Rintanen vs. Jhonnattan Castro
RINTANEN LEAD – Rintanen initiates high on the bank and maintains the high line all the way around the turn. Castro has a big gap after initiation, but is able to close the gap down due to Rintanen having big steering angle and taking the higher line. Castro keeps the gap much closer around the second turn, Rintanen’s car looks much more stable than Castro’s and appears to be much more predictable. No major mistakes from either driver around the second half of the course, probably a slight advantage to Rintanen for how strong he was on the bank.
CASTRO LEAD – Castro has a much better initiation, Rintanen is also closer to Castro than in the previous run. Rintanen has a major correction coming across the switchback, Castro stays consistent around the second turn while Rintanen has another mistake midway through the second turn and loses drift again while on a shallow line. Castro is looking strong coming to the second switchback but Castro spins out before the final turn. Both drivers are determined to have an incomplete on this run, which means the drivers will be judged based solely on the first run. Rintanen earns all three votes from the judges and will be moving on to the Top 16.
Justin Pawlak – Bye Run
PAWLAK LEAD – Pawlak’s rear bumper looked like it had been pushed through an oversized cheese grater after yesterday’s practice and qualifying session. The team is on their backup motor after hearing a tick in the valvetrain on Thursday evening, but that hasn’t slowed Pawlak down. With Gittin Jr.’s win earlier, all three Ford Mustangs will be in the Top 16 drivers' introductions.
Matt Field vs. Jeff Jones

FIELD LEAD – Field with a big entry and stays high on the bank, Jones is around three car lengths behind Field through most of the bank. Field lost his rear bumper on the big bank, then his side skirt jars lose coming off the big bank. Jones closes the gap just before the second turn, then maintains good proximity around the rest of the course. Field is a bit off the line entering the third and final turn, but otherwise, Field has a very strong run overall. Jones didn’t have any major mistakes except the lack of proximity and lower line on the big bank.
JONES LEAD – Jones pulls to the line, but Field has to pull off course. We find out that Field de-beaded a tire, and he’s not allowed to re-bead the tire due to Formula Drift rules that states tires must last two full runs. Jones will have a bye run, and Field will miss the Top 16 tandems for the first time all season. All three judges vote for Jones — possibly the easiest vote they’ve had all afternoon.
Matt Coffman vs. Kyle Mohan
COFFMAN LEAD – We had a restart initially due to Coffman jumping the starting light, but have a good run after that. Coffman initiates high on the bank with tons of steering angle, Mohan is on a much lower line and is much later to initiate. Coffman keeps around four car lengths of lead around the bank, but closes it down to around two car lengths around the second sweeper. Coffman continues with big steering angle and smooth transitions across the second switchback, Mohan has shallow angle and line around the final turn. This will likely be a big advantage to Coffman as Mohan had several moments of low angle and poor line.
MOHAN LEAD – Mohan has a much better initiation on his lead run, but still a bit lower on the bank than Coffman was. Coffman is around two car lengths behind Mohan around the bank and maintains consistent proximity through the switchback and around the second turn. Mohan has a pretty noticeable steering correction midway through the second turn and is shallow again entering the final turn. Coffman looks calm and consistent around the track, while Mohan appears to be struggling. All three judges vote for Coffman to move on to the Top 16.
Alec Hohnadell vs. Robbie Nishida

HOHNADELL LEAD – Both cars are slow off the line; it looks like Hohnadell might be having some mechanical issues. Hohnadell finally initiates well past the normal initiation point, midway through the bank. Nishida waits for Hohnadell to initiate and then initiates behind him, but Hohnadell pulls out of drift before the end of the bank and drives off course. Nishida continues to drift the bank and slides across the switchback in front of the fans, then shuts it down himself. This will be an un-chaseable run from Hohnadell; Nishida is given a major advantage.
NISHIDA LEAD – Hohnadell pulls off course and doesn’t return for the second run, having previously used his competition timeout yesterday prior to qualifying. Nishida has a bye run and will earn his first Top 16 appearance of the season.
FORD TOP 16
Before we sing the National Anthem, seventeen young enlistees for the United States Air Force are sworn in by one of the most enthusiastic Air Force employees we’ve seen. The National Anthem was sang by a current Air Force member, and was one of the better renditions we’ve heard this season as well. The sixteen remaining drivers are introduced, Chelsea DeNofa is handed a "bag o' cash" with $500 in it for qualifying first overall, and we’re ready for battle! Unfortunately, due to tight quarters at the track, there isn’t room for the cars to do their normal donuts and burnouts to get the crowd amped up.
DeNofa vs. Yoshihara

DENOFA LEAD – DeNofa has a great initiation and stays high on the bank along the guard rail, Yoshihara isn’t far behind him but on a slightly lower line. DeNofa shows big steering angle across the switchback, and has much more steering angle around the second turn. Yoshihara is able to maintain good proximity despite having less steering angle, but has a pretty major steering correction near the second switchback. DeNofa finishes the run with more big steering angle and tire smoke, likely an advantage to Denofa after this run.
YOSHIHARA LEAD – Yoshihara has a similar entry and line around the big bank, DeNofa is a bit lower on the line but has good proximity. Coming across the switchback, DeNofa over-rotates and spins out, while Yoshihara continues on. All Yoshihara has to do is maintain drift around the rest of the course, and he does so smoothly. This is very unfortunate for DeNofa as he had all the makings of his first Top 8 appearance of the season before the spin. All three judges vote unsurprisingly for Yoshihara to move on to the Great 8.
Essa vs. Gittin Jr.

ESSA LEAD – Essa has a faint entry close to the guard rail, Gittin Jr. initiates not far behind Essa but shuts it down shortly after. Not sure if there was a mechanical issue for Gittin Jr. or just a mistake, but he will definitely earn an ‘incomplete run’ mark from the judges. Essa continues the run with plenty of tire smoke and steering angle, he will have a huge advantage entering the second run. Gittin Jr. returns to the start line ready for the second run, so whatever happened doesn’t appear to be terminal.
GITTIN JR. LEAD – Gittin Jr. intiiates and continues drift this time, Essa is about a car length behind him. Essa has a steering adjustment on the switchback, but only a minor mistake. Gittin Jr. has plenty of tire smoke and steering angle around the course, Essa has a slightly shallower line and angle around the second sweeper but otherwise keeps around two or three car lengths of proximity behind Gittin Jr. around the entire course. All three judges vote for Essa to move on to the Great 8; both Nitto Tire Ford Mustang RTR drivers are knocked out in the first two runs of the Top 16.
Bluss vs. Hamilton
BLUSS LEAD – Bluss initiates high on the bank, Hamilton initiates close behind him but loses drift and crashes into the guard rail. Bluss continues through the course and finishes cleanly, Hamilton has to be towed off course. Hamilton still has his competition timeout remaining, but the car may not be repairable in the narrow five minute window.
HAMILTON LEAD – Hamilton’s vehicle is too damaged to continue, so Bluss gets a bye run. All three judges give Bluss a win into the Great 8.
Deane vs. Heilbrunn

DEANE LEAD – This is a rematch from the Long Beach finals. Deane initiates high on the banking; Heilbrunn is very close behind him with similar line and angle. There’s around a car length of gap between the two cars. Both drivers get through the switchback cleanly and slide into the second turn. Deane has an almost perfect line around the entire track, while Heilbrunn maintains a single car length of proximity from Deane but with slightly shallower steering angle. Looking at the replay, Deane really has more steering angle at nearly every turn around the track, but Heilbrunn’s ability to stay close to Deane means he’s not at too big of a disadvantage. If Heilbrunn can open up a gap on his lead run, he may be able to sway the judges to vote for him.
HEILBRUNN LEAD – Both drivers initiate almost simultaneously, Heilbrunn is very high on the brank again while Deane is a bit lower on the bank but quickly works his way to the high line behind Heilbrunn. Deane keeps close proximity around the bank, then leaves just enough room for Heilbrunn to transition across the switchback. Heilbrunn slides a bit off the line and finds his way on the wrong side of the transition into the second turn, sliding up onto the banking. Deane adjusts nicely and passes Heilbrunn on the apron, taking the lead and finishing the run smoothly. Heilbrunn effectively beat himself on this run. All three judges vote for Deane to move on to the Great 8.
Tuerck vs. Bakchis

TUERCK LEAD – Tuerck initiates on a good line with good tire smoke, Bakchis starts out lower on the bank but keeps less than a car length of proximity around the entire bank. Both drivers keep a good line and plenty of tire smoke around the bank, cross the switchback smoothly, then enter the second turn. Bakchis dumps a ton of steering angle entering the turn, which slows him down a bit but he is able to hold the steering angle without over-rotating and continue in chase. Tuerck has another smooth transition across the second switchback and rounds the final turn smoothly, with around a two car length lead on Bakchis.
BAKCHIS LEAD – Bakchis Tuerck is very aggressive across the switchback and looks like he’s going to collide with Bakchis but saves it before he hits Bakchis, taking out the front clip in the process. Tuerck is able to recover nicely and stays in chase behind Bakchis, albeit on a slightly shallower line. Tuerck stays aggressive, again surging ahead to try and close the gap to Bakchis as they enter the third turn, but is on an awkward line and misses the ‘touch and go’ area. Bakchis finishes strong across the finish line. The judges request multiple replays to try and understand whether Tuerck was over-aggressive with his move across the first switchback, or whether Bakchis was slowing earlier than he should have which caused Bakchis’ surge to look more awkward. This incident is in almost the identical area that the Forrest Wang vs. Chris Forsberg collision happened last season, it will be interesting to see how the judges play this out. All three judges vote for Bakchis to move on to the Great 8. One of the judges explains that Bakchis didn’t appear to be slowing down too much; Tuerck was too aggressive on the throttle to try and close the gap.
*UPDATE – After the Top 16 had ended, we hear that there was a protest around this battle. Ryan Tuerck’s team protested that Bakchis slowed down with a lack of tire smoke in an area that wasn’t a slowdown zone. After review, two judges reversed their decision and voted for a “One More Time,” while one judge was happy with the vote for Bakchis. This means we will require a “One More Time” battle to settle this.

One More Time
TUERCK LEAD – Tuerck initiates on a mid to high line, then uses the left foot brake briefly to get the car rotated. Bakchis uses his manji entry to suck in tight to Tuerck shortly after initiation. Both drivers slowly let the car carry up to the high line, riding the top of the bank near the guard rail by midway through the bank. Tuerck exits the bank around three car lengths ahead of Bakchis, Bakchis brakes late into the second turn and uses a slightly shallower line to suck in close to Tuerck’s door. Bakchis transitions early exiting the second turn to get even closer to Tuerck, both drivers have a smooth line around the final turn. Good lead run from Tuerck, a good chase run from Bakchis. Perhaps a slight deduction from Tuerck for his line in a few locations, and a slight deduction from Bakchis for the lack of proximity across the switchback and shallow line around the second turn. Overall, this is likely close to being an even run for both drivers.
BAKCHIS LEAD – Bakchis is high on the bank, while Tuerck is a bit lower on the bank. Bakchis takes out the inside clip on the switchback while Tuerck isn’t as close to the clip. Bakchis opens up a big gap through the second turn, Tuerck is unable to track him down. Overall, the lack of proximity from Tuerck will likely work against him. One judge votes for Bakchis, while the other two vote for a “One More Time.” We’re going to see this tandem again!
One More Time x2
TUERCK LEAD – Both drivers initiate almost simultaneously, Bakchis is hot on Tuerck’s door through the entire bank. Bakchis allows Tuerck to transition, then sucks in tight on Tuerck’s door again through the entirety of the second turn. Tuerck’s line around the track is very good, with tons of tire smoke, but the proximity from Bakchis is very impressive.
BAKCHIS LEAD – Bakchis is high on the bank, Tuerck again is a bit shallower on his line but only a car length behind Bakchis. Tuerck again leaves just enough room for Bakchis to transition, then stays on Bakchis through the second turn. Bakchis has a nearly perfect line across the second switchback and fills the touch-and-go nicely before finishing across the finish line. Tuerck didn’t have anywhere near the same amount of proximity as Bakchis did in chase. One judge votes for Tuerck; the other two vote for Bakchis.
Aasbo vs. Rintanen

AASBO LEAD – Aasbo is very high on the bank, Rintanen on a much shallower line around the entire bank, but only two car lengths behind Aasbo. Aasbo comes off the bank cleanly and transitions across the switchback, Rintanen takes out the inner clip on the switchback. Aasbo continues the run with a good line and tons of tire smoke, Rintanen transitions late on the second switchback and finds himself completely off course at the touch-and-go before the third turn. This will be an incomplete run for Rintanen, while Aasbo’s run looked like a high scoring qualifying run. There will be a big advantage for Aasbo after this run.
RINTANEN LEAD – Rintanen has a much better line on this initiation, Aasbo is only a car length behind Rintanen through the bank. Rintanen is much smoother on this switchback and avoids taking out the clipping point, Rintanen enters the second turn with around a two car length lead. Aasbo has shallow steering angle, but a good line and is never more than two car lengths behind Rintanen. Rintanen has the right line this time around the third turn, but it won’t be enough to overcome the mistakes in his first run. All three judges vote for Aasbo to move on to the Great 8.
Pawlak vs. Jones

PAWLAK LEAD – Pawlak is high on the bank, Jones is taking a bit of a more conservative line and falls back to around four car lengths behind Pawlak. Both drivers transition smoothly onto the flat bottom, Pawlak continues with good steering angle on the outside line of the second turn while Jones used a shallower line and shallower steering angle to try and close down the gap without much success. Pawlak has a super snappy transition across the switchback and into the final turn, both drivers finish smoothly. No major mistakes from either driver, but Pawlak had a much better line around the track and the lack of proximity from Jones will likely be considered a disadvantage.
JONES LEAD – There’s a false start due to Jones crossing over into Pawlak’s lane prior to initiation, which impeded Pawlak’s line. Both drivers drifted most of the course before this could be red-flagged, so they were given a chance to change tires to be fair to both drivers. On the restart, we have a clean initiation from both drivers. Neither is very high on the bank but there’s only around two car length between the two cars. Both drivers look smooth through the switchback and the second turn, Jones has around a two car lead going into the third turn when Pawlak throws a snappy transition again in the same area. The transition puts Pawlak off the line as he isn’t able to get out to the touch-and-go section, and he has to cut the third corner a bit shallow. One judge votes for Pawlak, while two judges vote for a “One More Time."
One More Time
PAWLAK LEAD – Pawlak has a good initiation and is high on the bank with tons of tire smoke, Jones is following on a slightly lower line around two car lengths behind Pawlak. Around the entire track, Pawlak has more steering angle while Jones maintains consistent proximity, if there’s an advantage for either driver it’s probably Pawlak. There’s a good chance that they’re close to even after this run.
JONES LEAD – Jones is a bit higher on the bank this time, Pawlak is only a car length behind Jones. Both drivers are smooth around the bank, Jones has a clean transition across the switchback while Pawlak over-rotates and can’t recover. Jones enters the second turn solo as Pawlak backs out of the throttle and coasts off the course. Jones finishes the final two turns smoothly and will take the win into the Great 8. All three judges vote for Jones to move on to the Great 8.
Coffman vs. Nishida

COFFMAN LEAD – Coffman with a good initiation, taking the high line around the bank with tons of steering angle. Nishida is around two car lengths behind Coffman but is on a lower line with much shallower steering angle. Coffman has a smooth transition across the switchback and a good line around the second sweeper, Nishida has a good chase but still around three car lengths behind Coffman for most of the run.
NISHIDA LEAD – Coffman is sideways as the chase car before Nishida can initiate, but both drivers have a good line in the bank. Nishida taps the wall at the end of the big bank, but powers through it and continues across the switchback. Coffman stays around two car lengths behind Nishida around most of the track. Nishida’s lap looks smooth, but a bit conservative on the line and steering angle while Coffman looks dialed in with his S13. All three judges vote for Coffman to move on to the Great 8. This is Jones’ first Great 8 appearance in his ninth season. He will be excited for the next round!
NOS ENERGY DRINK GREAT 8
Essa vs. Yoshihara

ESSA LEAD – Essa high on the bank, Yoshihara is on a much lower line around the bank. Yoshihara loses a lot of angle coming off the bank and might have completely lost drift through the switchback. Essa has good smoke and angle around the second turn, and keeps the proximity down to around two car lengths around the entire second turn. Essa finishes the final turn with plenty of tire smoke and steering angle, while Yoshihara is shallow around the final inner clipping point. This will likely be a major advantage to Essa.
YOSHIHARA LEAD – Yoshihara is higher on the bank on his lead run than in chase, Essa is around two car lengths behind Yoshihara through the bank. Essa has slightly shallower steering angle around the second turn but keeps consistent proximity to Yoshihara. Yoshihara looks much smoother on his lead run and has a much better line overall. All three judges vote for Essa to move on to the Final 4.
Bluss vs. Deane
BLUSS LEAD – Bluss is very high on the bank and taps the guardrail at least once if not twice. Deane was just a single car length behind Bluss, initially starting on a lower line but sliding into the correct line quickly. Deane is aggressive on the chase, sacrificing line a few times to maintain close proximity. Bluss gets out to the touch-and-go before the third turn while Deane takes a shallow line and ignores that touch-and-go to stay close to Bluss. Some small compromises from Deane to stay close to Bluss, but overall, the proximity Deane had is often promoted over the superior line that Bluss had.
DEANE LEAD – Deane is equally high on the bank, Bluss is equally close in proximity behind him. Both drivers have nearly equal steering angle across the switchback, Deane is on the outside line around the second turn while Bluss is a bit shallower in the second run. Deane gets out to the touch-and-go zone while Bluss stays close to Deane. All three judges vote for Bluss to move on to the Final 4. We get the explanation that the sacrifices Deane made in line were noticeable, and Bluss was able to maintain similar proximity in chase without sacrificing as much of his line.
Aasbo vs. Bakchis

AASBO LEAD – Aasbo has a nice high initiation, Bakchis initiates a bit later but sucks in very tight to Aasbo. Wow, it looked like there was nearly contact by Bakchis but he was able to narrowly avoid it! This was one of the most aggressive chase runs we’ve seen today, especially on the early part of the bank which can be one of the most inconsistent as far as how the drivers control the car getting to angle. Aasbo’s car really accelerates coming off the bank and across the switchback, opening up a three car gap. Bakchis uses shallower steering angle on the switchback and late braking into the second turn to close the gap down to less than a car length by midway through the second sweeper. Aasbo has a great line and steering angle, but the story of this run was clearly the proximity in chase from Bakchis.
BAKCHIS LEAD – Bakchis is high on the bank, but Aasbo is less than a car length away. Bakchis extends the lead to around three car lengths through the switchback, but has a slight steering correction transitioning back before the second turn. Aasbo uses that steering correction to suck in tight to Bakchis. Overall. we’re seeing Bakchis with a nearly perfect line around the course, while Aasbo has nearly perfect proximity. All three judges vote for a “One More Time.” We’ll see this tandem battle again!
One More Time
AASBO LEAD – Aasbo with a good initiation, Bakchis again closes the gap down to just inches with Aasbo midway through the bank and keeps similar proximity through the end of the bank. Aasbo opens up a slight gap to around a car length and a half across the switchback, but Bakchis stays tight to Aasbo around the second turn. Aasbo has a great line around the track, but the story of this run is really how magnificently Bakchis is keeping proximity to Aasbo in chase.
BAKCHIS LEAD – Bakchis has an initiation high on the bank, Aasbo isn’t nearly as close in proximity. Bakchis continues across the switchback cleanly, Aasbo continues to chase until midway through the second turn when Aasbo loses drift and cruises across the final switchback and final turn. Bachis finished the run smoothly, Aasbo will get an incomplete on this run. All three judges vote for Bakchis to move on to the Final 4.
Coffman vs. Jones
COFFMAN LEAD – Coffman has a good initiation while Jones is much later to initiate and on a shallower line. Jones is around a single car length behind Coffman for the entire second turn, leaving just enough room for Coffman to transition before sucking in tight to him again entering the third turn. Midway through the final turn, Jones slows and pulls off; this will be an Incomplete run for him. Coffman finishes cleanly, so this will be a big disadvantage for Jones.
JONES LEAD – Jones has a better initiation on this run, Coffman looks to be taking it a little conservative but still maintaining pressure. Jones has a good line on the bank and through the second turn, but takes out the inner clipping point at the second switchback. Coffman stays around two to three car lengths behind Jones through the course, but without any major mistakes. All three judges vote for Coffman to move on to the Final 4.
BLACKVUE FINAL 4
Essa vs. Bluss

BLUSS LEAD – Bluss high on the bank, Essa starts on a lower line but closes the gap nicely. Bluss has a good transition across the switchback, Essa transitions almost perfectly just inches from Bluss’ rear bumper and both drivers stay smooth through the second turn. Essa is a bit shallower on his line but stays close to Bluss through the turn. There’s a bit of a sacrifice in line for Essa, but the proximity looks great!
ESSA LEAD – Essa is much higher on his lead, Bluss has very shallow steering angle but is close to Essa. Essa has a great line with tons of tire smoke, but Bluss is noticeably shallower on steering angle in multiple areas around the track. Bluss takes out the inner clip on the second switchback, while Essa finishes his run cleanly with no noticeable mistakes. All three judges vote for Essa to move on to the Finals. Bluss will earn third place as he has outqualified both Bakchis and Coffman.
Coffman vs. Bakchis
COFFMAN LEAD – As Coffman is pulling to the starting line, his car is leaking fluids. He will call his Competition Timeout and be towed back to the pits. We see the countdown on the screen, and see Coffman’s car firing up nearly as the clock strikes 0 and pulling out of the pits. We find out that Coffman missed the cutoff by around 15 seconds. The work had completed, but the car was not running and on the way to grid, so he was not allowed to continue. Bakchis takes a solo lap and earns an appearance in his fifth career final, his first of the 2017 season. All three judges vote for Bakchis to move on to the Final Battle.
BLACK MAGIC FINAL BATTLE
Essa vs. Bakchis
It’s been nearly 30 minutes since we last had a tandem battle, and the track has changed considerably. The sun has completely set, and the lights are now on at the Wall Speedway track for the first time in Formula Drift history. Bakchis and Essa have met six previous times, with each driver winning three previous matchups. The most recent matchup happened in 2016 at Texas in the Top 16, and Bakchis earned the win. Both of these drivers are now back in championship contention, and the extra 20 championship points that can be earned in this round would go a long ways towards that contention.

ESSA LEAD – Essa initiates fairly high on the bank, Bakchis starts his manji entry even before Essa is sideways. Tons of steering angle and a good line from Essa, Bakchis is around a car length behind Essa through the bank. Essa has more steering angle across the switchback, Bakchis again uses a late braking technique to close the gap entering the second turn sweeper. Essa keeps around a two car lead ahead of Bakchis through the entire second turn sweeper and across the second switchback, which is more of a gap than previous drivers have had against Bakchis. This was a great run from both drivers, really no major mistakes from either driver.
BAKCHIS LEAD – Bakchis initiates a bit lower on the bank than Essa did, Essa is around a car length behind him through the entire bank. Coming off the bank, Bakchis takes out the front clipping point on the switchback, but behind him, Essa’s car washes out and he loses drift near the switchback clip. Bakchis continues into the second turn sweeper while Essa drives off course. This may be a mechanical issue from Essa, but will definitely be an incomplete run. Bakchis just has to keep it together to earn the win, and he finishes the final two turns in drift with plenty of tire smoke.
ROUND 4 FINAL STANDINGS
We have a winner! For the second consecutive event, Bluss will earn the third place position on the podium and has moved up to sixth overall in the championship. The winner of the Wall Speedway round is announced as Odi Bakchis — rather unsurprisingly due to Essa’s Incomplete run. During the winning interview, we find out that Bakchis has blown his motor as he was crossing the finish line, and would have been unlikely to continue if there was another run. This was the second blown motor from Bakchis as he also blew up his primary engine during qualifying. But he’s now holding the carbon fiber first place trophy, so the mechanical losses will be forgotten.

The win is the third of Bakchis’ career, and he now moves up to fifth place in the championship standings, 87 points behind James Deane. Essa now sits in second place overall, just 56 points behind Deane. The top seven drivers in the series are separated by less than 100 points, with another six drivers less than 150 points behind Deane. We’re now officially halfway through the Formula Drift season, and the championship is still very much up in the air. No driver has made it to the Great 8 in every round, and only five drivers have made it to the Top 16 in each round.