Essential Off-Road Food Safety Tips: Are You Optimizing Your Food Storage for Long-Term Overlanding?
Are you a weekend camper, a seven-day adventurer, or planning a future filled with overland exploration? Either way, you’ll need the right cooler to chill your food and beverages for the entirety of your trip off the grid. Fortunately for you, I’ve experienced a fair share of coolers across all price ranges, so you can learn from my mistakes and start off with the best option for your specific needs. Will my five coolers live up to what each manufacturer promises? We’re about to find out in the ultimate race to a liquid finish.
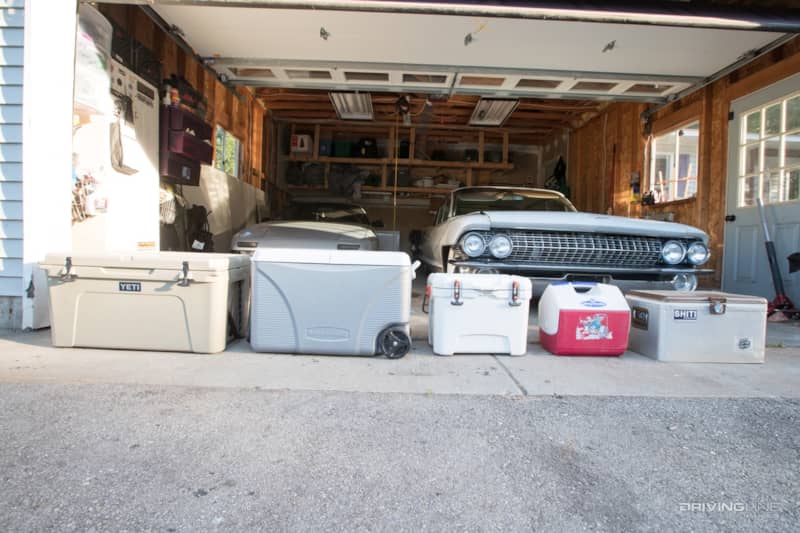
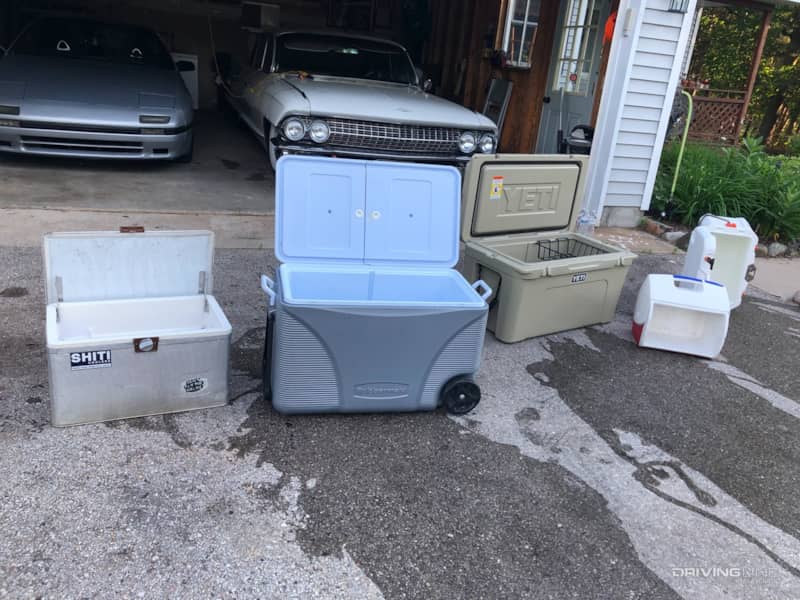
The lineup includes the world-renowned Yeti cooler, an Ozark Trail knock-off brand, and a mid-grade Rubbermaid. Just for the fun of it, I also tested out my “SHITI” cooler, an old school Coleman cooler that’s potentially as old as I am, and my trusty old weekend party icebox that is usually stored deep within the depths of my storage shed. I’m about to remember why I put it in the shed in the first place. Let the races begin.
The Cooler Test Setup
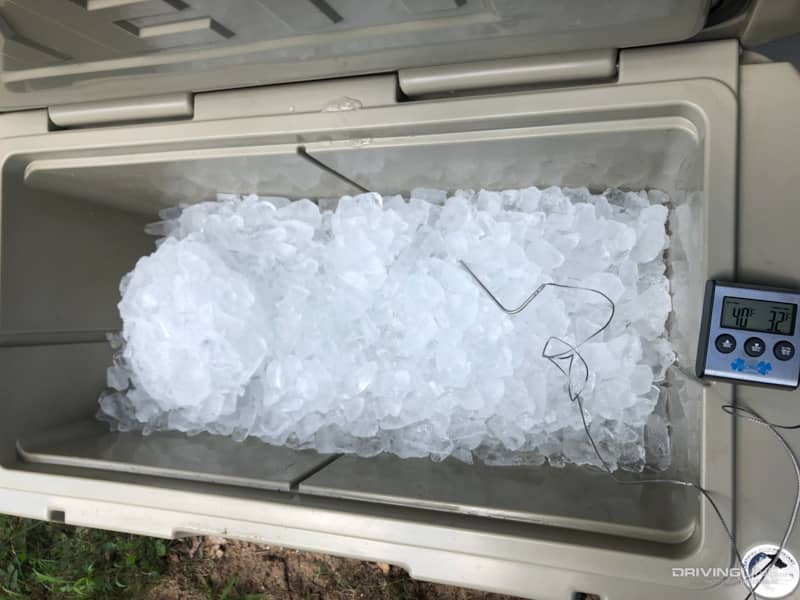
With 50-dollars’ worth of cubes, I filled the five coolers with ice, set up the thermometer probes and closed the lids at 9 am. The temperatures shot down to 25 ºF, then dropped to a steady 32-degrees in each within the first hour. Daytime temperatures throughout the experiment ranged from 82 and 90 degrees in full to partial sun with night temperatures dropping to an average of 65-degrees. The coolers were only opened once per day at noon for a quick temperature check and photograph.
Which Cooler is the Coolest?
The weekend party cooler, which I should have called “the overnighter” was already out of the running on day two. By noon, the water was warm enough for a relaxing foot soak of which I did not indulge. I would be disappointed, but to be fair, it’s really only meant to keep lunches or beach time beverages cold for a few hours. Aside from the overnighter dropping out of the running within 24 hours, the remaining four coolers held on to their low-30s temps through the third day. Ice remained solid in the Yeti through day four. The Ozark Trail began to flood, a water pool forming around the edges of the otherwise bonded cubes, but like the Yeti its temperature held steady at 32-degrees. The Rubbermaid showed signs of getting burned out with a temperature jump to 34-degrees and very little ice remaining.
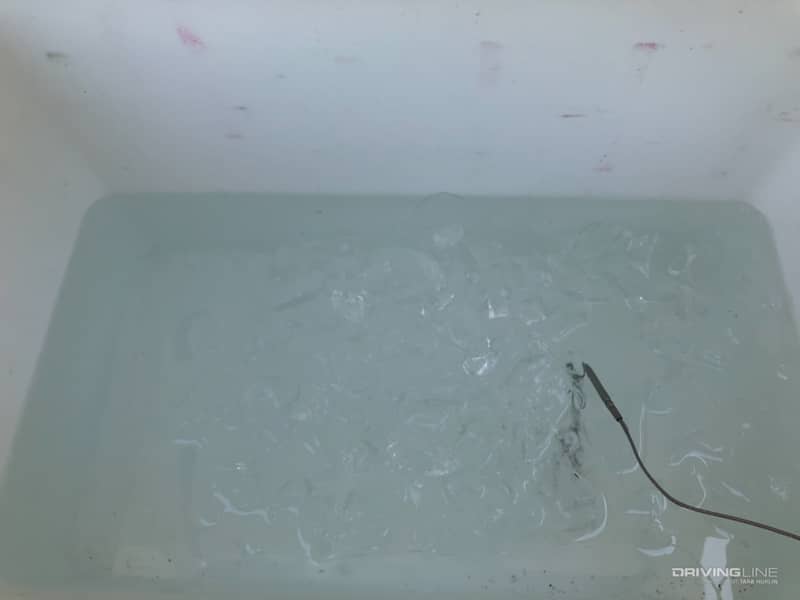
By day five, what was once ice in the ol’ SHITI cooler was liquefied at 48-degrees and poured over the sun scorched lawn. The SHITI cooler wasn’t so “SHITI” after all. It was a quality cooler in its day and held its own in the competition despite a rusty bottom and cracked seals, but there’s no way it can keep up with today’s modern insulation technology. The Ozark Trail still held onto a few floaters (ahem, ice cube remnants), but all was melted by the sixth day–an impressive result considering the brand’s promise of keeping cool for at least 4.5 days. The Rubbermaid became a 53-degree water bath on the seventh day, but it did (more than) hold up to its promise of keeping things cool for five days.
The Clear Winner
What about the Yeti? Frankly, I got bored waiting for it to tire itself out. Ice still remained on the 11th day, though there was more water than cubes. I admittedly forgot to check it on the 12th and 13th days, but on day 14 the water that remained was resting at 40-degrees. The Yeti clearly lost the race with its slow melting rate, which in this case is a good thing.
Notes to Consider...Get a Second Cooler
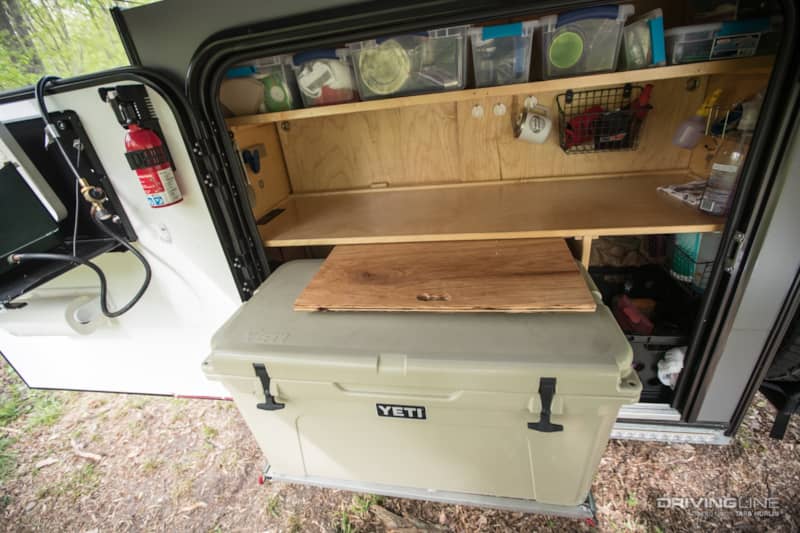
I’ll go ahead and state the obvious: for the experiment I only opened the coolers once per day, whereas in a real-life scenario, the boxes would be opened much more frequently and more cold air would escape. Speaking of the constant opening of coolers, especially for the sake of hydration, keeping your food and beverages separated into two coolers will keep your food colder longer, and at a more stable temperature. Digging underneath your food to find a cold beer at the bottom is not only a hassle but a major waste of energy. So, if you can afford it, a second cooler can really help your perishable food items stay colder and safer for longer. I used the off-brand Ozark Trail for beverages and the Yeti for food over the last year with great success.
Proper Packing Preparation and Optimization Techniques
To give your cooler(s) an advantage, take it out of the hot storage shed, attic or garage and into your home at least a day before your trip. You want the cooler’s starting core temperature to be as low as possible. If you’re really getting serious, fill it with cold tap water and sacrifice a bag or two of ice and let it sit for 12 hours. Dump the ice water right before you pack.
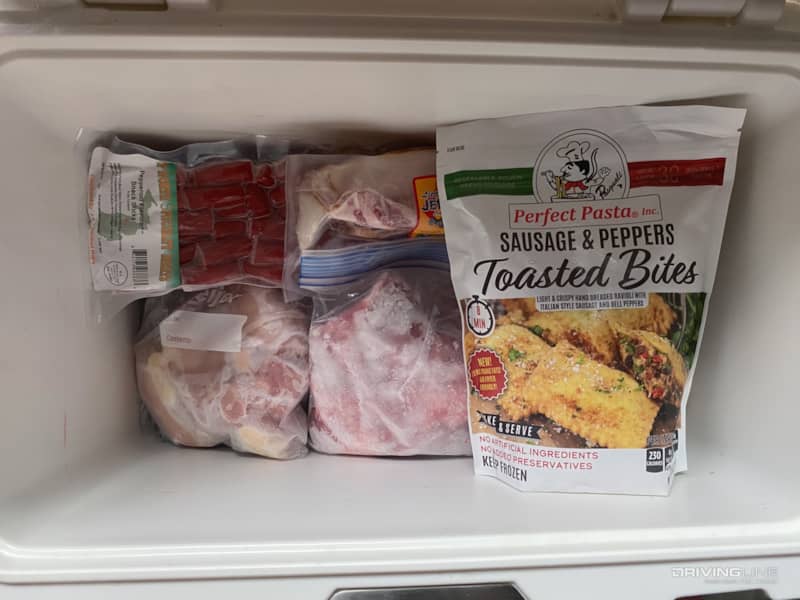
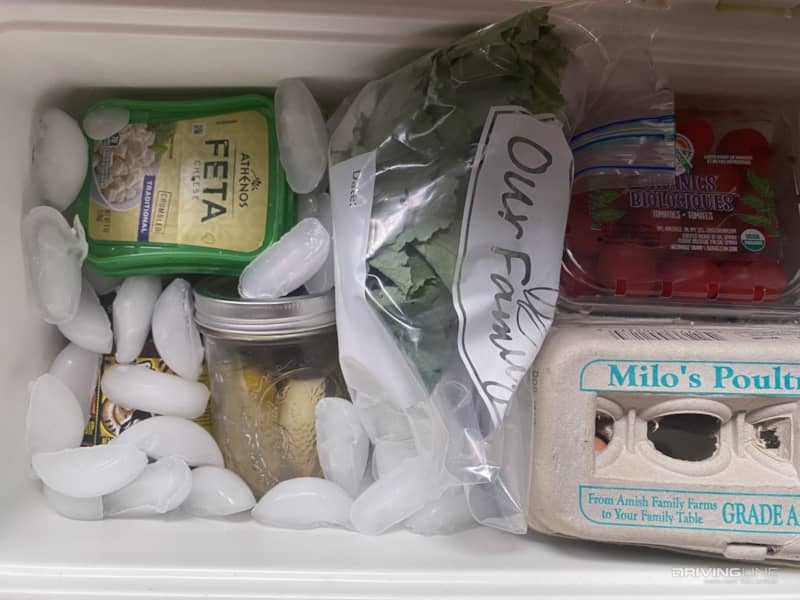
Transfer your food into re-sealable, leak proof containers, that way your cooler won’t reek of hot dog juice and more space is gained by eliminating excess packaging. For longer trips, you will want to freeze as much of your food as possible. Don’t freeze the food you plan to eat on the first night, but freeze those mid-trip shish kabobs and the celebratory steak you’re planning for the final day. You can also freeze water bottles as long as you empty ¼ of the liquid to allow for expansion. Everything that is not frozen should be refrigerated beforehand. No room temperature items should go into the cooler if you can avoid it, otherwise, you waste your ice by cooling things down instead of simply keeping already cold things cold.
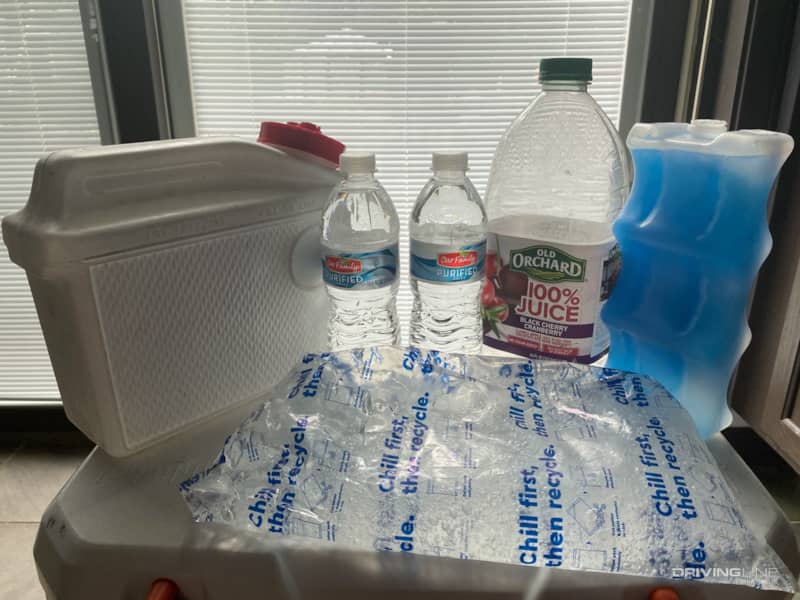
The best ice foundation is either block ice or large reusable freezer packs. Solid blocks of ice take much longer to melt. If you don’t have freezer packs, try re-using appropriately shaped juice jugs without handles or liter bottles. Place these at the bottom of your cooler and build on top of them, starting with your pre-frozen meats and ending with eggs and fragile produce.
Empty air space is the enemy when it comes to cooling longevity, and ice cubes do a great job at filling any empty space between food items. Dry ice is also an option for exceptionally long trips. It’s extremely cold and will freeze anything it touches (including fingers) so be very cautious. I’ve deemed myself too accident prone and have not turned to using the dry ice method.
Finally, once your rig is packed and ready to go, the cooler(s) should be the last thing to be placed into the vehicle. Avoid putting it in hot areas like a trunk and keep it in the shade as much as possible during the entirety of your trip.
Other Notes to Consider:
One more thing: though it may be tempting to drain the meltwater that your wieners are floating in, it has been scientifically proven that it is better to leave the melted water in the cooler rather than draining it.
More From Driving Line
- If you’re planning on glamping (er, camping) full time, you may consider an electric fridge/freezer built for the overlanding lifestyle. Follow me over here to see what it takes to power one with an off-the-grid solar setup.