Solar 101: The Ultimate Guide to Off-Road and Overland Solar Setups
Ah, to be nestled in a secluded landscape with nothing but the sights and sounds of nature. But just because you’re in the land of no reception doesn’t mean you won’t need to charge your phone. The battery may drain even faster from all of the photos and videos you’ll be capturing to show the rest of the world the beauty you saw. And, what about the luxury of having a portable fan to break the heat and mosquito swarms, or perhaps a bit of music for campfire ambiance?

There are a few solar-powered producing options that work well while off the grid. Direct charge solar panels make a good backup power source for small USB-chargeable devices, you know, like a cell phone, but they can be slow to charge and have limited capacity. Portable solar power stations such as this one from Antigravity Batteries are a dependable plug and play option—just choose your battery and solar panel, connect them and go. It works well for charging phones, laptops and other small devices, and it can be recharged via a wall jack, a car charger or by solar panel.

As you can see, I glamp a little more than the average bear. With plans to upgrade from a YETI cooler to a portable electric fridge/freezer, all the while depending on the sun to keep my cameras, drone and computer charged, I looked beyond the plug-and-play setups and ventured into a completely custom power station. All in all, the cost was around $700, and most of that expense was in the batteries, rather than in the solar panel, controller, and wiring harness.
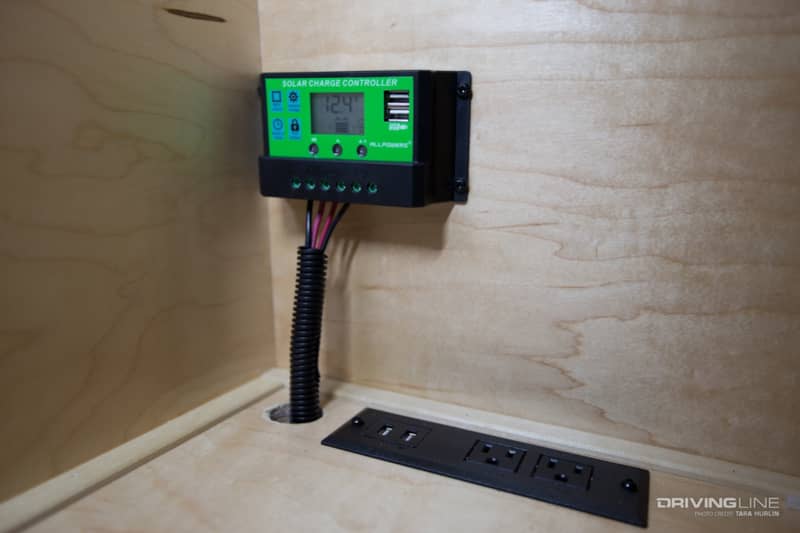
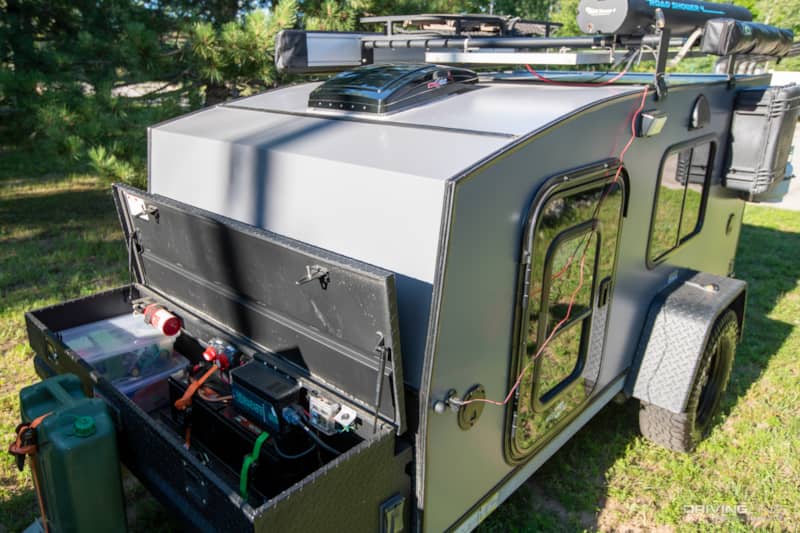
Planning the placement of the charge controller, solar panel(s) and batteries is half the battle— with the batteries being the bigger challenge out of the three. Put the battery weight as close to the axle if possible for optimal vehicle/trailer balance. The most convenient place on my trailer was inside of the front-mounted utility toolbox. Not ideal, but an upgraded suspension on my Tacoma fixed the “California lean.” As for the solar panel(s), most get mounted permanently to a roof rack, but some folks get fancy with extended wiring to make a removable panel that can be moved in the direction of the sun. (I’m not that fancy.) The charge controller should always be mounted as close to the battery as possible to minimize voltage drop and keep the controller’s and battery’s temperature the same (or close to). It’s best to keep it out of the elements, even if it’s waterproof, but I’m the “better safe than sorry” type.
Let the Sun Shine In: How to Choose Your Solar Set UP
The way you piece together the components needed for your solar setup depends predominantly on budget. If you have to pick and choose, spend more on the best controller and batteries you can afford first and upgrade the panel later if you so choose. The battery determines how much power you can store and for how long, and the controller protects and monitors that investment.
There are two popular types of solar controllers - PWM (Pulse Width Modulated) and MPPT (Maximum Power Point Tracking). PMW is the industry standard, while MPPT is the rising star of today’s solar systems with the most functional voltage and amperage, making between 10-30% more power compared to a PWM controller. I went with a less expensive PWM controller despite the advice I gave you above, but I have no complaints thus far. It’s important to note that not every controller will work with lithium batteries, so read the fine print before purchasing.
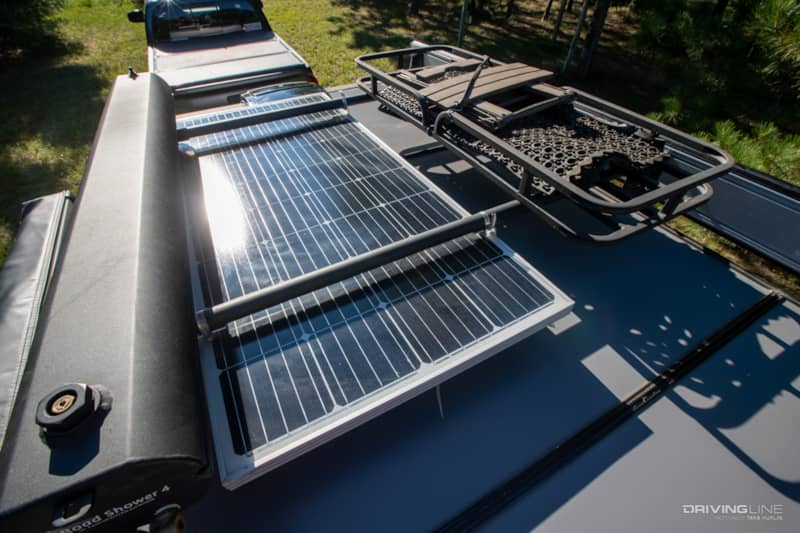
Solar Panels are rated by power output and efficiency. A 100-watt solar panel can produce around 30-amp hours per day. Estimating the power use from each of your devices that will be assisted by solar will give you an idea of which panel to choose and how many you need. Pick a panel that does not exceed the amperage of the controller. For example, if you have a 20-amp controller, select a panel or panel combination that produces 15 amps or less. Common control panels that you’ll run across in your search are polycrystalline, monocrystalline, and thin film panels. In short, polycrystalline panels are an older technology and less efficient than monocrystalline. Thin film panels are just as they sound: a low-profile approach to solar often used as thin sheets stuck to a roof’s surface. Of the three options, monocrystalline typically has the most power capacity and efficiency. I currently have a single 100-watt monocrystalline Renogy solar panel which works well, but it sometimes charges slowly during less sunny days. Because of this I am considering either a higher wattage panel or dual panels for the future.
Charging ahead: What to Know About Batteries for Portable Solar Power
Deep cycle batteries are the key component in the solar power storage system. There are three main types of batteries that are commonly used, and each has its own positives and negatives. For example, flooded or “wet” lead acid batteries have the longest track record in solar electric systems. They usually have the longest life and the lowest cost per amp-hour, too. But there’s a downside: regular maintenance in the form of watering, equalizing charges and keeping the terminals clean is required. I’m too lazy for that. Next option, please.
Sealed batteries, like the gel cell and Absorbed Glass Mat (AGM), are less maintenance intensive and more suited for setups on the move. Of the two, the AGM is your best bet. Gel batteries tend to lose power faster than AGM batteries, especially at lower temperatures, and though their Depth of Charge rating is typically greater than AGM, a gel battery must be charged correctly. If charged too fast, gas pockets form in its jelly-like innards which will decrease capacity and cause premature failure. AGM batteries present a longer lifespan and are more resistant to vibrations and extreme weather than gel cell batteries.
Some off-road rigs have restrictions on how much weight they can carry, and once all your gear is packed, the pounds add up quickly. This is where the more expensive lithium batteries come into play, but the benefits often outweigh the extra expense. Aside from being more compact and lightweight, deep-cycle Lithium-ion (or li-ion) battery technology is the most advanced and offers better, more stable charge and discharge speeds, and a longer lifespan.
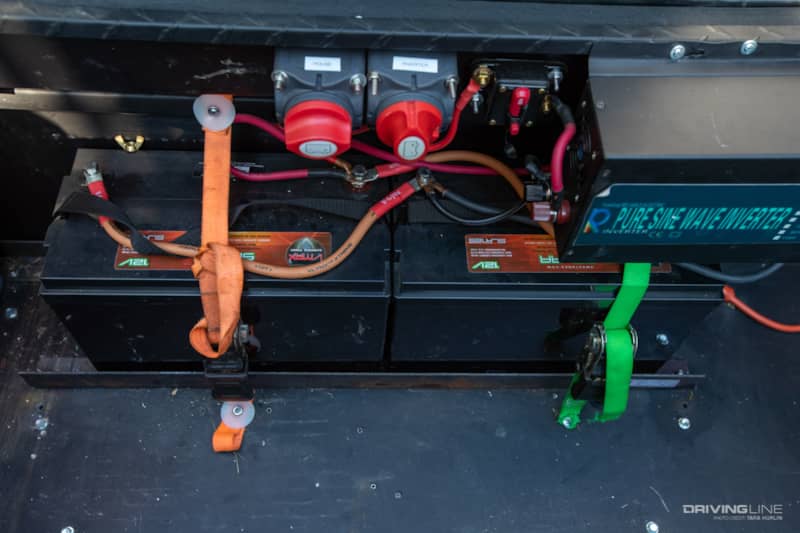
Before cashing in on a battery, compare each candidate based on its capacity (kWh), depth of discharge (DoD), round trip efficiency, and battery life warranty to find the best batteries for your system’s requirements. The higher the numbers the better on all accounts. My VMAX brand duo offers 225 amp hours each, totaling to 500 amp hours, which is plenty of juice to keep my cell phone, laptop, drone and camera batteries charged, and keep a fan running throughout the night. Why two batteries, you ask? Wiring two batteries together in parallel doubles the storage capacity instead of having a single ginormous battery with the equivalent amp rating pull all the weight.
Antigravity Battery’s battery trackers will help you to keep a close eye on your battery’s health. Speaking of, rumor has it that the company is aiming to have an ultra-lightweight lithium-ion solar rechargeable battery by SEMA 2020. When I first held one of their batteries at PRI last year, I almost ended up with my butt on the ground. Pro tip: When you go to lift an Antigravity Battery, don’t give it the normal heave-ho that a standard battery requires.
Connecting the Dots: Solar Charging Wiring
Is it too late to mention that you should consider the wiring type when selecting your controller and panel? The type of wiring harness needed depends on your specific application and components used. Most solar panels utilize the MC4 style plug, which is the case in my particular setup.
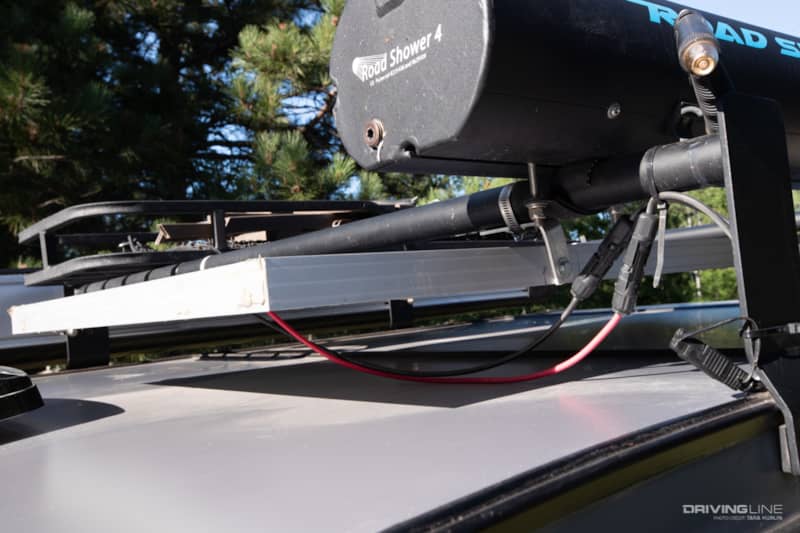
A weather-tight Zamp Solar plug is located on the outside of my off-road trailer, so a MC4 to SAE adapter cable was required to connect the solar panel to the trailer’s plug. That plug then routes to the controller, then forward and through the front-mounted storage chest to a fuse block that feeds the batteries.
Stored power is fed through an RV battery on/off switch and 60-amp breaker, which allows the battery’s power to be completely cut. When the breaker switch is on, power flows to the fuse box for light-use items like lighting, fans, usb charging stations and a future fridge/freezer outlet. A 600-watt power inverter, when activated, supplies power to two outlet locations—one inside the cabin and another routed to the rear “kitchen” area – for household devices that need 120-volt power.
Confused yet? There are lots of solar wiring how-to videos on YouTube, and every setup is a little different, so take your time exploring your options.
Now that your brain is full of information to ponder, let’s get some trail-riding therapy.