Painting your first car at home can be a fun and rewarding learning experience, or a complete nightmare. It all depends on your attitude and expectations.
Hopefully, you don’t have a delusional goal of creating a glass-smooth, 17-coat, deep-candy paint in your backyard. Because of the potential for contamination and mistakes, we generally don’t recommend using gloss paint for your first home paint job.
If you're interested in performing an at-home paint job, then you should probably forget about ever having your rig professionally painted. The prep work to remove whatever mistakes you lay down will likely be very time consuming and expensive. So, if you plan on having a real paint job someday, save your money and have a pro do it right the first time.
If you have accepted that you’ll be driving a 20-foot 4x4 (looks good from 20-feet away), then a backyard paint job is for you. Here are 20 tips that will help you cleanly fog a new coat on your 4x4:
1. The easiest paints to lay down are lusterless, satin and flat paints.
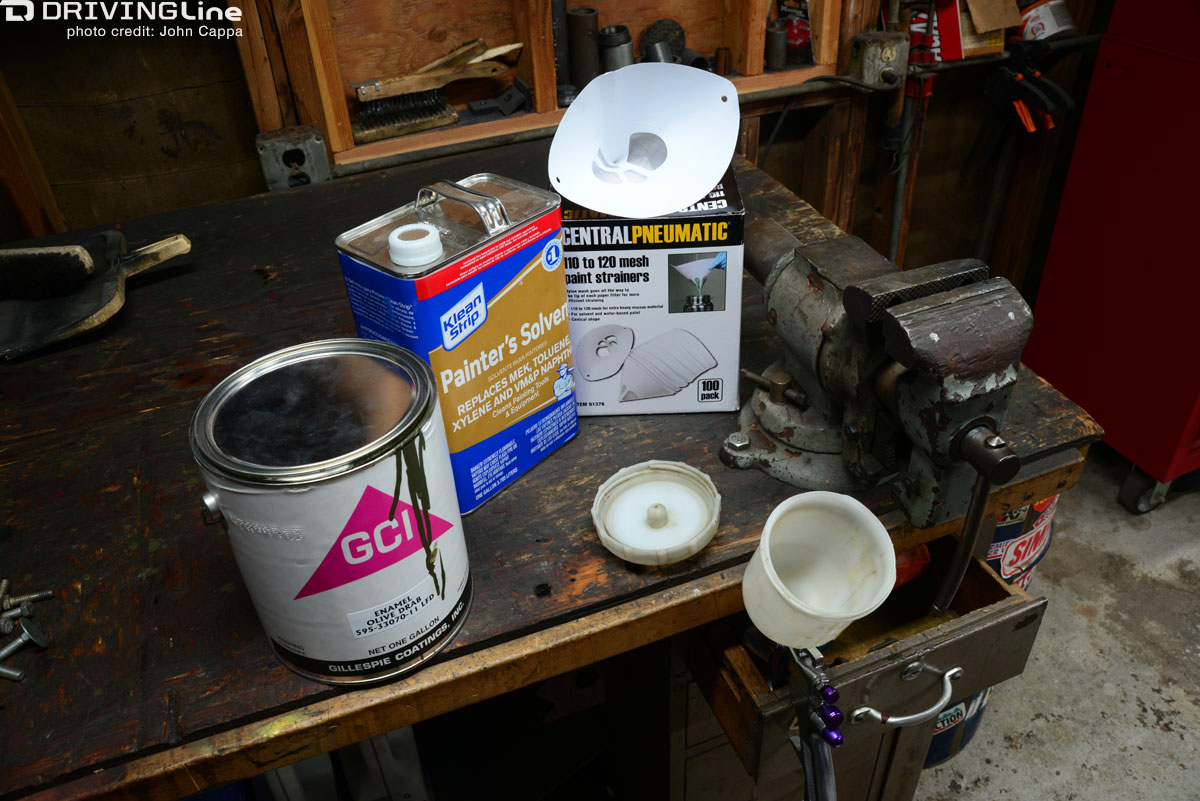
These finishes also hide imperfections in the body and your prep work, or lack thereof. We selected Gillespie Coatings Red Oxide Primer III and 33070 WWII Lusterless paint from Army Jeep Parts. There are many different period-correct military coatings to choose from. Also, lighter colors hide imperfections better than darker colors if that’s important to you.
2. As with any paint job, yours will only be as good as the prep work.
This is the least fun part of the process. It’s understandable why so many people skimp on it. If you sort of care how your paint job turns out, you can hit the whole vehicle with dual-action sander loaded with 220-grit. This will help knock out old chipped paint and other imperfections.
Prime any bare metal. At the very least, you should wash the vehicle, roughen up the surfaces to help the paint adhere (especially on the edges), and wipe it down with a wax and grease remover.
3. Pull off as many components and trim bits as you can.
It’s been our experience that it’s easier to remove things you don’t want painted than to tape them off and try to work around them with the paint gun.
4. Plan ahead and pick the proper time of year to paint your 4x4.
Watch the weather. Painting in wind, rain, and snow is as bad of an idea as it sounds. Some paints won’t cure properly in overly cold, hot, or humid conditions. Painting in spring is also not recommended since the air is often filled with bugs and pollen just waiting to land on your freshly laid paint.
5. Choose a proper location.
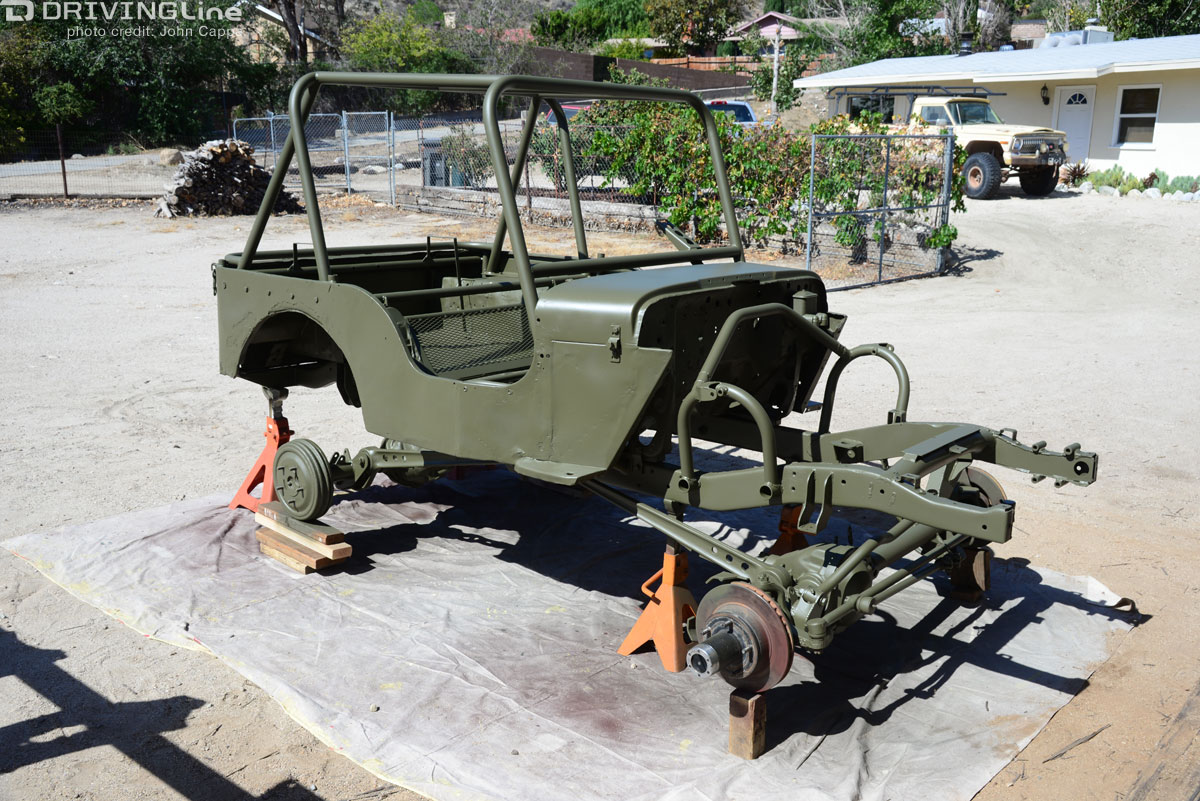
Painting over a lawn or under a tree will guarantee you’ll have lots of insects or leaves embedded in your paint. We live in a desert environment, so we painted our 4x4 in the summer, early in the morning before the sun had a chance to increase the air temperature. There are fewer bugs in our area at this time of day too.
6. We set up shop over dirt and didn’t have much of a problem with dust.
We laid down a large tarp before rolling the vehicle on top for painting. You can also wet the ground to help control dust if it’s a concern.
7. Avoid painting in direct sunlight.
It will cause dry spots. You can create a shaded temporary outdoor spray booth with a tarp or easy-up and masking film.
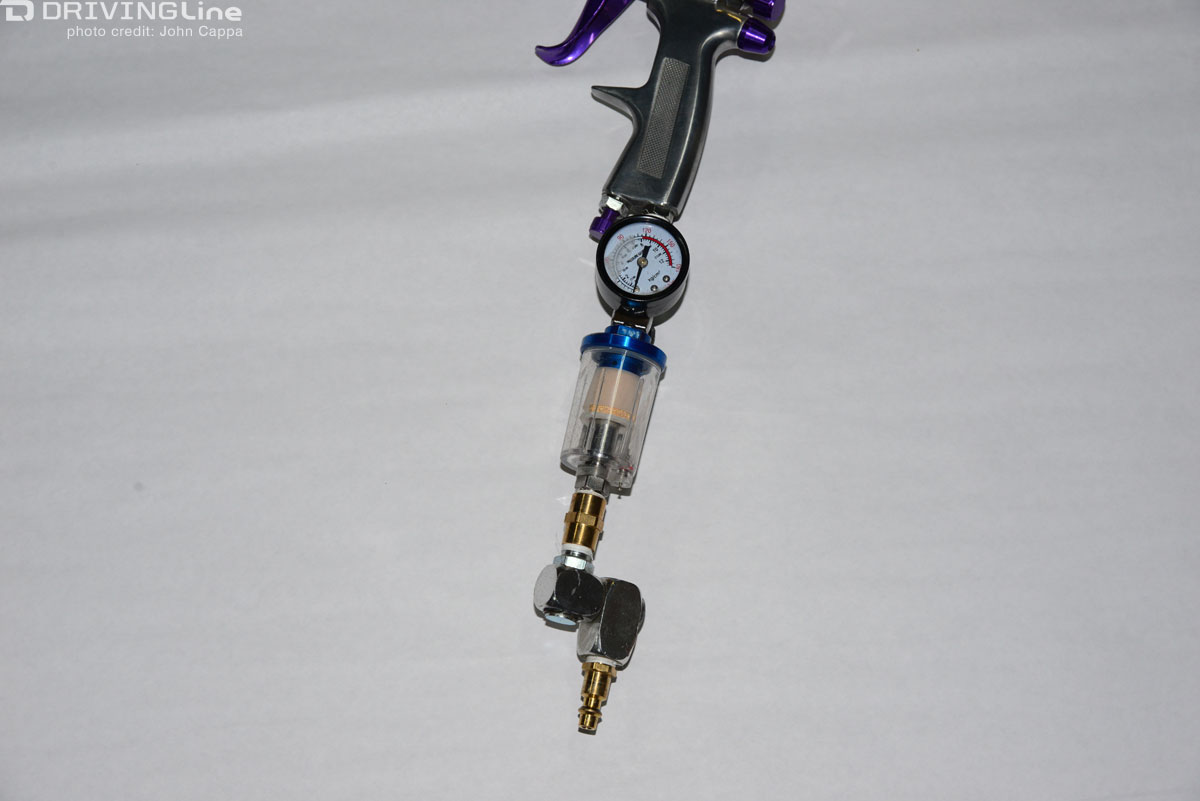
8. Install a water trap on the compressor.
It’s recommend that you install an inline filter on the gun itself too. Sometimes your air hose will have gunk in it that can work its way into the gun.
We also installed an inline regulator. A swivel end allows for more maneuverability of the gun at the end of the air line.
9: Some settling of the paint is normal.
Make sure it has been thoroughly stirred or shaken. Follow the thinning directions on the can and use the recommended thinner. One quart paint cups make mixing and pouring easier. You can find them at any paint store.
Find a place where you can comfortably hang or support the spray gun for refilling. Use a new paint strainer each time you pour paint into the gun or solid particles could clog the tip.
10. We used a Harbor Freight HVLP (high volume, low pressure) paint gun kit (part number 94572).
We found that the fan pattern on our larger 20-ounce gun used more air volume than our compressor and 3/8-inch airline could provide at the recommended 40 psi. So, we did most of our painting with the gun adjusted to the round pattern.
11. Don’t forget to wear a respirator.
A dust mask isn’t good enough. A decent disposable respirator only costs $15 to $30. We found this Gerson P95 maintenance-free dual cartridge respirator on sale at Harbor Freight for about $16 (part number 66554).
12. Practice on a piece of scrap material and play with the airflow and paint adjustments on the gun to find what works best for you.
Move the gun side to side and keep the surface you are working wet with paint. The gun nozzle should remain perpendicular to the surface as you move along.
13. Start from middle of your project and work your way out.
This way you’ll be less likely to drag your arm, leg, or airline over the wet paint and mess it up.
14. Hit the hard to reach crevices first and then spray your way around them.
The round spray pattern works best for tight spots. You may want to increase paint flow to get better coverage on wheelwells, frames, suspension parts, and axles.
15. We found that the round pattern also works best on rollcage tubing.
It seems to waste less paint. You can adjust the gun to reduce paint flow and slow down a bit, helping you avoid runs.
16. Larger flat panels are best painted with the gun adjusted to a fan pattern.
That is, if your compressor will support the required air volume.
17. Spray the backside of any removed parts and body panels first.
You can then flip them over and paint the front side while still tacky without making a mess that everyone will see. Of course, if possible, it’s always better to hang the panels so they can be painted all at once.
18. Multiple thin coats of paint are better than a single globbed-on coat.
Paint the entire vehicle at one time, otherwise it may look spotty. Follow the paint directions for curing time prior to adding another coat.
19. If you can, try to finish up in the driver area.
This will give you time to get better at painting elsewhere on the vehicle so you’ll have fewer imperfections to look at from behind the steering wheel.
20. Let the paint properly cure prior to handling the parts or removing any masking.
You may want to wait several days for the paint to fully cure before bolting things back together.
If you follow these tips, you should end up with a fine DIY paint job. Like anything, the more you practice, the better you'll become.
Want to learn another way to change the color of your vehicle? Here's how to do that without paint: vinyl wrapping.