How To: King Coilover Shock Rebuild
A well-tuned suspension can drastically improve the on- and off-road performance characteristics of a given 4x4. For racers, it can mean the difference between winning and losing. When it comes to easy ways to improve the suspension on your daily driven ‘wheeler or dedicated trail toy, a rebuildable shock is a great place to start. While you don’t have to be an elite motorsports driver to purchase some of the high-end suspension components, you will have to put in a little homework to get your suspension dialed.
One of the biggest advantages of a rebuildable shock is that it’s infinitely adjustable. Think your rig is ridding too rough? Well, you might need lighter compression valving. Do you notice that it unloads quickly in off-camber situations? This could be a sign that the rebound shims need to be swapped out with a thicker set. A rebuildable shock will give you the power to change these characteristics so you have a shock that works well for your exact needs.
Although, there are many variables to consider when tuning a suspension system, one of the most critical and common has to do with the shocks valving. When we refer to shock valving here, we are specifically referencing the valve packs that reside on either side of the valve piston. These valve packs, (also known as shim packs) are what moderate the flow of oil as it passes through the valve piston.
By adjusting the size, thickness, and amount of shims, you can effectively alter the vehicles compression (upwards shock motion) and rebound (downwards shock motion). It might sounds like a big bag of black magic that’s better left to the professional shock tuners, but we assure you, it’s something that can be done from the comforts of your home garage. Here, we’re taking a look at the re-valving process of on a King 2.0 series coilover, but most of what you’ll see is applicable to 2.0 and 2.5 series King shocks.
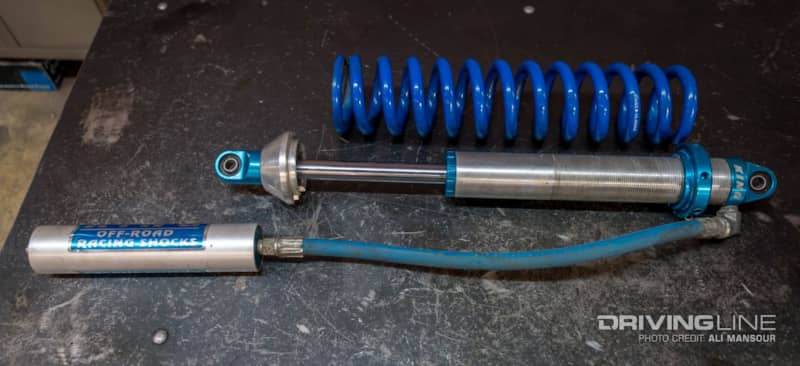
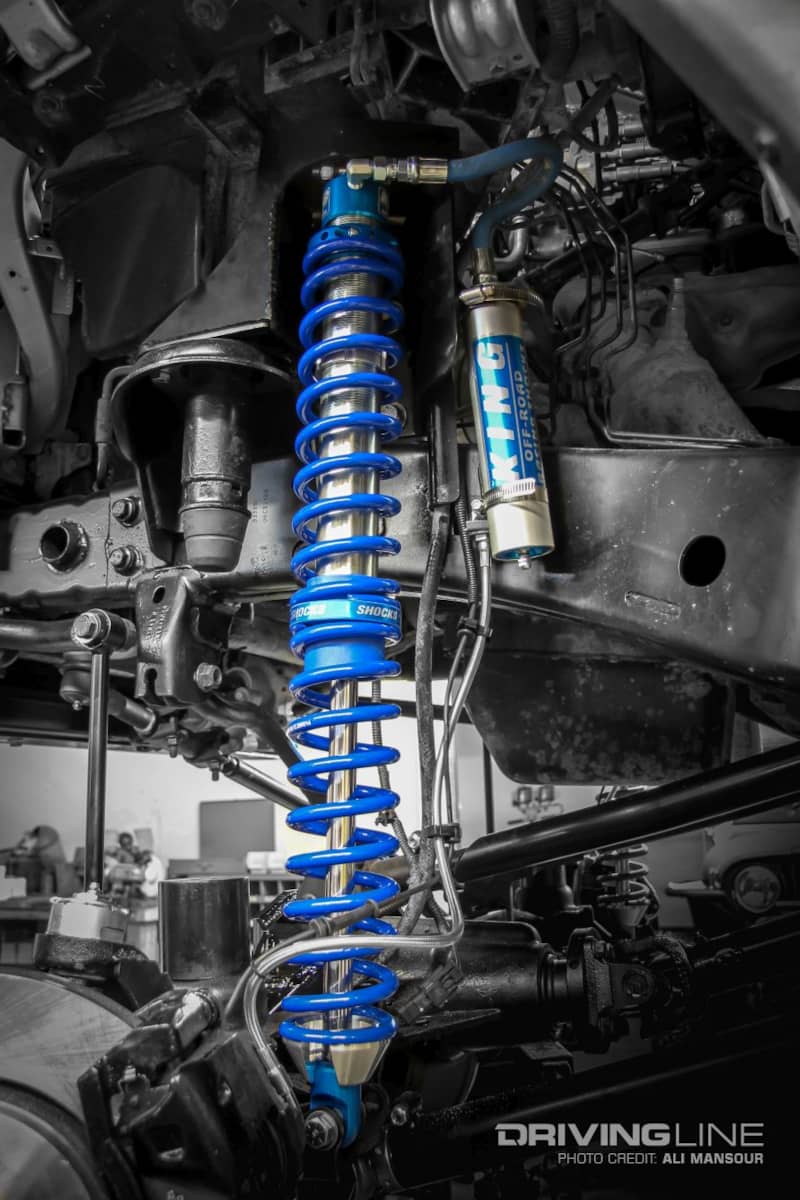
Your most common King 2.0 series shocks used in the aftermarket are equipped with either a fixed or remote reservoir. Inside the reservoir resides what’s referred to as a nitrogen or floating piston. It’s this piston that separates the nitrogen gas chamber from the shock fluid. On a conventional gas-charged shock, this piston would be packaged inside of the main shock body. By placing it in a remote canister, you are able to gain more travel in a smaller package, along with increasing the fluid capacity and size of the nitrogen pocket. This not only increases the shock performance potential, but reduces fatigue that is often the result of prolonged and high-velocity off-road travel.
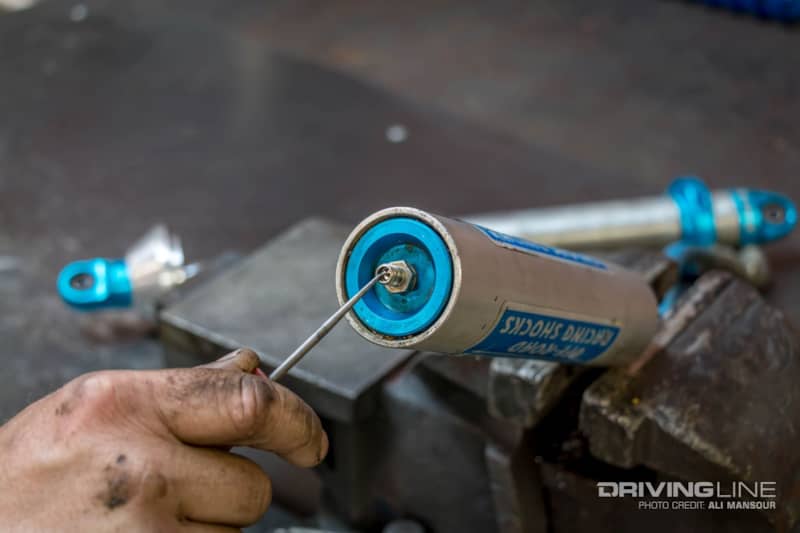

To remove the shaft assembly, you’ll press down until you can view the snap ring in side of the housing. This won’t take much effort. Once you pull the snap ring, you pull firmly until the assembly is free. Be mindful of the piston wear band as it easily becomes dislodged and can be potentially damaged.
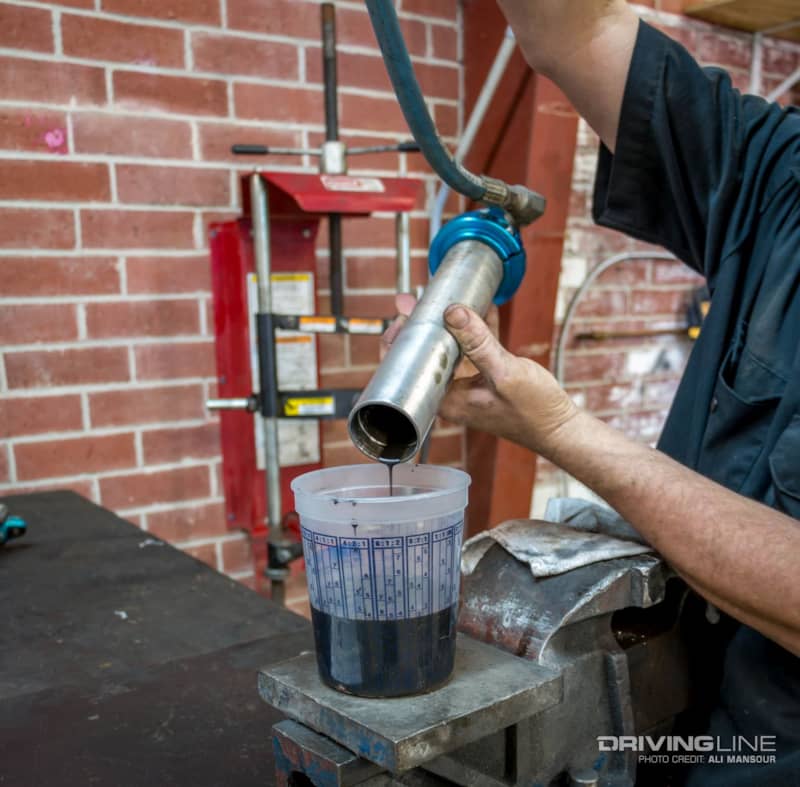
Just like the oil in your engine, your shock oil can breakdown over time. The frequency in which you change out the fluid is directly correlated with how you use the vehicle. For a recreational 4x4, once a year is probably plenty. If it’s a street queen, you can get a few years. For racers, it’s often swapped out nearly every outing.

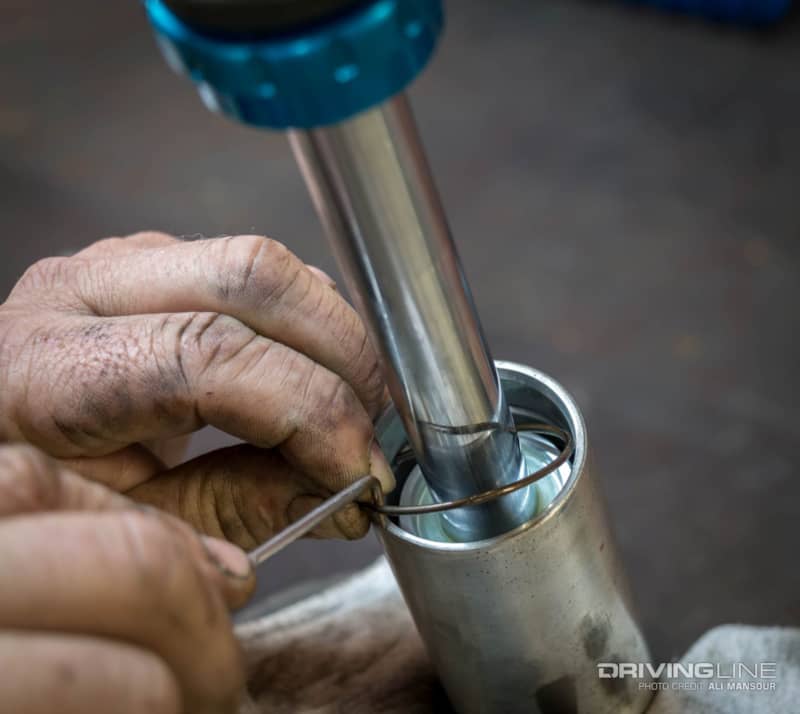
If you’re changing the shock’s valving as we are, you’ll need to remove the nut that secures the valve piston in place. This is also a good time to replace your shock seals and wear band, all of which can be purchased through King via one of its shock rebuild kits.
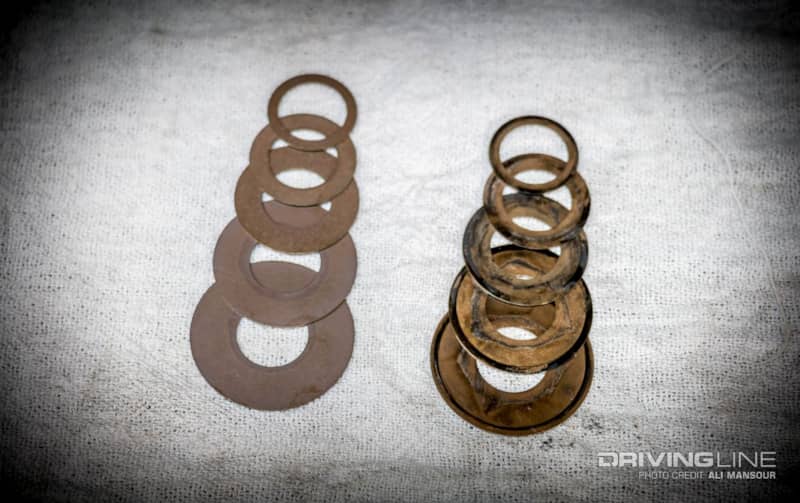
Here, we were replacing the valve stack that came with the shock with a thicker set to increase the compression. By adding a few thousandths, it can drastically change the performance attributes of the shock. In our case, we were looking for a firmer compression valving to help compensate for the increased weight and speed our 4x4 is now enduring. Keep in mind that shims are velocity sensitive, so they can control both high and low-speed shock movements. If ordering directly from King, you can discuss your shock needs with one of its experts, to help get your valving extremely close out of the gate.
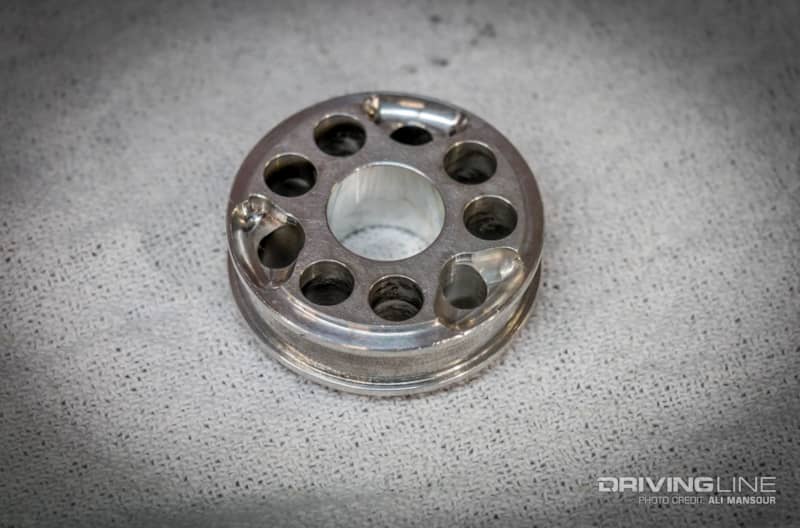
The valve piston is another area are another area we could have altered our shock if needed. The King 2.0 shock we are using is equipped with a linear piston, which is what you would typically find in a coilover or bypass shock. The linear piston is a high-flow-rate piston that offers little resistance. This is ideal for high-speed applications where the shock is constantly cycling. For low-speed wheeling, a digressive-style piston is sometimes preferred as it has a lower fluid rate.
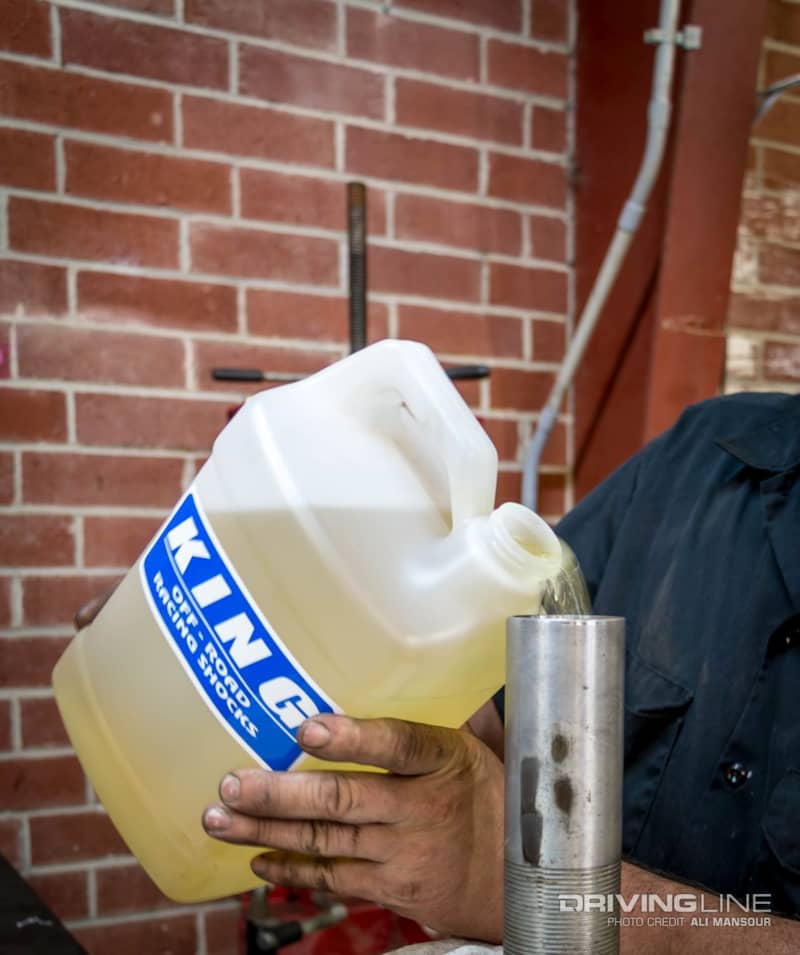
Once you have your new valve stack in place, you can reassemble the shock. King has its own proprietary shock fluid they recommend using for the shock, which we used. While fluid amounts will vary between shocks, a general rule is to have the fluid line approximately one inch below the snap ring groove.