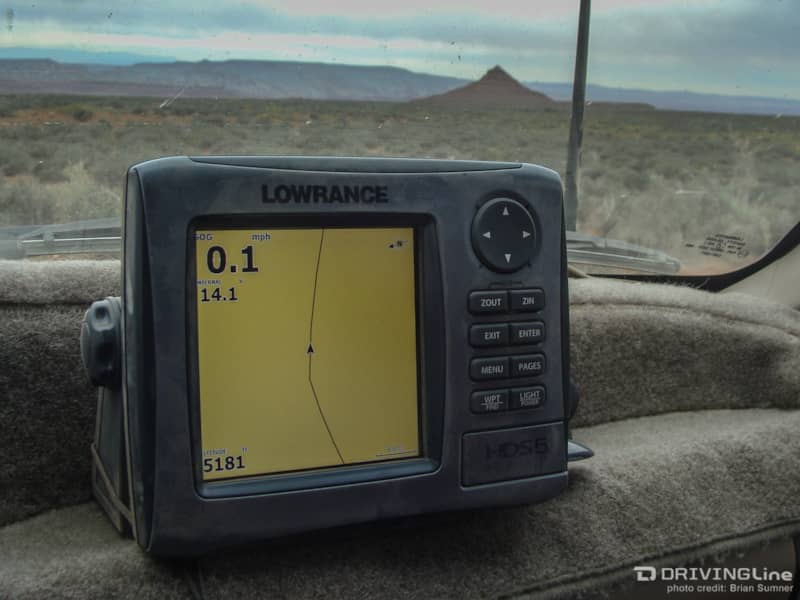
Navigating Trails With a Lowrance Off-Road GPS
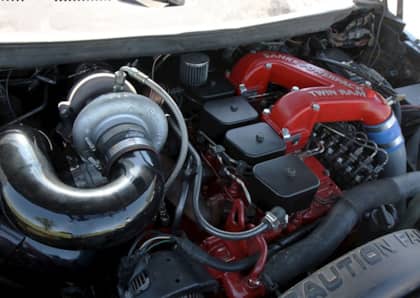
Take a look in any Ultra4 or desert race vehicle, and you will likely see a Lowrance GPS staring back at you. This got us wondering: If they are good for racing at the Hammers and in Baja, would they work well for recreational trail wheeling too? To find out, we spent a large amount of time and several thousand miles navigating trails using a Lowrance HDS-5 Baja GPS unit in places such as Moab, the Mojave Road, Colorado’s mountain passes and week-long overland excursions.
Lowrance units are designed for marine use in harsh salt water environments so they can easily stand up to the rigors of off-road use with their dust and water-proof housing. We mounted the unit on our dashboard and hardwired it to our auxiliary battery. Our 5-inch screen model has a housing that is 7 inches wide, 6 inches tall and 3 inches deep. The first downside we noted is that this GPS is not as portable as others since it did take some time and planning for a clean install in a vehicle. A RAM mount could be used with the mounting bracket if desired and the power cord did come with a 12v plug that we cut off in favor of hardwiring. The internal GPS antenna is a nice feature to eliminate extra wires and it has a good view of the sky through the windshield. An external antenna is standard issue in race vehicles; however, we have not experienced any problems with the built-in antenna.
Lowrance GPS Basics
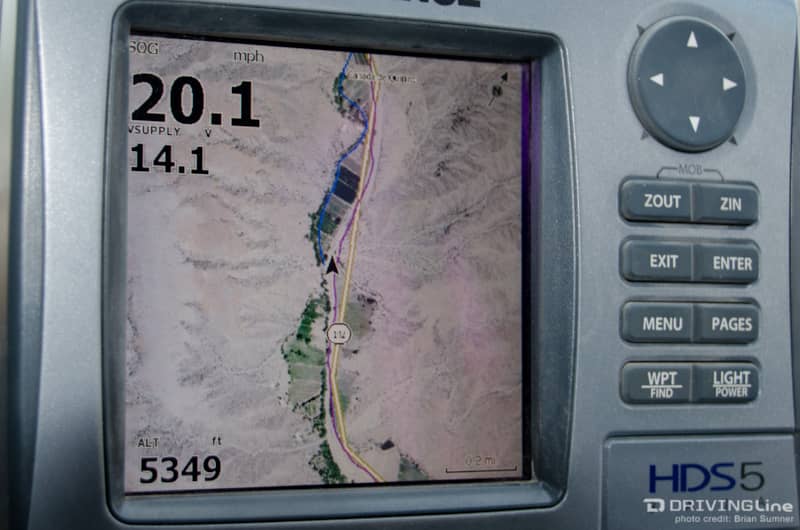
The Lowrance comes with a North America base map that is not very detailed. It shows major roads and highways but leaves off many details like residential streets and forest roads. In situations we needed street navigation, we just turned to the GPS on our smart phone. It is surprising to see what is included such as small water tanks that appear seemingly in the middle of nowhere and other major points of interest like parks. Shading lets you know the difference between public and private land boundaries. We found the base map leaves much to be desired; however, we were able to load satellite imagery maps of one of our favorite areas.
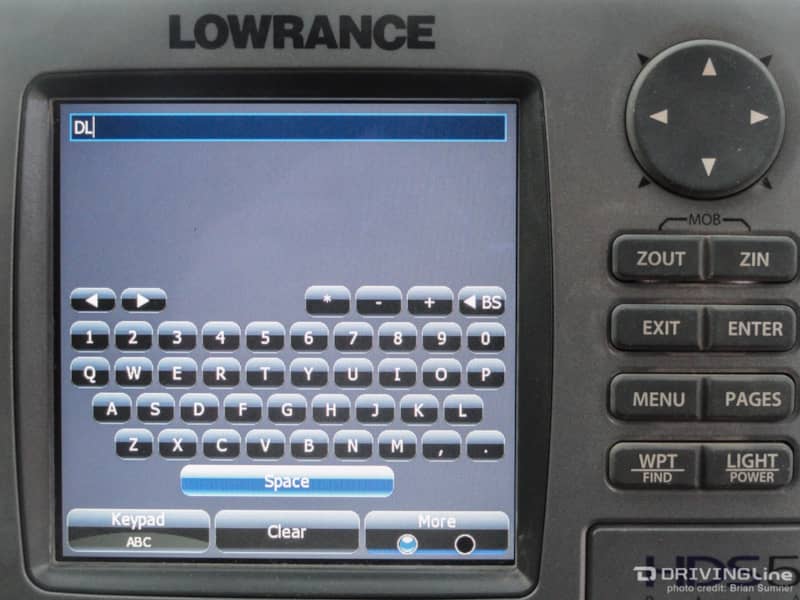
The HDS-5 does not have a touch screen; instead, it uses pages to rotate through different views of the map, trip calculator, trails and waypoint lists and more. Menus are available within each page and a main menu for universal settings is accessible by using the menu button. An on-screen keyboard will pop up to name trails and waypoints, but it is tedious to use because each letter has to be selected with the multi-direction button. This is where a touchscreen in the newer models shines.
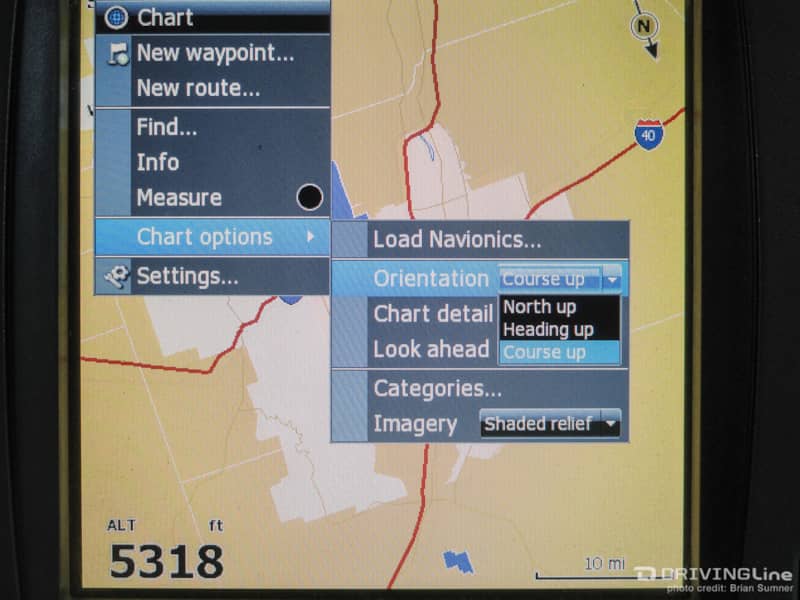
A useful setting to change right away is to make the map display “course up,” which always puts the direction you are driving on the trail at the top of the screen. The user interface takes some time to learn, but once you do, the knowledge transfers between most Lowrance models. Zoom levels are easy to set, and the current zoom level is displayed in the lower right of the screen. 500 feet to 500 miles can be shown; we found that a 0.2-mile to 0.5-mile zoom level worked well on the trails.
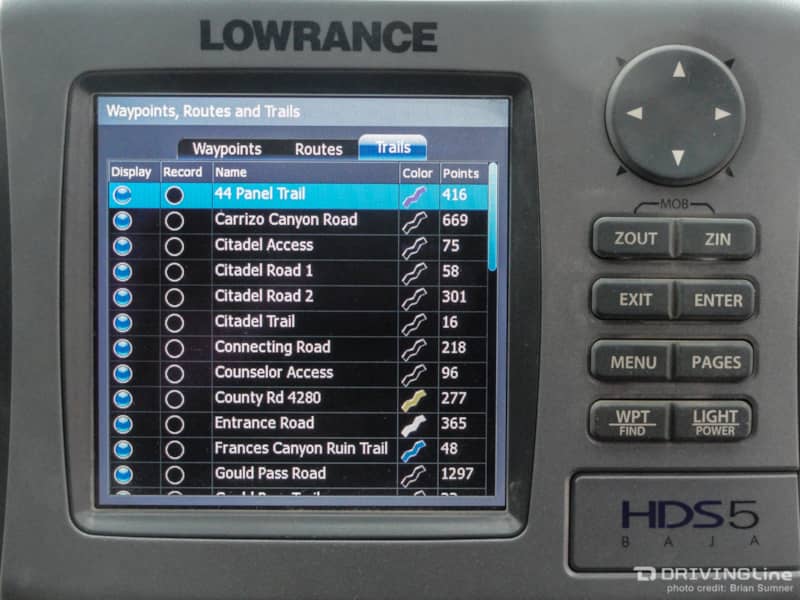
Loading Trails and Waypoints On Lowrance
Finding trails is up to you with this GPS. You cannot simply type in a trail name and find it on the GPS. You must map it yourself in a program such as Google Earth using coordinates from a guidebook or download an existing file from a crowd-sourced trail library like All Trails. Lowrance does offer Topo Insight and Insight Planner mapping software to create maps and waypoints. Alternatively, Rugged Routes offers premade maps for popular trail areas like Johnson Valley and Moab.
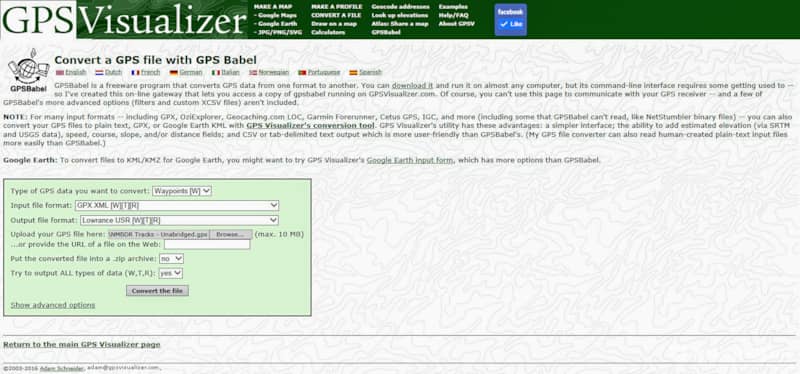
Lowrance uses a unique file extension (.USR), so the first thing that needs to be done is to convert your trail file into the Lowrance format if it is not already. This can be done using a free online converter like GPS Visualizer to change GPX, Google Earth KML files and more into the proper format. The next step is to load the file onto a SD card and insert it into the GPS. Lowrance recommends using a 2GB card or less, but don’t worry — you can pack a ton of trails and waypoints onto the card because the file sizes are small.
Through the pages button, you access the SD card where it lists all the trails loaded to the card. Scroll to the trail you want and hit enter, and the trail will be loaded to the GPS. Each trail can be made a different color or renamed through additional steps, making it easier to differentiate nearby trails on the same screen.
Creating Trails and Waypoints
Creating waypoints on the go is easy; simply press the enter button, and a waypoint will be added to the screen. A menu will appear to change the symbol and name if desired. Press enter again to save the waypoint. Adding trails is also easy by accessing the waypoints, routes and trails menu and then by selecting new trail under the trail tab. You can rename it and set the line color. This will record a line on the screen as you go, so backtracking is easy.
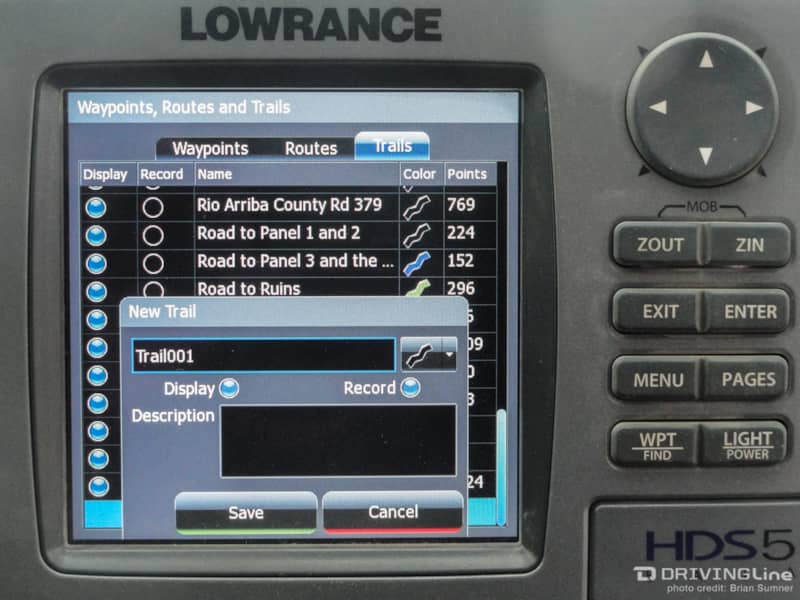
Each trail can hold a whopping 20,000 points with the HDS units. To save the trails and waypoints is also easy and is accessible by scrolling through the pages to the settings, selecting files and then the waypoints, routes, trails option. This will export all data currently loaded on the GPS so you may want to clean up some files before taking this step. The files can be exported as a USR or in the universal GPX format.

Additional Features
Additional features we found very useful is the on-screen data overlays. Once we added bigger tires and different gearing to our 4x4, the dash’s speedometer has not been completely accurate. We added a speed overlay to the upper left corner of the screen that lets us know the actual mph. Many of our off-road adventures take us up and down mountains and through desert valleys. Because of this, we always like keeping track of our elevation, so we added a small elevation overlay to the bottom left of the screen.
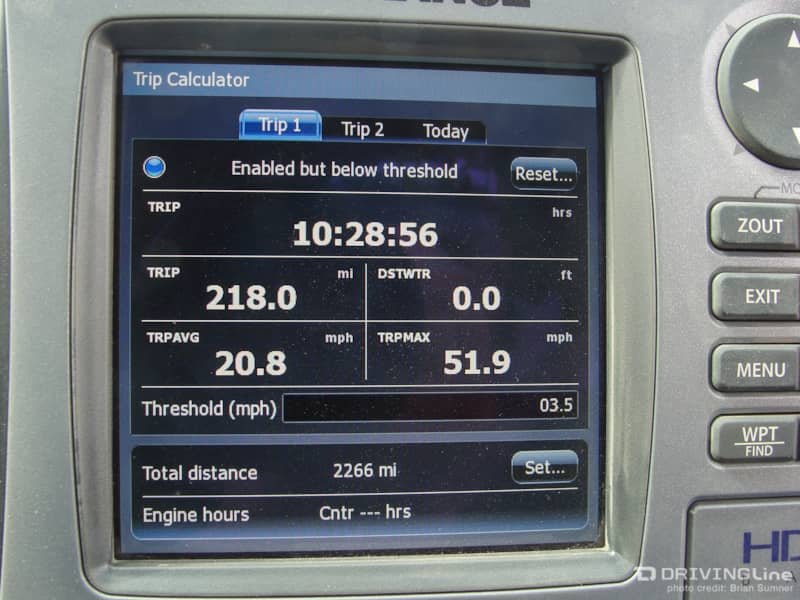
One other great overlay that we use is a voltage meter that we placed on the left of the screen as well. This keeps track of our auxiliary battery’s voltage, which eliminates the need to add an additional gauge to our dashboard. At a quick glance we can tell if there are any voltage problems. We have also set an alarm to go off if the voltage spikes or becomes very low. Lastly, there are two trip calculators that keep track of minimum and maximum speeds, time and mileage. A running odometer also keeps track of the lifetime mileage while the GPS is on.
Which GPS Is Right for You?
There are many different options for off-road navigation including tablet apps and dedicated GPS receivers. If you plan to race, the Lowrance is hard to beat. The 10Hz update frequency is more than adequate for race speeds compared to the 1Hz of competitors. The Lowrance is also a good choice if you enjoy making your own maps and trails or planning your trips in Google Earth.
During our testing we found it to be a great, no-nonsense GPS that does exactly what an off-road GPS should do: It suggest the route and lets you enjoy the adventure. It does not overload you with information, because you load only what you want onto the unit. The HDS-5 Baja we used here has been discontinued in favor of a streamlined Trophy-5m Baja mode; the Gen3 HDS-7 with touchscreen and wireless connectivity is also a popular choice for off-road use that offers even more features.
Lowrance Tips for Racing King of the Hammers
With the Nitto Tire King of The Hammers race upon us, we thought we would wrap up our review with a few tips for using your Lowrance GPS to prerun and during race day.
- Use a digital voice recorder or notepad to keep track of the auto-numbered waypoints you mark during prerunning. Add in the details (such as “sharp left up wash”) back at camp with Lowrance software for faster course marking. You can also change the waypoint icons for turns, dangers and more.
- Create a “trash” trail and activate it any time you exit the course. Deleting the trash trail for race day will be less confusing and only show your prerun lines (if you choose to keep them) and the course. Make the prerun trails a different color than the course.
- Reset the trip calculator on race day to keep track of your speeds and mileage
- If you see crosshairs on the screen, the GPS is not showing your position. Press Exit to get back to your position. Elite and Trophy users need to press Menu then Enter to get back.