Properly Torquing Your Lug Nuts—It's Not Just for the Race Track
Having a wheel come off your vehicle while driving at speed is one of the most terrifying things that can happen to you as a driver, whether you're barreling down the back straight of your local race track or navigating three lanes of rush hour traffic on the way home later that evening.
How do I know? Because I've been there, having watched a wheel on a pickup truck driven by my father shear off the hub and travel across the highway and into the median while he was in the process of towing his race car. The truck and trailer survived, thanks to the judicious application of driving skill, but it was a scary moment that was completely preventable.

The vast majority of cases where a wheel separates from the hub can be traced back to one simple thing: lug nut torque. The rims on my father's truck had recently been swapped and the shop in question hadn't bothered to check that the correct tightness had been applied at each corner.
It might seem like a simple thing to make sure that your lug nuts are properly tightened before you get behind the wheel, but this simple act of maintenance is so often overlooked, or improperly done that we felt it warranted a refresh on the right way to torque lug nuts—and the consequences associated with letting things slide.
How Do Lug Nuts Work?
Lug nuts are designed to 'stretch' a certain amount when torqued to their factory-specified level. This stretch allows the nuts to make a strong mechanical connection to the threads on the lug. If undertorqued, this connection isn't made, the bolt doesn't stretch, and the connection is 'loose,' allowing for vibration and movement on the lug. If it's overtorqued, the bolt stretches to the point where its tensile properties are weakened, which makes it more likely to shear, crack, or otherwise separate itself violently from the lug.
If lug nuts are undertorqued, the nut can continue to loosen itself through the vibrations associated with driving, which in turn will unseat the wheel from the hub and create additional vibrations as it spins erratically. This can put pressure on the lugs themselves that they were never designed to handle, leading to eventual failure, if the nuts haven't slid off first and the rim hasn't separated from the hub completely.

Overtorquing can have similar effects. Stretched lugs (also known as studs) and nuts can lead to warped brakes as loads are distributed unevenly across the hardware. The previously-mentioned cracking and shearing can also separate both the nut and the stud from the hub, and potentially lead to catastrophic wheel loss.
Do It Right The First (And Second) Time
How can you ensure that your lug nuts are properly torqued? It's fairly simple, and it relies on repeatable procedures that you should use every time you swap rims or hit the track
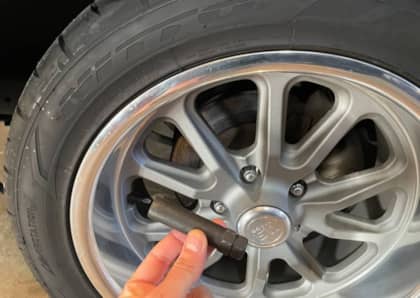
The first step is to make sure that the threads on your wheel studs are as clean as possible. Any dirt, grim, or metal chips sitting on the threads can interfere with accurate torquing. You also don't want to lubricate the threads, or use any type of rust-proofing, as this will also prevent a proper mechanical connection between the lug nut and the threads.

Next, use the right tools. Power impact wrenches and torque sticks are great for removing lug nuts, but you don't want to use them to put them back on again because there's simply no way to fine tune the amount of torque they're applying. Attach each lug nut by hand, and then use a manual torque wrench to tighten until you hear the 'click' sound that indicates you've reached the right amount of torque. The number—usually in the 75-100 lb-ft range—should be easy to locate in your vehicle's owner's manual.
The pattern in which you tighten the lugs also makes a difference. The most common sequence is to move in a 'star' pattern on a 5-lug setup—start with a top-corner lug, and then move diagonally across until each lug has been tightened. On 4-lug wheels, move diagonally for the first bolt, then across, then diagonally again. For 6-lug wheels, you'll want to start horizontally with the bolt that's directly across, then move diagonally, then horizontally again, horizontally a second time, then a final diagonal. Using these patterns properly seats the rim against the hub while you apply torque and allows for the most accurate application of tightening force.
Re-Torque And Drive Safe
You might be surprised to learn that torquing new wheels once isn't enough. Most manufacturers recommend that lugs be re-torqued after 50 to 100 miles of regular driving. This is due to any settling that might have occurred between the rim and the hub, as well as any initial vibration that might have loosened any lug nuts.

For a track vehicle, where stresses are significant each session, it's not overkill to check lug nut torque after every session. The same can be said for vehicle that are used for towing, as the excess pressures exerted by the load that is being hauled can amplify any looseness or other lug nut and wheel issues. It's worth checking torque again once you've reached your destination.
It takes only a few minutes per wheel to ensure proper torque—minutes that can add up to serious dollars saved by avoiding an incident that could see you losing complete control of your vehicle. Invest $50 in a torque wrench and make it a regular habit to check your rims before you leave pit lane.
Curious to know more about wheels and tires? This guide to fitting the right set to your vehicle will point you in the right direction.


