An In-Depth Guide to Learning Traditional Navigation
Navigational skills could mean the difference between an awesome trek or an unfortunate trip—no matter if you use the traditional map and compass or a modern GPS. In the first Navigational Basics article, I discussed important terms like latitude, longitude and declination. I also shared traditional navigation tips like understanding topographic (topo) maps, how to use map scales and methods to determine how many steps you take to walk 50 feet. Traditional navigation, even at the basic level, can be complex and hard to understand. In the second installment of this two-part series, I’ll take a deeper dive into the world of old-school navigation.
Reading a Topo Map
It is important to know how to read topo maps so you can correctly measure your trek with confidence. Below are some tips to help get you topo-ready.
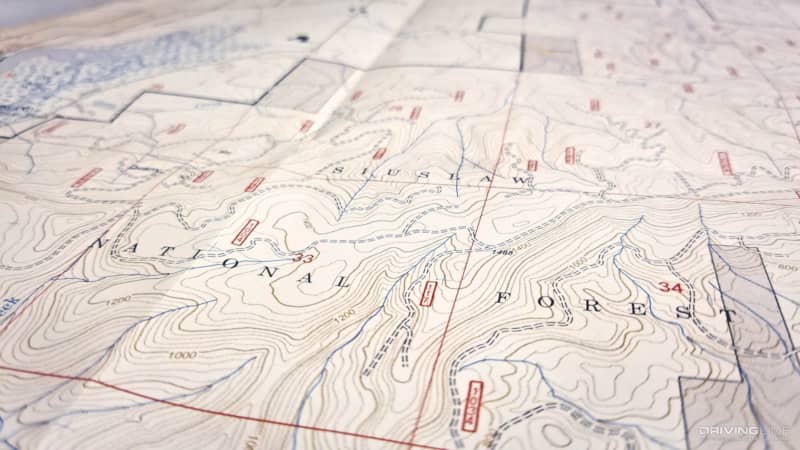
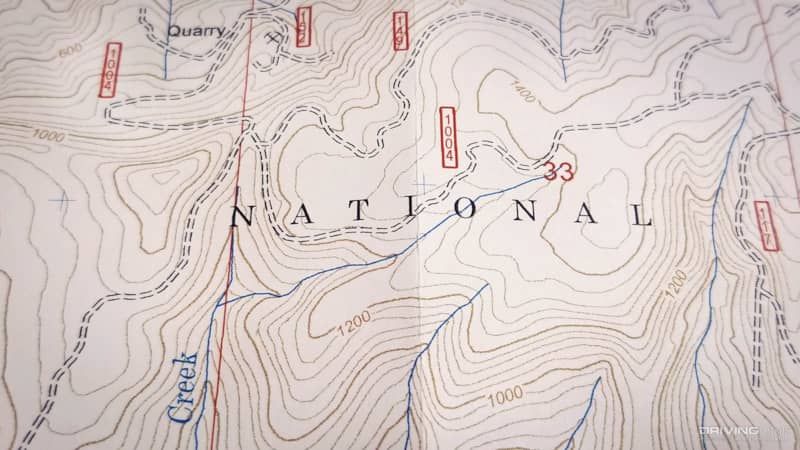
Contour Lines
Contour lines follow areas that share the same elevation above sea level. If these lines are close together, the elevation is steep and changes quickly. If the contour lines are wide apart, the elevation change is gradual, like a gentle slope or a depression. Every fifth line, which appears darker and thicker, is known as an index contour line. Index contour lines include numeric elevation listings, showing exactly how high you are above sea level. Contour lines rarely cross each other. They only touch or cross at a cliff or overhang. First, to figure out what you’re looking at, use the numbers on the index contour lines (indicating elevation) to determine the direction of the slope. For instance, how do you find what is uphill and downhill? Generally speaking, U or V shapes pointing uphill are depressions like drainages, bowls or gullies (depending on how sharp the shape is). In contrast, U or V shapes pointing downhill indicates protrusions, like ridges.
Contour Intervals (or Vertical Scale)
Each map will have its own vertical foot count per elevation, meaning that one map may indicate elevation in 40-foot increments, whereas another may have 50-foot variances. It’s important to know your map’s contour line intervals before you take to the trails. This is usually indicated in the map’s legend.
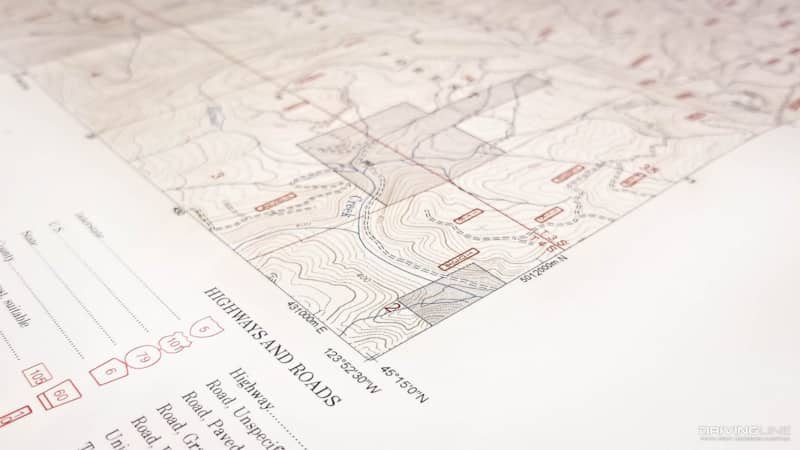
Grid Numbers and Lines
Topo maps have grid numbers listed on the top, bottom and both sides. These numbers may be degrees/minutes/seconds, representing latitude and longitude, or regular numbers. To find grid coordinates or where you are, find the number to the right of the map and then on the bottom of the map to see what quadrant square you’re in. Since some maps don’t have grid lines printed on them, you may first need to draw them in from side-to-side and top-to-bottom.
Topographic Colors
Topo maps have many colors printed on them, and each one has as meaning behind it. U.S. government agency maps such as USGS guides and many other maps use the same colors. While it may not be a universal color system, it’s still important and beneficial to know. Contour lines are typically brown. Vegetation that is tall enough to hide a human are green, whereas shorter vegetation or above tree-line vegetation is white. Hydrographic features like lakes, streams and irrigation ditches are blue. Major highways and prominent man-made features like boundaries are red. Roads, trails and railroads, along with cultural features, are black.
Reading a Map
When reading a map in a remote location, you should first orient it to the surroundings. This means your map should correspond to the details of the actual landscape. In order to reach your destination accurately, you should keep your map oriented while traveling along your route.
Measuring a Map
As discussed in my first article, you can measure a map with a pen and string, your finger, a homemade paper scale or a store-bought map scale. Some methods are more accurate than others. Using string or your finger can be good enough for survival and to find significant geographic features, but for precise measurements, a pre-printed map scale that matches the exact scale of your topo map works best.
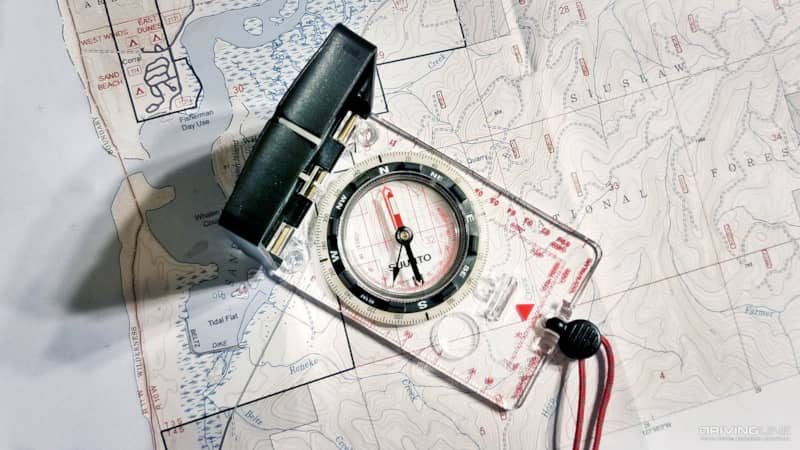
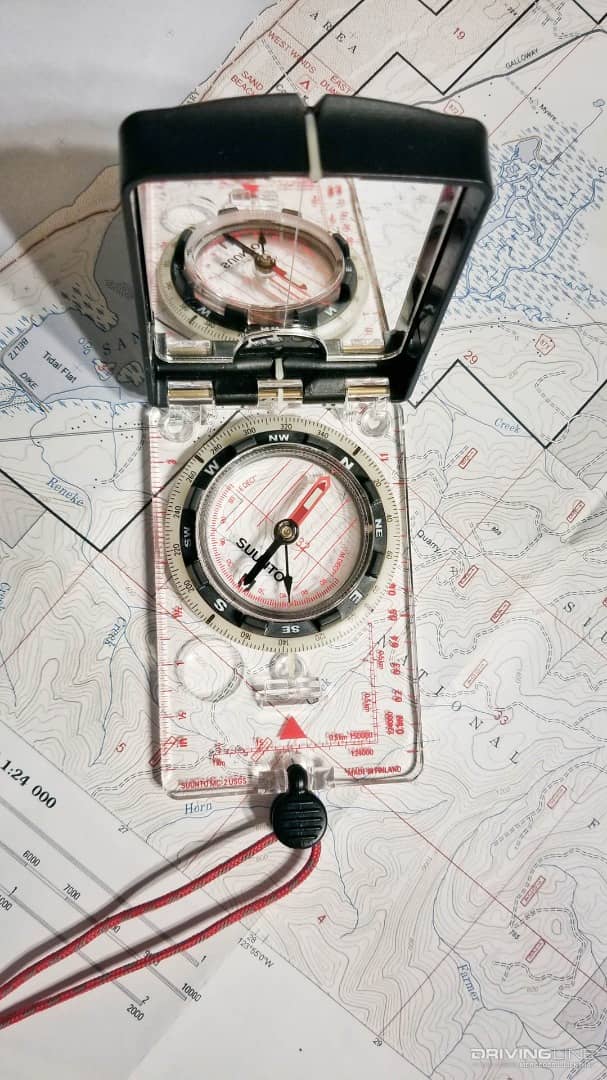
Parts of a Compass
Baseplate: The clear plastic plate that the compass is embedded into. Many times, this plate will have various-sized scales printed on it.
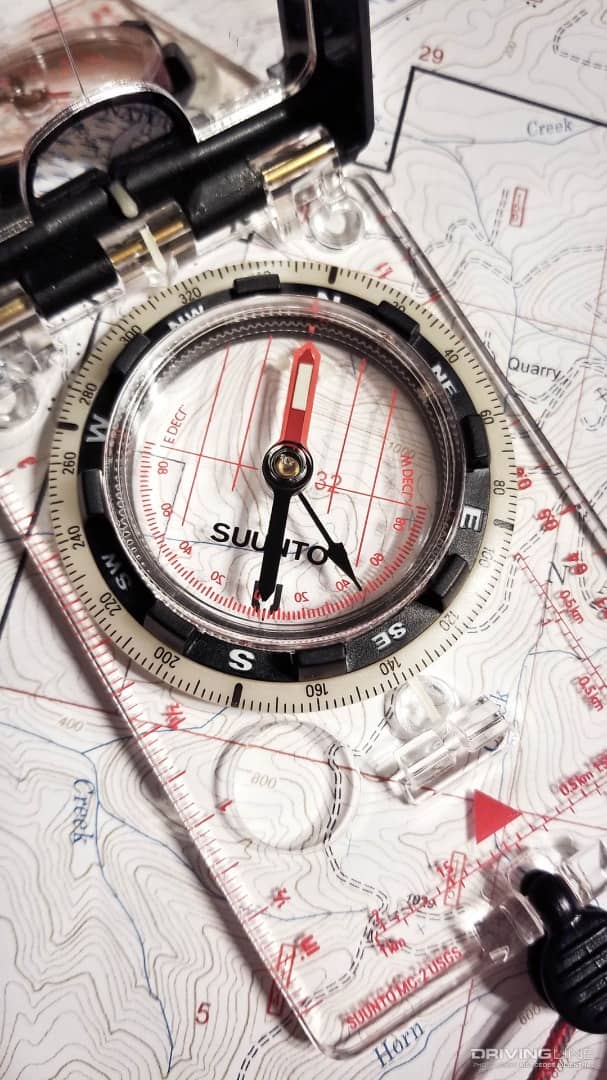
Direction of travel arrow: A large arrow or arrowhead that is printed on the baseplate outside of the compass housing.
Compass housing: Also clear plastic but usually is a liquid-filled disc-shaped housing that the magnetic compass needle resides in.
![]()
Degree dial: A twistable, 360-degree dial that surrounds the compass housing.
Magnetic needle: The red needle that spins easily within the compass housing and is known as “red.”
Orienting arrow: Typically a large red arrow, usually printed as an outline of an arrow, that resides within the compass housing and is known as “the shed.”
![]()
Orienting lines: Found within the compass housing and reside parallel to the orienting arrow.
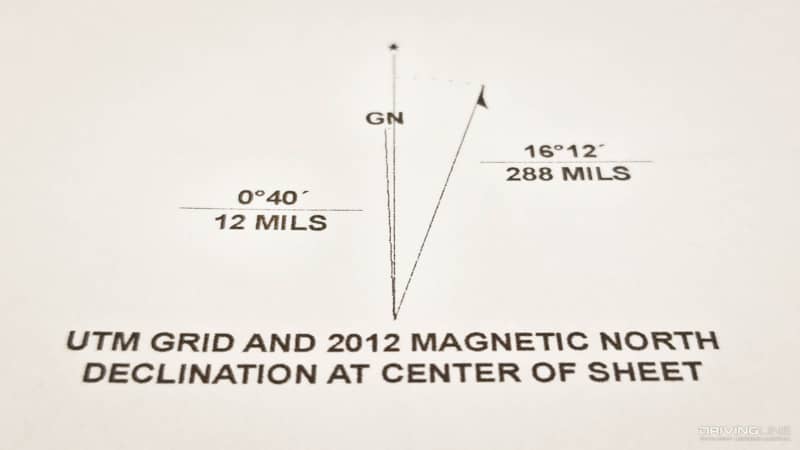
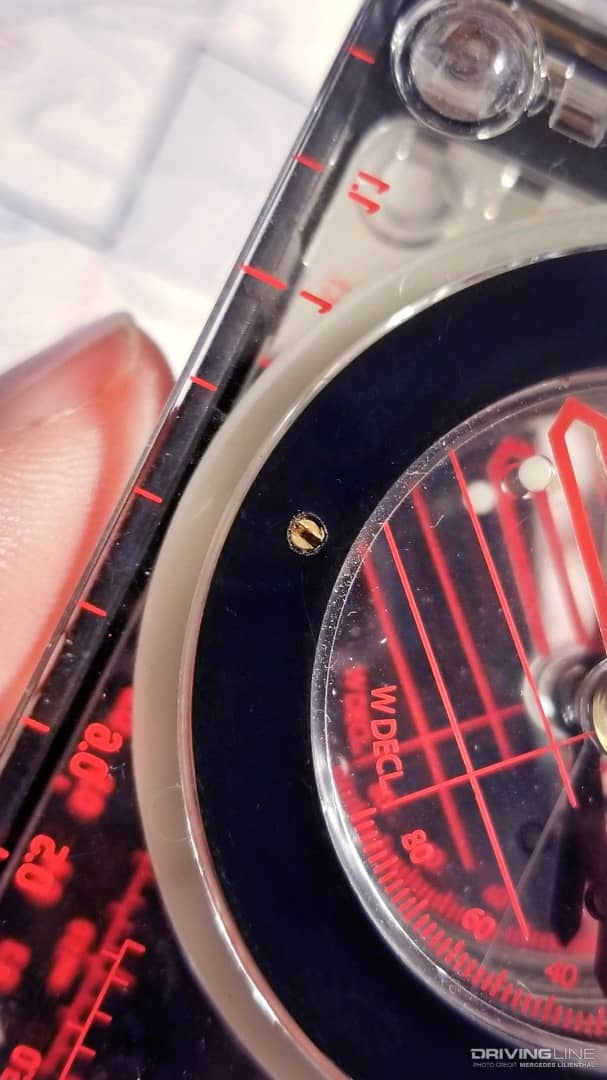
Declinating Your Compass
In the continental U.S., declination (difference of true north and magnetic north) can vary from nearly 20 degrees east on the West Coast to nearly 20 degrees west on the East Coast. When you’re navigating in remote areas, degrees matter. For example, a 15-degree error on a mile-long hike can take you off course by a quarter-mile.
Because declination varies depending on where you are, your first step is to find the declination value for where you want to go. Additionally, whenever you head to a new destination, you’ll need to check and likely reset your compass declination. Even though some maps show declination in the legend, it may not be current. It’s best to use the most recent declination data possible.
A compass with adjustable declination allows you to rotate the orienting arrow independently of the compass dial. You can calculate your map bearing without adding or subtracting the amount of local magnetic declination. It’s easier to have an adjustable compass than constantly doing the math to get correct numbers for true north.
There are different ways to change declination and methods change per compass manufacturer. I have a Suunto MC-2 compass, so I’ll explain how to alter this model’s declination.
- Find the declination value for your trip area. Topo maps typically list a declination diagram in the legend. Note: The declination of any given location changes slowly over time. Check your map’s revision date or, for the best information, check the National Oceanic and Atmospheric Administration’s (NOAA) website for the latest magnetic declination listings.
- Locate your adjustment key. It’s a tiny metal plate located on the lanyard.
- Turn the compass over and locate the small metal adjustment screw (located outside the compass ring).
- Insert the metal key into the small adjustment screw.
- Turn the key until the declination indicator is the correct number of degrees east or west of zero degrees based on the declination value you found on your map. Be sure to double-check your number to make sure it’s accurate. Any slight variation from that number could mean you’re off your target destination.
As a helpful bonus, the adjustment key comes pre-strung on the Suunto MC-2 compass’s lanyard. It’s easy to do the adjustment, but keeping track of this key may not be. If you lose it, you may be able to use a tiny multi-tool blade-end to change the adjustment screw.
Orienting Your Map to True North
Now that we’ve discussed maps and compasses, and you’ve declinated your compass to your map, you can use them together to navigate successfully. The first thing you need to do once you’ve gotten this far is orient your compass and map together and find true north. Here’s how you do it:
- Place your map on an even surface with your compass on the map. Make sure the compass’s direction of travel arrow is pointing north (north is usually straight up on the map).
- Keep the compass in this position and rotate the map and compass together until the magnetic needle, red, is within the orienting arrow, the shed. In orienteering words, you need to put "red in the shed." Another term for this is "boxing the needle."
You have now oriented your map to true north. Double-check your surroundings to make sure what you see around you is what you see on the map.
Getting a Direction of Travel (or Bearing) With Your Compass
Now it’s time to put it all together. In order to accurately find your destination, follow these steps:
- First, find the point on the map where you currently are and make sure you remove any metal objects from the area—it will throw off the compass.
- Place your map on an even surface and your compass on the map so the side of the base plate connects your origination point (where you currently are) to your destination. In the event your base plate isn’t long enough to measure between these points, use a ruler or straight edge to connect them. If you like, use a pencil to draw an actual line. Make sure your direction of travel arrow points towards your destination. A good rule of thumb is to have the bottom edge be your origination point and the top edge be your destination.
- Hold the compass firmly against the map, and with the other hand, turn the degree dial until the orienting lines and arrow in the center of the dial point northward on the map, as indicated by the map’s north arrow (or vertical lines).
- Keep the compass in this position and rotate the map and compass together until the needle is within the orienting arrow.
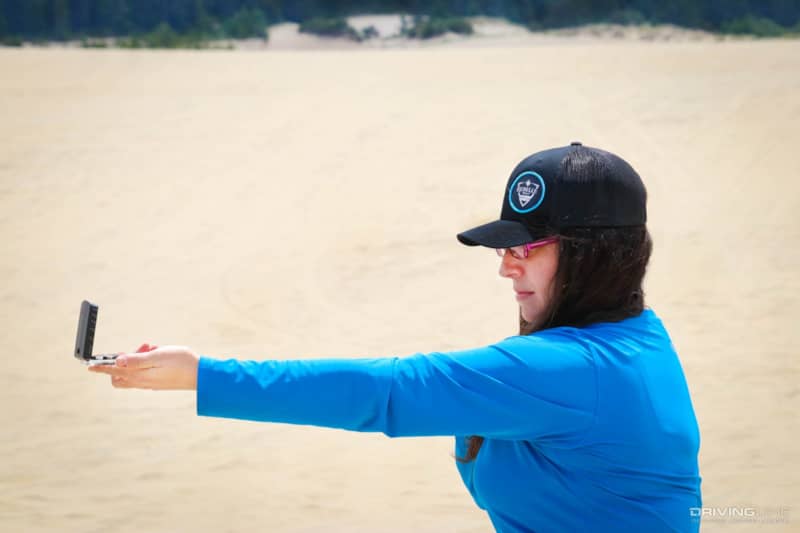
- Hold the compass out in front of you. Ensure the base plate keeps flat with the direction of travel arrow pointing straight in front of you.
- Rotate your body until the north arrow, the shed, lines up directly under the magnetic needle, red. Now you’ve just put red in the shed, or boxed the needle, and just determined a direction of travel with your map and compass.
When starting to trek along your path of travel, choose a prominent feature to travel towards. Recheck your path of travel regularly to ensure you haven’t deviated from it. Additionally, reorient your map, check your location and keep comparing your map against your surroundings. The best way to maintain an accurate heading is to find that prominent feature that is in exactly the heading you want and is something you can reach/arrive at. Keep in mind that it’s virtually impossible to stare at your compass continually while walking in a straight line the entire time. Once you reach that prominent feature, take another heading and find another object in the direction you want to go. This will ensure that if there are obstacles you need to go around (which happens a lot in real life), your overall direction stays accurate.
Practice Makes Perfect
Traditional navigation seems a bit foreign until you do it many, many times. Practice makes perfect, or at least good enough to get to where you’re confident with your skills. In addition to practice, various organizations, YouTube, the Internet and friends can help you hone your directional prowess. Once you get good at it, you’ll be able to navigate your way safely, smartly and thoughtfully.